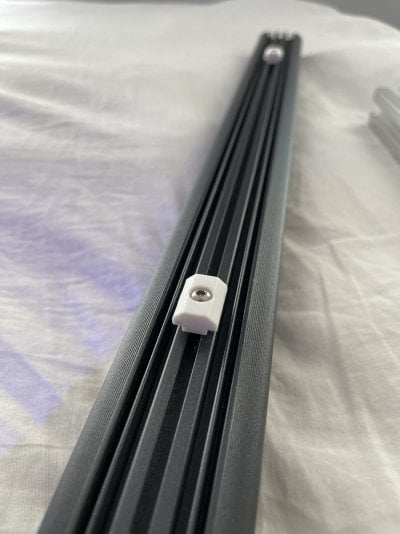
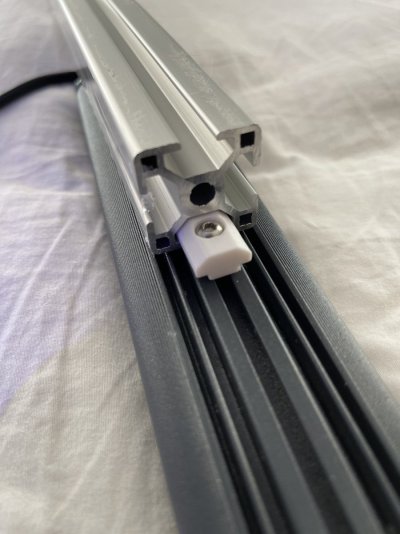
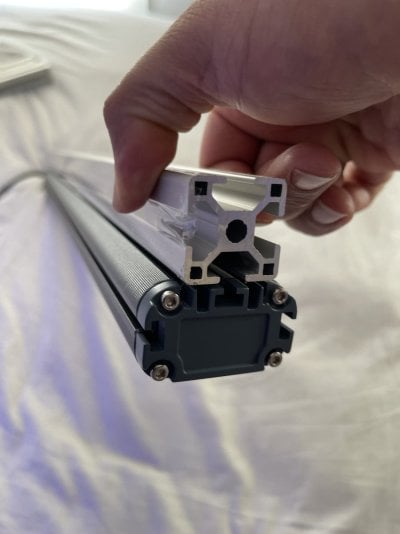
100% agree so you get a clean flush finish with the skin.it would be nice if the magnets were inside the T-slot.
that is why I have not done t slot stand I am not sure I can get it to look as good as the flat packed stand like WB/RS
Follow along with the video below to see how to install our site as a web app on your home screen.
Note: This feature may not be available in some browsers.
100% agree so you get a clean flush finish with the skin.it would be nice if the magnets were inside the T-slot.
Absolutely the best way to fasten tslot. Each anchor fastener is rated at 1100# if I remember correctly. Two per joint makes a very strong stand. The external plates and internal gusset fasteners don’t even touch the load ratings of the anchor fastener. 8020 has a chart somewhere. Unfortunately only 8020 has anchor fasteners, they are very expensive and lead times for machining can be long.This is what I am ended up doing. Used internal double anchor fastening assemblies. Required machining, but came out good. The anchors are very stout.
Absolutely the best way to fasten tslot. Each anchor fastener is rated at 1100# if I remember correctly. Two per joint makes a very strong stand. The external plates and internal gusset fasteners don’t even touch the load ratings of the anchor fastener. 8020 has a chart somewhere. Unfortunately only 8020 has anchor fasteners, they are very expensive and lead times for machining can be long.
I think Tenecor Aquariums has a nifty idea of using L-Clips. I bet you could offset them enough to make flush if placed in the right spots.it would be nice if the magnets were inside the T-slot.
Informative write up. Thank you for doing this.
T-Slot aluminum extrusion is an ideal material for building modern, strong tank stands and canopies. And it isn’t as difficult as you might think, essentially you are playing with a supersize Erector kit! Using simple fastening methods and careful planning, even an individual with no experience can build a high tech stand quickly and easily!
Standard DIY disclaimers applies - The author is not responsible for anything you build based on information in this article.
Why use T-Slot extrusion over wood?
Building with T-Slot has a number of advantages over building with wood. Aluminum extrusion is stronger and lighter than wood. Once the cuts are made, it can also be put together and taken down easily. And while it isn’t exactly cheap, designing and building your own stand need not be overly expensive either.
One of the keys to successfully building your T-Slot stand is careful planning and design. I order my T-Slot and brackets from Zyltech (zyltech.com), where you can have bars precision cut to specific sizes for a small fee. Other T-Slot suppliers also offer custom cutting services, and I highly recommend this since extrusion can be a challenge to cut precisely on a home miter saw. If you choose to cut the bar yourself, it is recommend to use a blade designed for cutting aluminum extrusion, like a 60-72 tooth carbide tipped triple chip blade. Always use proper eye and safety protection when cutting T-Slot, cutting has a tendency to produce tiny/sharp/hot aluminum shavings!
3030 profile bar. 30mm x 30mm
What profile (size) do I need?
Profile refers to the size/thickness of the T-Slot bar used. Common profiles are 2020 (20mmx20mm) , 3030 (30mmx30mm), 4040 (40mmx40mm) etc. Aluminum extrusion is very strong, and in most cases you will not need to build with anything over 3030. For example, a 36” 3030 bar supported on 2 ends can support 3,573 lbs! For very large systems, you might choose a larger profile.
(From left to right) reinforced corner bracket, tee plate, 90 corner plate
How do I attach it?
The simplest way to attach T-Slot is by using external plates or supported corner brackets. These brackets attach to the exterior of the bar, and are anchored in place by T-Bolts and Nuts. I prefer the look and strength of external plates in most situations. They also make it much easier to add slide-in panels between the bars for aesthetic purposes.
So, let's build a stand!
For the purposes of this sample build, we will use the simplest types of external fasteners, plates and corner brackets
In the example build for this article, we will build my custom 68g acrylic tank stand seen here.
(The basic aspects of the tank can easily be duplicated to your specific tank needs).

My custom AIO is 32”w x 26”d x 20”h, holding approx. 68-72 gallons max. Figuring 10 lbs/gal with water/rock/etc, the stand should hold a minimum of 720 lbs. With 3030 bar, this could easily be accomplished even without the additional front center braces, but I like to include at least one center brace on med/larger tanks.
The stand height is 32”, converting to mm is 813mm, so the stand has 4 bars cut to 813mm.
- The 4 front width top/bottom bars are 753mm (front of tank is 813mm, minus the 30mm bars on the left and right)
- The 4 side top/bottom bars are 600mm (side of tank is 660mm, minus the 30mm bars on the left and right)
- X’s denote where corner or center plates are attached. There are a total of 16 90deg plates used on the corners, and 8 Tee Plates used for the inside and outside of the center braces.

Using a Hex wrench and M5 nuts/bolts (M5 for 3030 bar, the nut/bolt size will change depending on profile) - loosely thread a bolt on the back of each bolt to attach the plate. Then place the plate over the rail and tighten/hand torque it into position. Tighten the bolts well, but don’t over tighten them, it can make them extremely hard to remove if you need to make adjustments or disassemble it!

I had 2 pieces of white acrylic cut that easily slide into place when using exterior plates. These can make nice decorative or mounting features. I also attach a padded neoprene tape to the top of the stand where it meets the tank.


Additional images from the construction of this stand
These are just the basics, once you are comfortable working with it, any number of other features can be included on your T-Slot stands - like lighting canopies, shelving, doors, caster brackets, etc!


I hope this information is helpful to your future T-Slot project endeavors!
- Zach (polyppal)
Some T-Slot suppliers you might consider:
8020 http://8020.net
Amazon http://amazon.com
Grainger http://grainger.com
Openbuilds http://openbuildspartstore.com
Orange Aluminum http://orangealuminum.com
Parco http://parco-inc.com
Zyltech (my preferred supplier) http://zyltech.com
I'm looking into a t-slot stand for my 60 Cube. Mainly I want more space underneath. Does anyone know if this would be possible with t-slot due to the angles?
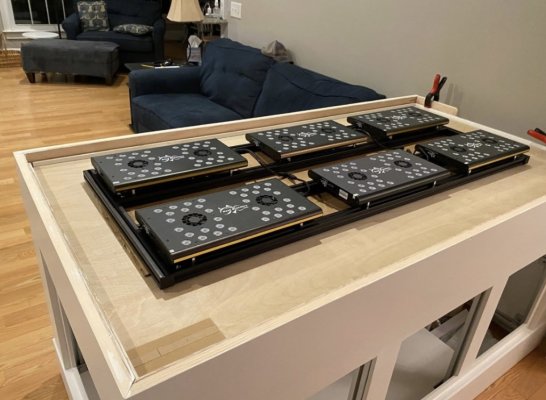
Thank you for posting/sharing your pics with the community. I am looking to build a lighting frame with either 2020 or 2040 and I have all the parts figured out except for the part that allows me to hang the frame with wires connected to the ceiling. Your picture here (the one with “polyp pal”) looks like you are hanging your frame with wires. Can I ask what type/size of tslot alumnium you are using and what is the part called that allows you to connect a hanging wire? where did you buy it?I gotta give a huge shout out to @neon_reefer for the custom 3D printed parts!
Top notch! Perfect custom T-Slot adapters for my new Quanta Pro setup!


What is the part called that allows you to hang your frame with hanging wire to your ceiling. I’m trying to find that part. Thanks.I just put up my rail frame, Using 3030 from zyltech, got rid of that stupid useless ecotech RMS rail. These rails are the future for the Aquarium industry. Thank you @polyppal for putting up this thread!! your a pillar to the reefing community!!!
![IMG_0821[1].JPG IMG_0821[1].JPG](https://test.reef2reef.com/attachments/img_0821-1-jpg.2718273/)
![IMG_0817[1].JPG IMG_0817[1].JPG](https://test.reef2reef.com/attachments/img_0817-1-jpg.2718274/)
![IMG_0819[1].JPG IMG_0819[1].JPG](https://test.reef2reef.com/attachments/img_0819-1-jpg.2718275/)
![IMG_0820[1].JPG IMG_0820[1].JPG](https://test.reef2reef.com/attachments/img_0820-1-jpg.2718276/)
We can Help you get that all put together, we make almost every LED brand fixture mount to 5 different size rails, including 2020..I want to build lighting frame using 2020 or 2040 Tsloted Aluminum. I’ve included a pic here to show what I’m building. I need to now hang this from the ceiling with hanging wire and need to know the part I have to order that allows me to connect hanging wire to this lighting frame. I want to use hanging wire which will give me the flexibility to raise/lower the lighting frame. Any help on identifying the part I need to order to hang this fixture would be so appreciated.

The eyebolt ? then there are the anchors, one going to the ceiling and the other to the rail.What is the part called that allows you to hang your frame with hanging wire to your ceiling. I’m trying to find that part. Thanks.
The last picture is the part I believe I need to suspend my 2040 frame to the ceiling. What is that part called or part number?The eyebolt ? then there are the anchors, one going to the ceiling and the other to the rail.s


The rail anchor. we sell that part as well.The last picture is the part I believe I need to suspend my 2040 frame to the ceiling. What is that part called or part number?


