Navigation
Install the app
How to install the app on iOS
Follow along with the video below to see how to install our site as a web app on your home screen.
Note: This feature may not be available in some browsers.
More options
You are using an out of date browser. It may not display this or other websites correctly.
You should upgrade or use an alternative browser.
You should upgrade or use an alternative browser.
LEGO Themed 125 Gallon Aquarium Build
- Build Thread
- Thread starter Orsini26
- Start date
- Tagged users None
They've actually held up well so far. They've had a lot of algae and other corraline growth on them. Haven't removed them yet but I'm thinking I could just remove them and soak them in vinegar to remove itInterested to see how long mini-figs hold up for in saltwater.
That would have been funny to doHaha I love it! I did see that set and am tempted to use some of the fish from that set in my new tank. Lego fish swimming with real fish. The tang wouldn't be pleased with it I bet lol
Sounds interesting! Are you going for an old shipwreck kind of look? Cause it will never stay free of coralline algae and stuff. 
Lol yep it will likely stay with the algae on it. I do like the old shipwreck look. I'll have to see how much algae growth there is with a t5 led hybrid system. Never used that style but I assume more algae growth overallSounds interesting! Are you going for an old shipwreck kind of look? Cause it will never stay free of coralline algae and stuff.
Curious if there are any updates!
Lol finally getting all the equipment ready. Black friday BRS Tv did not disappoint!Curious if there are any updates!
My first build steps:
1. Raise the space in the stand a few inches (I got a OCTO 2000 int protein skimmer on sale but increasing cabinet space would make this much more accessible), I was thinking of adding some wood planks to raise the edges of the tank and thus the space under the tank (if anyone has any comments or suggestions to this, I'm all ears!)
2. Adjust the sump space as I might need to increase the overall length on the acrylic one I got 2nd hand. I saw some reviews online for JB waterweld so I might try adding some additional acrylic pieces using this to increase length of sump. Also will have to play with the sizing as I also bought a red sea roller mat kit (biggest model)
3. Build the aquarium canopy. I finally got the hydros with a 0 to 10 v connection as well as 4 separate 36 in long dimmable t5 retrokits. Was likely planning on having 3 ai primes in the center with 72 in (2 x 36 on dimmable t5) flanking each side for supplemental lighting. I was planning on creating the canopy from wood. I believe I can increase the airflow by cutting some holes and drilling in a few computer fans.
Let me know if u all have any thoughts or suggestions. Hopefully I can get some pics of the beginning of the process next week or early December!
Any joy on your Lego build? LolLol finally getting all the equipment ready. Black friday BRS Tv did not disappoint!
My first build steps:
1. Raise the space in the stand a few inches (I got a OCTO 2000 int protein skimmer on sale but increasing cabinet space would make this much more accessible), I was thinking of adding some wood planks to raise the edges of the tank and thus the space under the tank (if anyone has any comments or suggestions to this, I'm all ears!)
2. Adjust the sump space as I might need to increase the overall length on the acrylic one I got 2nd hand. I saw some reviews online for JB waterweld so I might try adding some additional acrylic pieces using this to increase length of sump. Also will have to play with the sizing as I also bought a red sea roller mat kit (biggest model)
3. Build the aquarium canopy. I finally got the hydros with a 0 to 10 v connection as well as 4 separate 36 in long dimmable t5 retrokits. Was likely planning on having 3 ai primes in the center with 72 in (2 x 36 on dimmable t5) flanking each side for supplemental lighting. I was planning on creating the canopy from wood. I believe I can increase the airflow by cutting some holes and drilling in a few computer fans.
Let me know if u all have any thoughts or suggestions. Hopefully I can get some pics of the beginning of the process next week or early December!
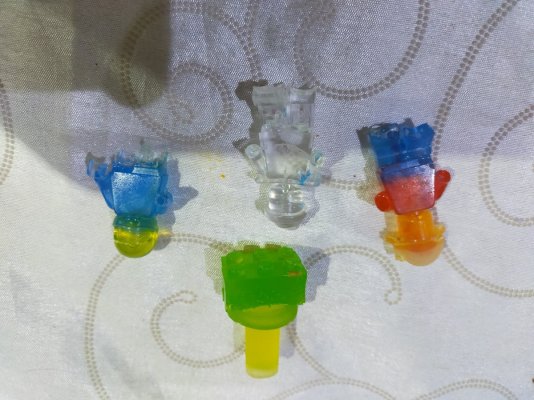
I attempted this a while ago but due to trademarks etc.. you are kindly reminded/ requested to not progress
Attachments
Lol there will b lots of joy from this build, especially my foxface who is needing a bigger home.Any joy on your Lego build? Lol
I attempted this a while ago but due to trademarks etc.. you are kindly reminded/ requested to not progress
That's cool! U made those yourself from epoxy I assume? I've been using actual lego minfigures and lego pieces since I have so many laying around from the childhood days. And lego, please don't shut me down
...
Attempted to make I will add lol.Lol there will b lots of joy from this build, especially my foxface who is needing a bigger home.
That's cool! U made those yourself from epoxy I assume? I've been using actual lego minfigures and lego pieces since I have so many laying around from the childhood days. And lego, please don't shut me down
...
Hands, swords, helmets went missing in moulds/could not remove easily so moulds was a bust lol, we had great fun though
Hello all!
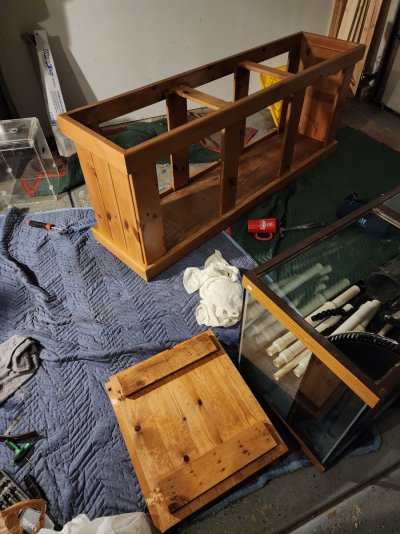
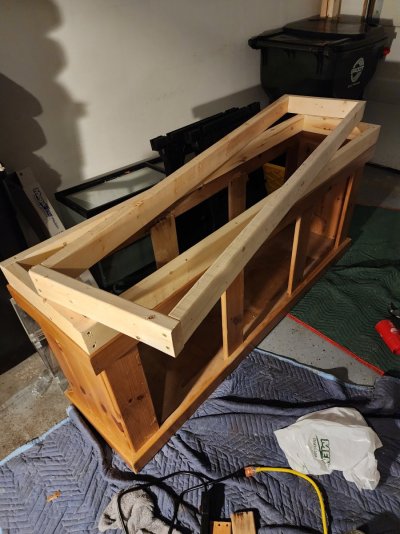
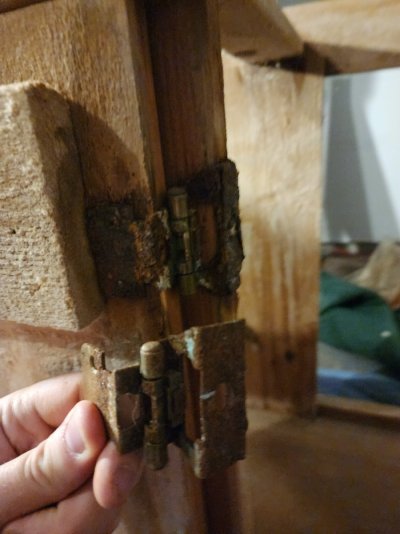
So I've made progress, albeit it's somewhat minimal right now. I have built up the stand to add some more clearance for the reef octopus skimmer. It was quite a fun to see how rusty the door hardware had become lol. I also painted a coating of polyurethane on the inside of the stand to aid in water resistance. I was planning on using a basic 55 gallon aqueon tank for my sumo but unfortunately the tank it too tall to work. I have a smaller acrylic sump I found on Facebook marketplace and am doing a little diy work to extend it out using some acrylic glue.
Now I am working on the aquarium hood as well which is where I will store 3 ai primes and 2 dimmable t5 tunes. I was considering a total of 4 tubes, but am thinking of just using 2 as supplemental lights in the hood. Any opinions on the 2 bulb vs the 4 bulb configuration?
Another thing i thought of to add to the stand was a large plastic tray under it. Sadly the only place the tank can go is a carpeted area. And I'm thinking I can place a large tray or some plastic under it to prevent less water getting on the carpet. However I am having a hard time finding anything online that is that big. It would need to fit the size of a standard 125 g tank stand meaning it would likely have to be 80 in by 30 in. Anyone know where I could find something like this? Alternatively I could also cut a piece of acrylic and glue it to a piece of plywood for support. Then I could glue small pieces of acrylic onto the sides to make it into a tray. Any thoughts here?
Pictures below aren't too exciting but just an idea of what it looks like
Attachments
Similar threads
- Replies
- 66
- Views
- 1,102
- Replies
- 10
- Views
- 238
- Replies
- 8
- Views
- 639


