looking wicked you are motivating me now my tanks crated and ready to ship!!
Navigation
Install the app
How to install the app on iOS
Follow along with the video below to see how to install our site as a web app on your home screen.
Note: This feature may not be available in some browsers.
More options
You are using an out of date browser. It may not display this or other websites correctly.
You should upgrade or use an alternative browser.
You should upgrade or use an alternative browser.
iReefers 700 Gallon Peninsula
- Monster Build
- Thread starter iReefer12
- Start date
- Tagged users None
looking wicked you are motivating me now my tanks crated and ready to ship!!
Can’t wait to see yours come to life!
Got 90% of the plumbing done. I just need to plumb the Frag tank inlet & drain, and the emergency drain down to the floor drain.
This was a big job, lots of angels, too many angles.
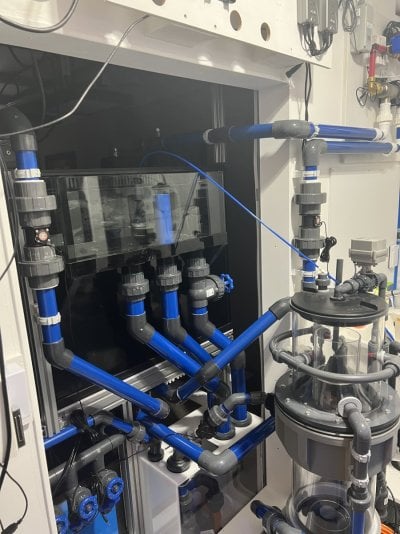
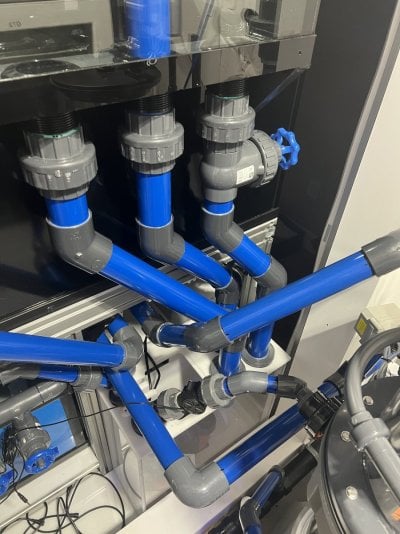
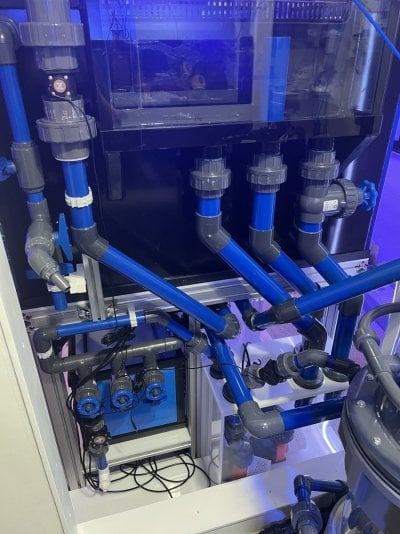
I added a drain that when the ball valves are opened drains about 50 gallons from the display. About the amount of saltwater I’ll have on hand at any given time.
To drain, 2 handles have to be turned, meaning less chance of a mistake or the kids turning handles there not supposed to.
I also added a Tee with a barb fitting so at any time I can attach a hose and drain water into a container or bucket instead of down the drain.
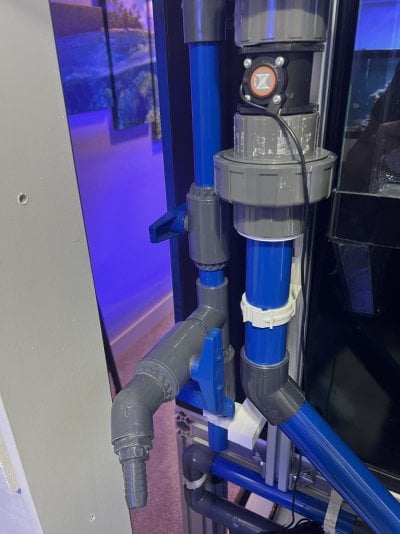
This was a big job, lots of angels, too many angles.


I added a drain that when the ball valves are opened drains about 50 gallons from the display. About the amount of saltwater I’ll have on hand at any given time.
To drain, 2 handles have to be turned, meaning less chance of a mistake or the kids turning handles there not supposed to.
I also added a Tee with a barb fitting so at any time I can attach a hose and drain water into a container or bucket instead of down the drain.

Is the overflow box attached directly to the tank or is it removable? It looks sweet. Who built the tank?
It’s a @Planet Aquariums tank. Yeah, old school external overflow box, the removable overflow boxes are neat, but the thin internal section really collects detritus over time, so wanted to avoid that, pros & cons for each type albeit.
Old school external overflow is way to go imo, one less failure point with fewer holes drilled into tank.It’s a @Planet Aquariums tank. Yeah, old school external overflow box, the removable overflow boxes are neat, but the thin internal section really collects detritus over time, so wanted to avoid that, pros & cons for each type albeit.
THATS THE BEST WAY..It’s a @Planet Aquariums tank. Yeah, old school external overflow box, the removable overflow boxes are neat, but the thin internal section really collects detritus over time, so wanted to avoid that, pros & cons for each type albeit.
looking sweet! Any good sources for plumbing parts at reasonable prices? I use flexpvc. com a lot tons of random stuff.. I may even do this next build in all spa flex as to reduce turns and tight bends might not be as pretty but its efficient.
I use supplyhouse.com & pvcfittingsonline.com the most, I sometimes find better deals at Lowe’s too, but they don’t always carry some of what you need.THATS THE BEST WAY..
looking sweet! Any good sources for plumbing parts at reasonable prices? I use flexpvc. com a lot tons of random stuff.. I may even do this next build in all spa flex as to reduce turns and tight bends might not be as pretty but its efficient.
Very close to being full now. I think if I run the water for 12hrs tomorrow, the tank will be filled.
Most of the rockwork is covered so turned all the lights on to get a good look at it submerged.
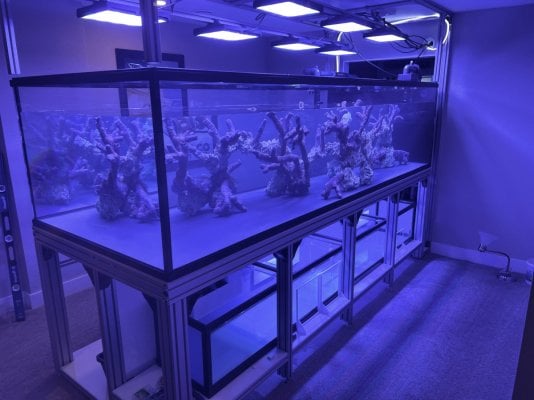
I did some work on the return line plumbing today, I’ll be using 2 returns and 2 1.5” Sea Swirls. One line runs through the UV and one runs through he heat exchanger.
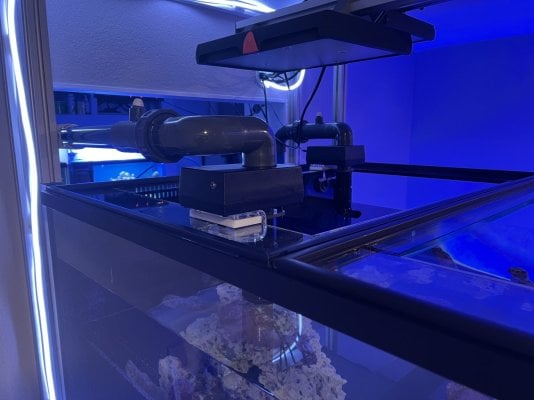
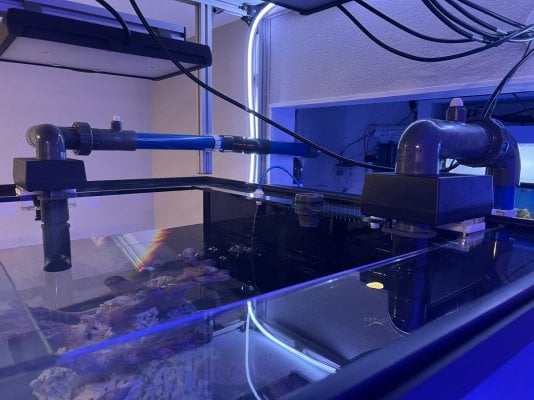
Next I started work on the Frag tank plumbing. It’s a very short drop from the Frag tank into the sump - I elected to do a full beananimal overflow on the Frag tank too instead of a tank adapter… it felt safer this way, albeit the lack of a drop really is concerning, so just going to have to test it and see now. Final drain line will be plumbed tomorrow.
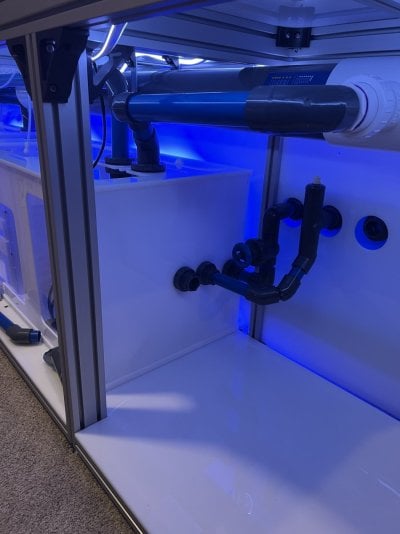
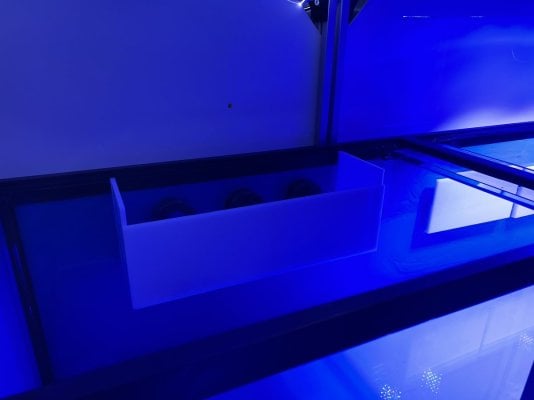
I built the internal box myself over some spare acrylic I had laying around. Should do the job.
While I was at it, I installed these brackets on the back glass of the Frag tank with silicone. I’m pleased with how these worked out, I made them out of scrap acrylic, an L shaped frame slides into the slot between the bracket and the glass which allows me to place a basket to hold Anemones. (Needed a place to store anemones once I pull from the display). Originally I was going to silicone the entire Basket holder onto the glass, but this allows me to remove them one not in use.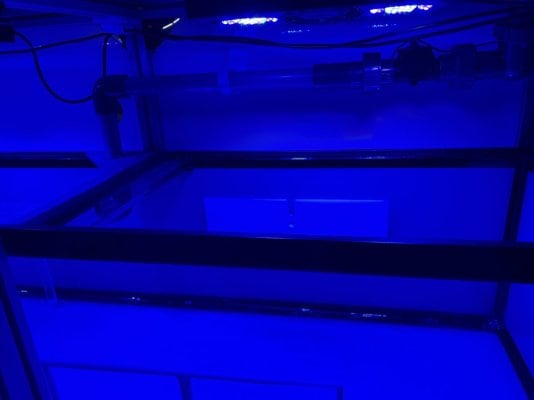
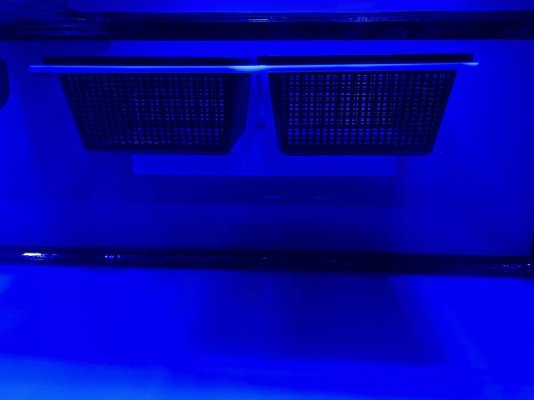
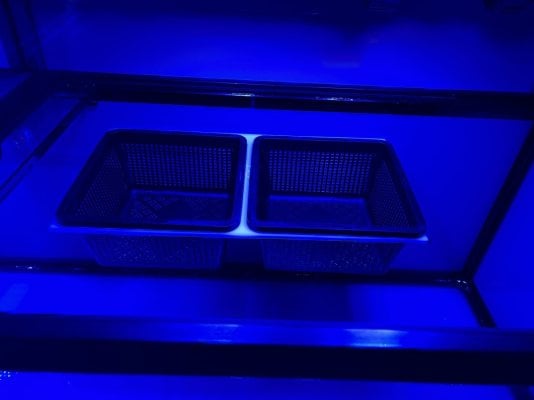
The Frag tank full shot.
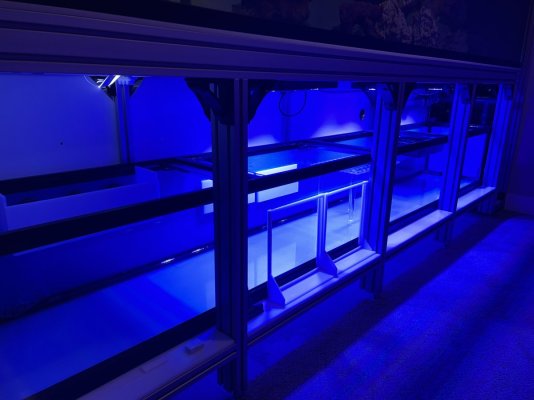
Most of the rockwork is covered so turned all the lights on to get a good look at it submerged.

I did some work on the return line plumbing today, I’ll be using 2 returns and 2 1.5” Sea Swirls. One line runs through the UV and one runs through he heat exchanger.


Next I started work on the Frag tank plumbing. It’s a very short drop from the Frag tank into the sump - I elected to do a full beananimal overflow on the Frag tank too instead of a tank adapter… it felt safer this way, albeit the lack of a drop really is concerning, so just going to have to test it and see now. Final drain line will be plumbed tomorrow.

I built the internal box myself over some spare acrylic I had laying around. Should do the job.

While I was at it, I installed these brackets on the back glass of the Frag tank with silicone. I’m pleased with how these worked out, I made them out of scrap acrylic, an L shaped frame slides into the slot between the bracket and the glass which allows me to place a basket to hold Anemones. (Needed a place to store anemones once I pull from the display). Originally I was going to silicone the entire Basket holder onto the glass, but this allows me to remove them one not in use.


The Frag tank full shot.

It’s nerve wracking for sure. I’m excited and terrified to turn the pumps on… just how well did I plumb those pipes, about to find out.
Definitely come check it out!
Definitely come check it out!
- Joined
- Aug 23, 2015
- Messages
- 272
- Reaction score
- 370
I definitely understand that, years ago I worked in the industry for a while setting up a ton of different tanks and I've never had anything catastrophically fail. Usually with plumbing it would be a random small leak where threads were involved that was pretty easy to fix. Your attention to death makes me believe that it's going to work swimmingly .
I'll send you a message about swinging by!
I'll send you a message about swinging by!
Time for an update.
Been a big week since the last post.
Plumbing is now 100% complete. Tank is filled. And water is running.
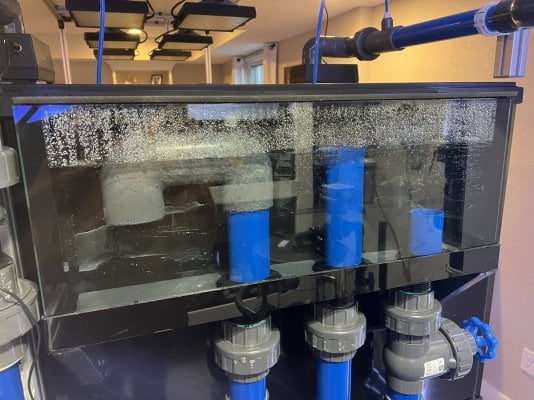
I found a couple of leaks, a couple of easy ones, a loose Union and one of the flow sensors I needed to redo the sealant on the threads. And one leak that was a little more tricky, one of the drain lines the joint where the pvc pipe meets the abs bulkhead had a small leak… I used the abs to pvc cement, did my usual thing, but not sure what caused the leak. Anyway, had to shut everything off, chop that drain line between the Union and the bulkhead, and then use a socket saver drill bit, drilled out both sides and redid those 2 joints. Worked great, a bit messy, but fixed the leak.
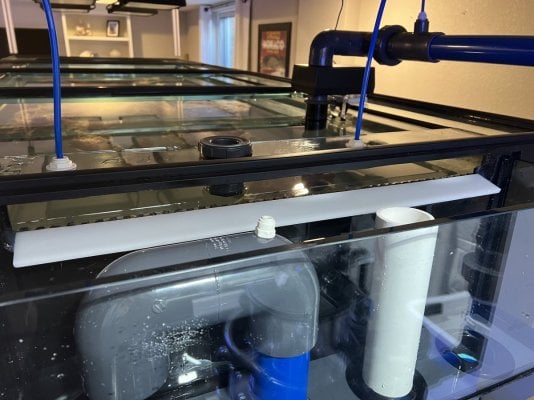
In the downtime it allowed me to attempt to make it all operate a bit quieter. The flow into the external overflow box was super loud. I’d originally asked to have a flat weir and no teeth, but was convinced to have teeth to stop fish slipping into the overflow box.
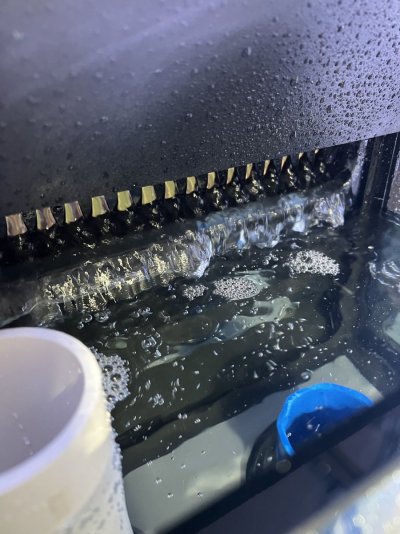
I gave it a try, but the noise of water rushing through was too much. So, got the dremel out and went to work.
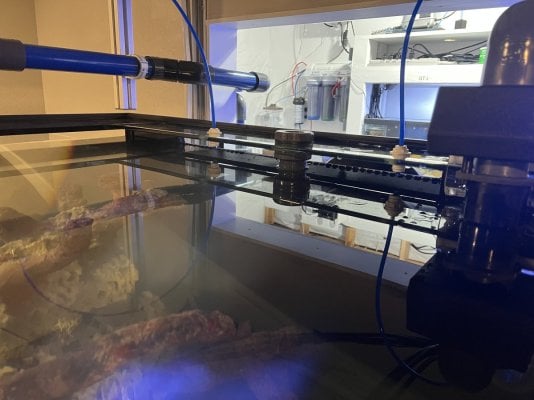
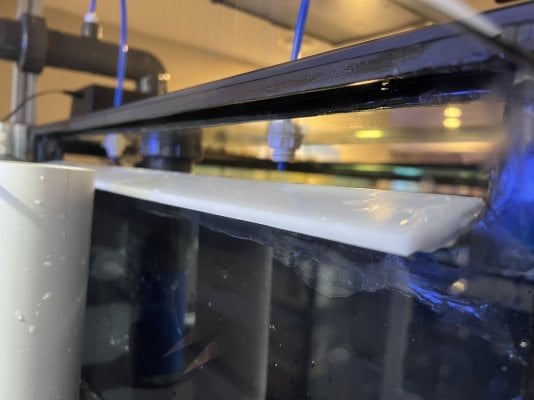
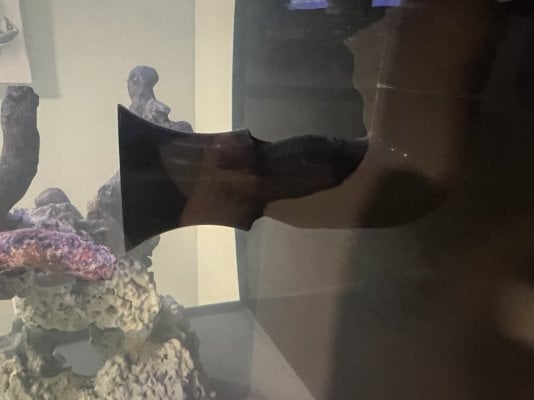
It made it a lot quieter, but still wasn’t silent, so I cut up some scrap acrylic and added this shelf type piece on the back side of the overflow. This really helped bring the water together and glide into the box without separating and splashing, and it made it pretty much silent.
Next, added the MP60’s on the end.
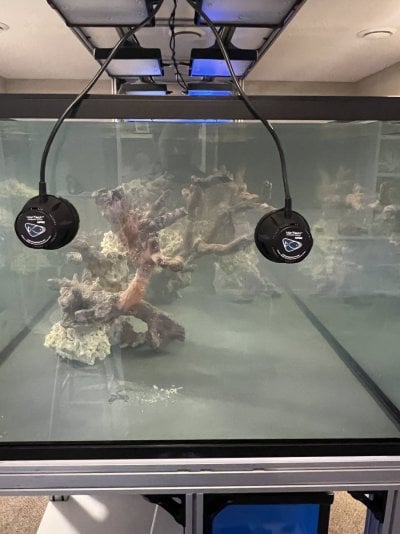
It’s a bit cloudy, but it cleared up when I turned the UV on.
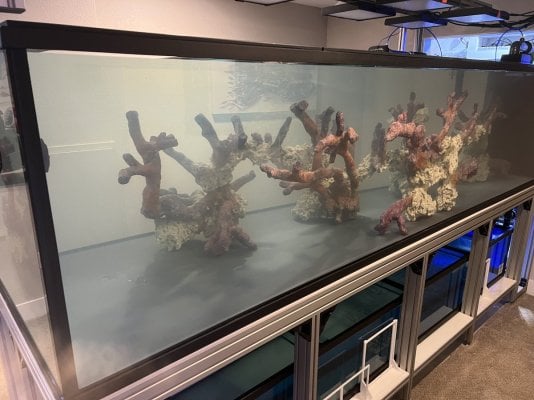
Added some Return nozzles to the sea swirl return line just to mix up the flow even more.
I’ll post some more updates tomorrow.
Salt is added.
Temp is up.
Another big thanks to @neonreef3d for his help with printing a few parts for me. Really good quality printed parts.
Been a big week since the last post.
Plumbing is now 100% complete. Tank is filled. And water is running.

I found a couple of leaks, a couple of easy ones, a loose Union and one of the flow sensors I needed to redo the sealant on the threads. And one leak that was a little more tricky, one of the drain lines the joint where the pvc pipe meets the abs bulkhead had a small leak… I used the abs to pvc cement, did my usual thing, but not sure what caused the leak. Anyway, had to shut everything off, chop that drain line between the Union and the bulkhead, and then use a socket saver drill bit, drilled out both sides and redid those 2 joints. Worked great, a bit messy, but fixed the leak.
In the downtime it allowed me to attempt to make it all operate a bit quieter. The flow into the external overflow box was super loud. I’d originally asked to have a flat weir and no teeth, but was convinced to have teeth to stop fish slipping into the overflow box.

I gave it a try, but the noise of water rushing through was too much. So, got the dremel out and went to work.

It made it a lot quieter, but still wasn’t silent, so I cut up some scrap acrylic and added this shelf type piece on the back side of the overflow. This really helped bring the water together and glide into the box without separating and splashing, and it made it pretty much silent.


Next, added the MP60’s on the end.

It’s a bit cloudy, but it cleared up when I turned the UV on.

Added some Return nozzles to the sea swirl return line just to mix up the flow even more.

I’ll post some more updates tomorrow.
Salt is added.
Temp is up.
Another big thanks to @neonreef3d for his help with printing a few parts for me. Really good quality printed parts.
- Joined
- Aug 23, 2015
- Messages
- 272
- Reaction score
- 370
Very exciting update, a fully running tank is always a good feeling . I'm glad you had just a few small leaks that were relatively easy to fix!
It might be good to think of a custom solution to stop fish from taking the swim into your overflow box. Off the top of my head had a few ideas.
1. Create a custom netting solution that could be attached to the inside of the overflow box to stop this?
2. Create an acrylic piece that can be leveled (nylon screws and tapping the overflow box?) by you to shrink the opening above the water going into the overflow box, but doesn't hinder the water at all?
Yeah, I thought about adding a shelf piece on the inside so I could slot some egg crate in place if I needed to, I may do this in the future.
I’ve had a flat weir in the 220 gallon and surprisingly I only ever had one fish go over the top in all the time it was set up. I might risk it, and add the shelf/bracket down the road if I need to.
I’ve had a flat weir in the 220 gallon and surprisingly I only ever had one fish go over the top in all the time it was set up. I might risk it, and add the shelf/bracket down the road if I need to.
Looks great can’t wait to see it mature! So excellent and well thought out.
Dropped the ball on updating this thread.
In summary:
• Sand is in!
• Fish are all in!
• All the LPS are in!
• A few SPS frags are in!
I told you the sand is in, poll: should I take it out of the bag? Or looks good like this?
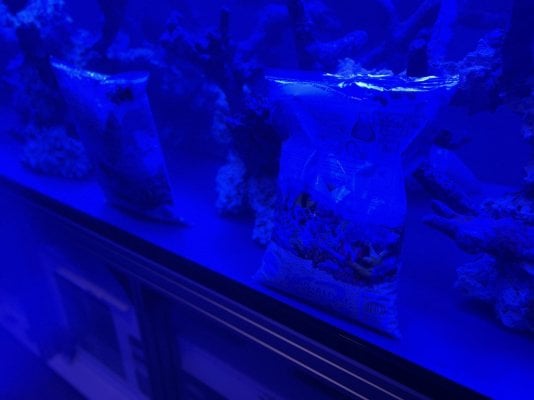
 JK, I placed all the bags into the tank and emptied them right onto the bottom in an effort to limit the dust storm, - didn’t make too much of a difference tbh, but it helped to distribute the sand around.
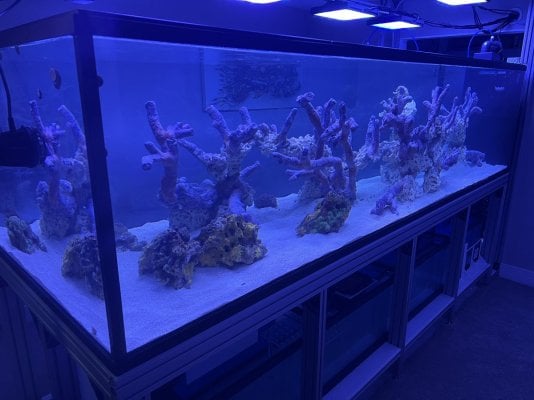
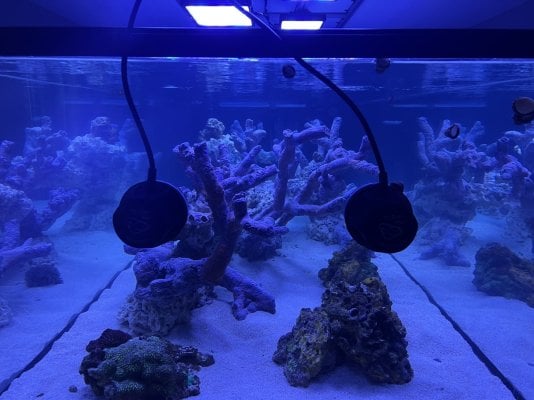
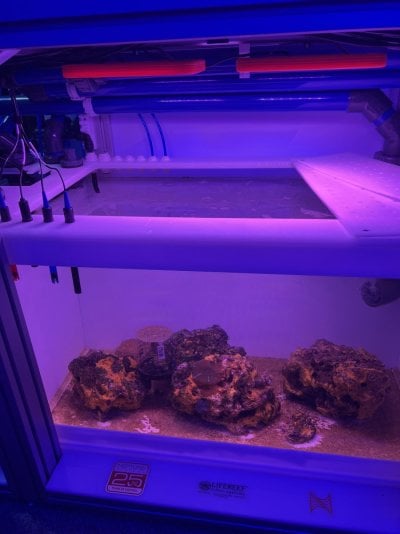
Here’s the fuge with some of my old rock and a ball of chaeto I’ve been holding on to.
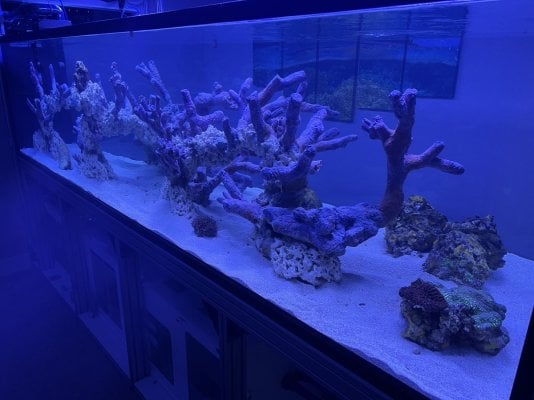
Another FTS
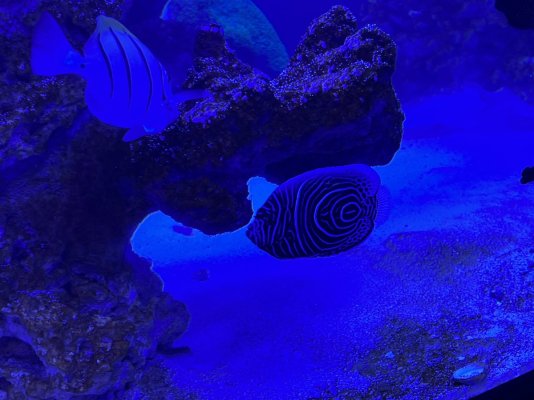
Emperor loves his new space
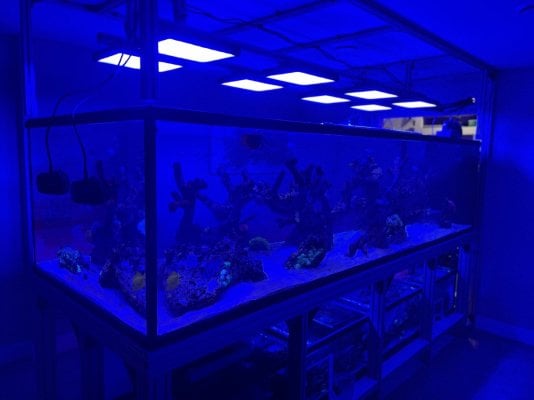
Equipment room is all tidied up and looking clean, wife is happy with it.
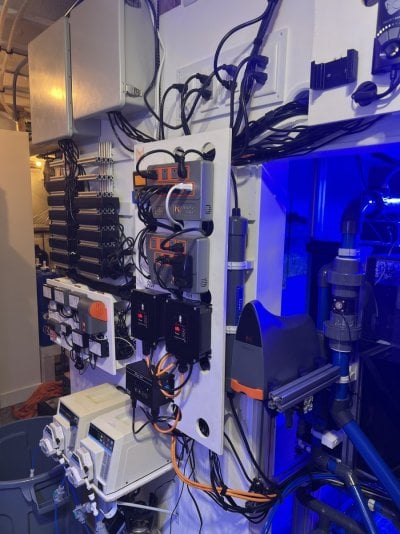
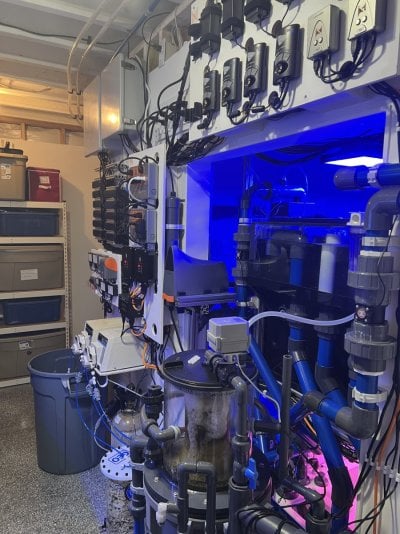
I spent way more time than I am prepared to admit on mounting the shelf for the trident, but in the end, it was kind of the only place to put it, and it works well here.
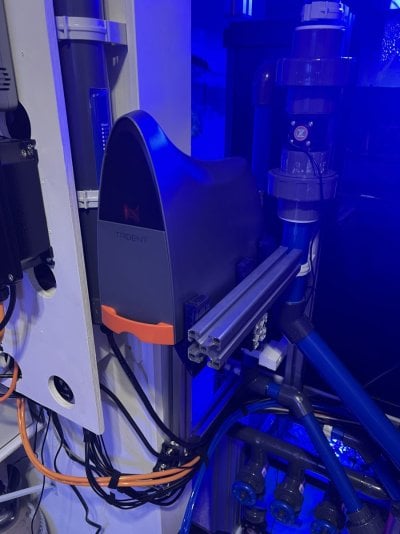
That’s all for now, tank is going through the ugly stage at the moment, water is a little cloudy, and diatoms building up on the dry rock, but to be expected, it actually looks like it’s cleared up a bit in the last 24hrs. Will try to update this thread.
In summary:
• Sand is in!
• Fish are all in!
• All the LPS are in!
• A few SPS frags are in!
I told you the sand is in, poll: should I take it out of the bag? Or looks good like this?


Here’s the fuge with some of my old rock and a ball of chaeto I’ve been holding on to.

Another FTS

Emperor loves his new space

Equipment room is all tidied up and looking clean, wife is happy with it.


I spent way more time than I am prepared to admit on mounting the shelf for the trident, but in the end, it was kind of the only place to put it, and it works well here.

That’s all for now, tank is going through the ugly stage at the moment, water is a little cloudy, and diatoms building up on the dry rock, but to be expected, it actually looks like it’s cleared up a bit in the last 24hrs. Will try to update this thread.
looking great!!!Dropped the ball on updating this thread.
In summary:
• Sand is in!
• Fish are all in!
• All the LPS are in!
• A few SPS frags are in!
I told you the sand is in, poll: should I take it out of the bag? Or looks good like this?

JK, I placed all the bags into the tank and emptied them right onto the bottom in an effort to limit the dust storm, - didn’t make too much of a difference tbh, but it helped to distribute the sand around.


Here’s the fuge with some of my old rock and a ball of chaeto I’ve been holding on to.

Another FTS

Emperor loves his new space

Equipment room is all tidied up and looking clean, wife is happy with it.


I spent way more time than I am prepared to admit on mounting the shelf for the trident, but in the end, it was kind of the only place to put it, and it works well here.

That’s all for now, tank is going through the ugly stage at the moment, water is a little cloudy, and diatoms building up on the dry rock, but to be expected, it actually looks like it’s cleared up a bit in the last 24hrs. Will try to update this thread.
Coming together nicely!Dropped the ball on updating this thread.
In summary:
• Sand is in!
• Fish are all in!
• All the LPS are in!
• A few SPS frags are in!
I told you the sand is in, poll: should I take it out of the bag? Or looks good like this?

JK, I placed all the bags into the tank and emptied them right onto the bottom in an effort to limit the dust storm, - didn’t make too much of a difference tbh, but it helped to distribute the sand around.


Here’s the fuge with some of my old rock and a ball of chaeto I’ve been holding on to.

Another FTS

Emperor loves his new space

Equipment room is all tidied up and looking clean, wife is happy with it.


I spent way more time than I am prepared to admit on mounting the shelf for the trident, but in the end, it was kind of the only place to put it, and it works well here.

That’s all for now, tank is going through the ugly stage at the moment, water is a little cloudy, and diatoms building up on the dry rock, but to be expected, it actually looks like it’s cleared up a bit in the last 24hrs. Will try to update this thread.
Looks amazing ! I love it all great job
Similar threads
- Replies
- 4
- Views
- 298
- Replies
- 4
- Views
- 151
- Replies
- 17
- Views
- 429
- Replies
- 1
- Views
- 177


