thom_smith

Active Member
View Badges
Joined
Jan 12, 2013
Messages
269
Reaction score
102
Location
Albany, NY
Rating - 100%
1   0   0
Hello reefers, my daughter and grandchildren really enjoy my tank while visiting. They've decided they want to start a tank of their own. We started out considering smaller cubes with a simple hang on back skimmer and basic marine light. My son-in-law chimed in he had always wanted a saltwater tank with coral too. So then it became a full family thing.


Background
They all decided they want some clowns and eventually an anenome and want to try their hand at corals. And they like the cardinals, gobies and tangs in my tank. So we outgrew the simple small cube before even starting to look for a tank. And on top of that, one thing led to another and we got a little ahead of ourselves and have a small heram of three captive-bred Ocellaris clowns. Nemo, Nemo and Nemo. The clowns went through quarantine and are in my observation tank. I put an anenome in with them and they went to it instantly and it's hosting them. Unusual as captive-bred often don't instinctively goto anenomes. Also have a tiny, tiny Tomini Tang that can spend its youth in their tank and eventually graduate to my larger tank. All before they even have a home!

Thus began the hunt for the Goldilocks tank. Small enough to fit their space and not overly combersome to maintain. Large enough to accomodate a fair number of fish and not be subject to rapid parameter swings. Enter the Innovative Marine Nuvo-INT 50. Checks all the boxes. Found a great deal on one in immaculate condition at Benson's Fish Room.


Equipment:
Now that we have a tank, much of the other equipment selection fell in place quickly and we are near ready to start our build. Most of it is coming from my stash.

Tank = Innovative Marine Nuvo-INT 50 with Internal Overflow Aquarium
Stand = Innovative Marine APS Cabinet Stand
Sump = Trigger Systems Platinum Sump Cube 20
Return Pump = Reef Octo VarioS 4
Flow Pump = Reef Octo Octo Pulse 4 & Octo Pulse 2
Skimmer = Reef Octo Elite 150SSS
Light = Ecotech Radion XR30 Gen 4 with Reeflink
Heater = Inkbird ITC-306A with Finnex Titanium 300
Controller = Hydros Control X4, Control XP8, Wave Engine to start with
Sand = CaribSea Arag-Alive Fiji Pink 60lbs
Rock = Mostly Fiji rock. The real thing! 38lbs dry and another 16lbs cured and clean.
Cycle = Fishless with a variety of things. PNS Substrate Sauce. Clean, seeded live rock. A bit of live sand mixed with the CaribSea.


This is going to be an awesome setup! Learned from my own past experiences, early mistakes trying to cut corners, trials and errors and starting them off right.
 
Last edited:

Peace River

Thrive Master
View Badges
Joined
Apr 29, 2014
Messages
21,631
Reaction score
165,374
Location
USA
Rating - 100%
1   0   0
How exciting! Congratulations on the new adventure!!!
 
OP
OP
T

thom_smith

Active Member
View Badges
Joined
Jan 12, 2013
Messages
269
Reaction score
102
Location
Albany, NY
Rating - 100%
1   0   0
20230114_150826.jpg
20230114_151115.jpg
20230114_150743.jpg
 
OP
OP
T

thom_smith

Active Member
View Badges
Joined
Jan 12, 2013
Messages
269
Reaction score
102
Location
Albany, NY
Rating - 100%
1   0   0
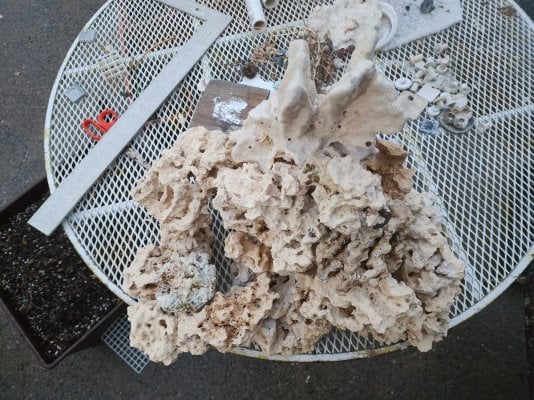
Was able to find Fiji rock at Capital Coral in Albany, NY. Real Fiji rock, very porous with a ton of surface area, not terribly heavy, already cured and clean from a trusted source. Picked out a couple nice pieces, a small shelf rock and some rubble/accent pieces to fill space. Couldn't resist the temptation to at least place them in the tank and get an idea how they may fit together. Looks good but I significantly understimated the available height I have and need to go back and get a couple more pieces probably equal to what I already have this weekend before somebody else grabs them. For the time being the rock is in my sump.

received_730406608543226.jpeg
received_1759399651099848.jpeg
received_473380711634712.jpeg
received_1380951995775448.jpeg
 
Last edited:
OP
OP
T

thom_smith

Active Member
View Badges
Joined
Jan 12, 2013
Messages
269
Reaction score
102
Location
Albany, NY
Rating - 100%
1   0   0
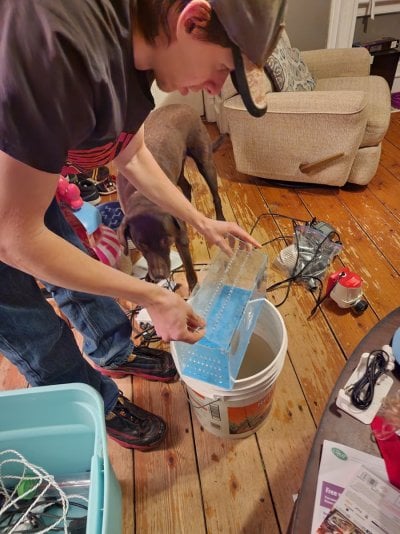
Awaiting shipment of the Trigger Platinum Sump Cube 20C, Spears true union check valve and another bag of CaribSea Arag-Alive Fiji Pink sand. Aside from some basic prep and cleanup of the equipment we're using from my stash we are presently in a holding pattern. A brief citric acid bath and a light brush and everything looks like new again.

20230114_195650.jpg
20230114_203723.jpg


20230114_210058.jpg
 
Last edited:
OP
OP
T

thom_smith

Active Member
View Badges
Joined
Jan 12, 2013
Messages
269
Reaction score
102
Location
Albany, NY
Rating - 100%
1   0   0
Still deciding on skimmer
The current standstill gives me some time to check out skimmers. Not as though I need one right away until the tank is cycled and I have some bioload. Even then just the fleece may suffice for a bit. Primarily want to come to a decision so I can plan for the Hydros controller setup. With the Reef Octo return and flow pump, the skimmer could dictate a Wave Engine as opposed Wave Engine LE. My other tanks have Reef Octo Elite and Regal skimmers and I'm a big fan of the VarioS DC controllable pumps. Just need to find something which fits within the limited 9″ x 12.5″ footprint of the sump skimmer section. I am half considering the Elite 150SSS. It's serious overkill but compact, fits the space and can be driven off my Wave Engine eliminating the native controller and power brick. Also scoping out Bubble Magnus Curve 5 Elite and Nyos Quantum 160. Anybody following this thread please chime in on these or other appropriately sized for ~50 gallon let's assume heavily stocked.
 
Last edited:
OP
OP
T

thom_smith

Active Member
View Badges
Joined
Jan 12, 2013
Messages
269
Reaction score
102
Location
Albany, NY
Rating - 100%
1   0   0
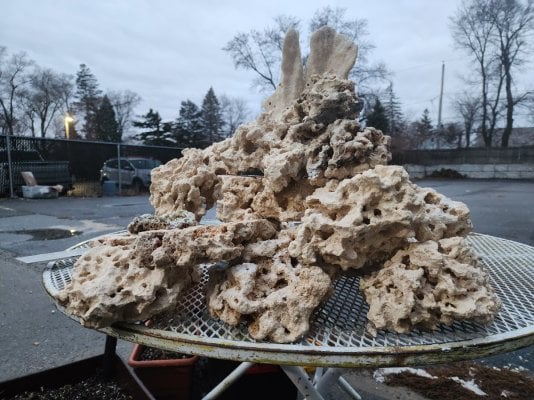
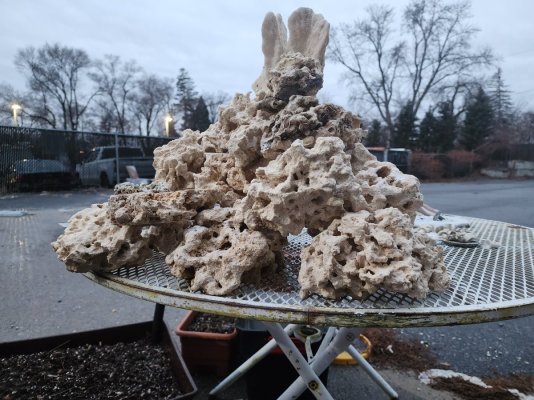
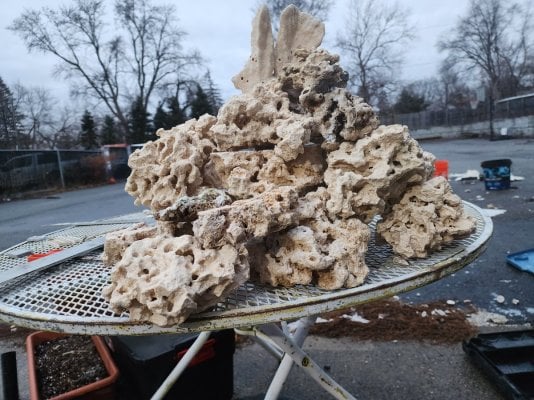
Went back to Capital Coral for more live rock. Unfortunately they had sold the remaining pieces of already cured rock I had my eye on. They had a bunch more Fiji, cut shelf pieces and unique branch rock that came from the same customer tank they'd just nuked in an acid bath and were preparing to go in their sumps to seed. Since it wasn't yet cured, I got it for just a couple dollars per pound. Spent about an hour picking out pieces trying to assemble a good scape. Came up with something I think I can work with and fits the 24"x24" footprint of the tank. Not a lot of contact with the bottom. A lot of caves. Depth and dimension. Pretty good start. Also got a couple softball-plus/volleyball-minus sized larger pieces, some rubble and a small shelf from previous batch to mix in. All the rock is very porous and not at all heavy relative to size. Pictures outside the tank with terrible background don't really do it justice. I snapped a ton more pics and tried to box up in some sort of order so I may be able to at least closely recreate and morter together at home. We shall see. Now have 38lbs of dry rock from this batch and 14lbs or cured rock from the previous batch to work with. Away for the weekend and will begin final assembly morter of the scape in the next week or so. Need to get the tank and sump plumbed and ready for water, leak tested with tap water, rinsed with rodi water, dried and final saltwater mix prepped to go so I can do the scape and quickly place in the tank with minimal die off of my live rock.

20230117_165315.jpg 20230117_165410.jpg 20230117_165457.jpg 20230117_165420.jpg
 
Last edited:
OP
OP
T

thom_smith

Active Member
View Badges
Joined
Jan 12, 2013
Messages
269
Reaction score
102
Location
Albany, NY
Rating - 100%
1   0   0
Sump, sand, check valve and morter arrived between yesterday and today.

received_728528435553090.jpeg


Just waiting on another add-on input fitting to be shipped direct from Trigger. The final piece to the puzzle. Once it arrives we'll be full speed ahead with the build. The add-on included with the sump will be the third input for the bean animal overflow. The extra in transit will be the return. Plan is to hard plumb the return between the sump top and tank then a short length of vinyl tubing between the pump and sump top.
 
OP
OP
T

thom_smith

Active Member
View Badges
Joined
Jan 12, 2013
Messages
269
Reaction score
102
Location
Albany, NY
Rating - 100%
1   0   0
Hydros controller plans
I've been focusing on the essentials of the tank build and really haven't given much thought to the controller and tank automation. My goal is to automate most tank functions to minimize maintenance activities, give me the ability keep an eye on the tank remotely and allow the kids to learn a little responsibility performing basic functions but spend more of their time enjoying the tank and inhabitants. I'm a big user of CoralVue Hydros with with nearly everything from ATO to pumps, lighting to parameter testing, reactors, dosing and more controlled by Hydros. This will be a slightly scaled down version of my tank unless/until they venture down the more advanced coral path.

My initial plan is just to get them through the cycle with what I have and re-evaluate options based on new product availability, what I want for my tank and what they need for essential functions. I've currently got a Wave Engine v1, Control X4 and wifi power strip. Starting with the Wave Engine saves significant space eliminating the native controller and power supplies, gives me much more granular control than the native controller and allows me to max and match manufacturers/pump styles. I'll power and control the VarioS 4 return pump and Octo Pulse 4 flow pump. The Octo Pulse 4 is a bit oversized for this tank. But it's what I currently have without additional purchases. Will see how that goes. May end up reclaiming my Octo Pulse 4 and getting them a pair of smaller Octo Pulse 2s, Icecap/Maxspect Gyres or one of each to get better crossflow from both sides of the tank. Then I've still got another direct drive port leaving my skimmer options open. The X4 will give me (Probe) pH, (Sense) temperature, sump level, fleece level, leak and (Drive) ato pump leaving me with one remaining Probe and one Drive port. Depending on the specifications of the Trigger Platinum fleece motor I may use the second Drive port. Hoping Trigger uses a 12v motor. If not, I'll place it on a wifi power strip for the time being. Then I'll also put the Inkbird and heating element, Reeflink, EcoTech Radion XR30 and Hydros autofeeder on the remaining wifi strip outlets. Lastly add a button box off the Control X4 0-10v inputs with one button to activate feed mode, one spare button TBD and a maintenance switch to turn pumps off.

I'd like to see some redundancies. A secondary temperature sensor at a mininum. A skimmer sensor depending on skimmer decision. Maybe a sump high, sump low. Eventually an awc drain level and a flow rate sensor which I have and will plumb in during the initial install. Probably add a Control XS to spread inputs over two controls. And maybe take advantage of the Wave Engine 0-10v inputs using basic float switches for some of these.

Future considerations to extend Hydros controls to basement below to drive RODI, auto water changes and maybe dosers as they grow from FOWLR to reef. Available space in the stand is very limited so anything that can be remotely located will be. Want them to learn proper husbandry through regular parameter testing, observing tank and livestock as parameters change, recognizing and reading trends, performing water changes, etc before automating and oversimplifying everything.
 
Last edited:
OP
OP
T

thom_smith

Active Member
View Badges
Joined
Jan 12, 2013
Messages
269
Reaction score
102
Location
Albany, NY
Rating - 100%
1   0   0
Skimmer decision outstanding
Reef Octo Classic 152s, Reef Octo Elite 150SSS, Bubble Magnus Curve 5 Elite and Nyos Quantum 160 are all still in consideration. Thought about an Icecap AGS-200 Medium turf scrubber taking advantage of equipment I have in my stash. According to the Trigger and Icecap specifications, I could *barely* fit this in the skimmer chamber. Turns out with the sump depth, height of the scrubber and height of the stand it just didn't fit. So back to original skimmer options. Feedback on the Bubble Magnus and Nyos options appreciated. I'm very familiar with Reef Octo Elite skimmers having had other models and many VarioS pumps.
 
Last edited:
OP
OP
T

thom_smith

Active Member
View Badges
Joined
Jan 12, 2013
Messages
269
Reaction score
102
Location
Albany, NY
Rating - 100%
1   0   0
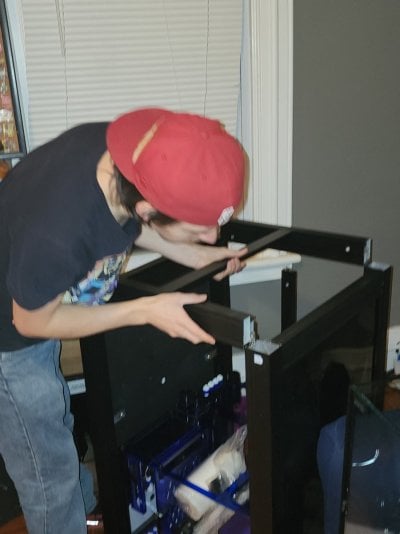
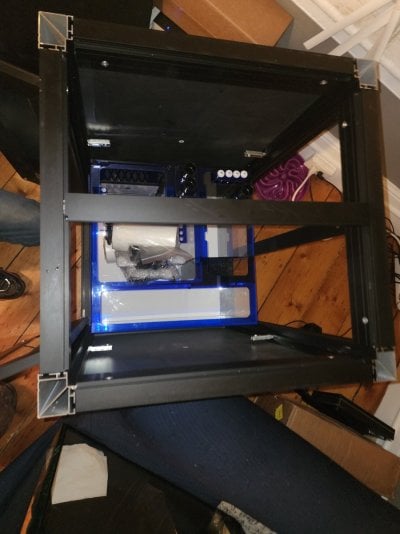
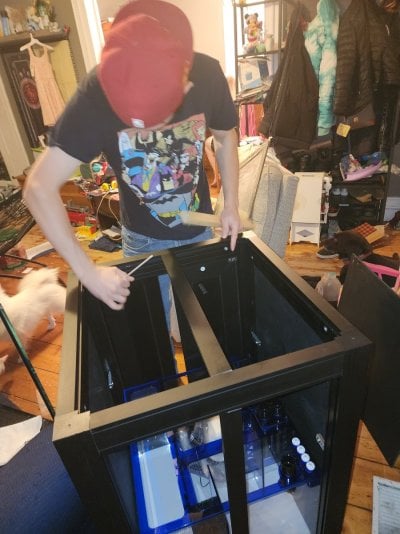
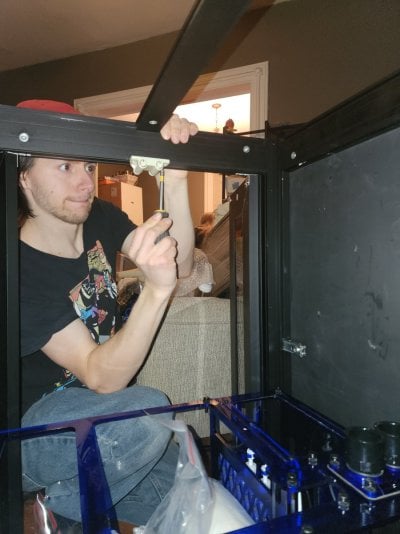
Placed Trigger Platinum 20C sump in the stand this evening. Fit was extremely snug with virtually no room to spare. Had to take the top of the stand apart and unmount top and bottom door magnets, place sump from the top of the stand and re-assemble the top. Bottom door magnet was 1/8" too deep and had to be left out as we couldn't slide it far enough back to permit doors to close properly. Everything came apart and went back together kind of like a jigsaw puzzle.

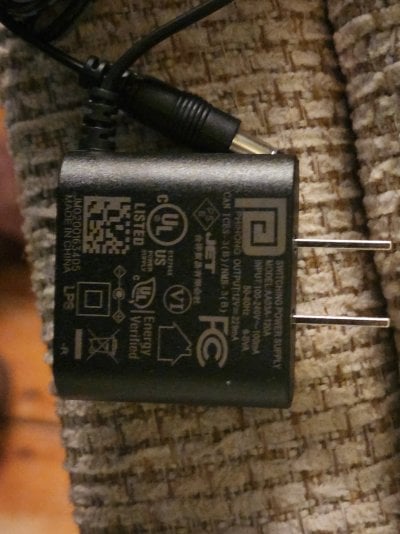
Scoped out the fleece power source while I was there and determined it is 12v 229mA so we'll be powering it on the second Hydros Control X4 drive port leaving only the second probe port available.

20230122_190408.jpg

20230122_190459.jpg

20230122_191158.jpg

20230122_191816.jpg
20230122_191910.jpg
20230122_191921.jpg
20230122_191948.jpg 20230122_192450.jpg 20230122_193110.jpg 20230122_193623.jpg 20230122_202916.jpg
 
Last edited:
OP
OP
T

thom_smith

Active Member
View Badges
Joined
Jan 12, 2013
Messages
269
Reaction score
102
Location
Albany, NY
Rating - 100%
1   0   0
Equipment mounting challenges solved
Putting a sump in the Innovative Marine APS stand, plumbing the overflows and return and intention of also having an in-sump skimmer chews up much of the available space and makes salvaging the included shelf for mounting or storage difficult. Mounting anything to the sides is out for fear of breaking the thin acrylic. Or is it? The Hydros community has turned me on to printed 3D mounts and starboard to attach to the side rails and give a solid mounting surface.


Shout out to @reefiniteasy for turning me onto this solution and @JosephRyan for printing the mounts for me. Got a bunch of his other items too. If you haven't seen his work, reach out or check him out at https://fragtags.com/.

Representative photos off Thingverse as we just ordered and not yet received.

Screenshot_20230123-153230_Chrome.jpg
Screenshot_20230123-153237_Chrome.jpg
Screenshot_20230123-153248_Chrome.jpg
 
Last edited:

Sean Clark

7500 Club Member
View Badges
Joined
May 16, 2019
Messages
8,055
Reaction score
31,606
Location
Michigan
Rating - 0%
0   0   0
Putting a sump in the Innovative Marine APS stand, plumbing the overflows and return and intention of also having an in-sump skimmer chews up much of the available space and makes salvaging the included shelf for mounting or storage difficult. Mounting anything to the sides is out for fear of breaking the thin acrylic. Or is it? The Hydros community has turned me on to printed 3D mounts and starboard to attach to the side rails and give a solid mounting surface.


Shout out to @reefiniteasy for turning me onto this solution and @JosephRyan for printing the mounts for me. Got a bunch of his other items too. If you haven't seen his work, reach out or check him out at https://fragtags.com/.

Representative photos off Thingverse as we just ordered and not yet received.

Screenshot_20230123-153230_Chrome.jpg
Screenshot_20230123-153237_Chrome.jpg
Screenshot_20230123-153248_Chrome.jpg
These look fantastic.
 
OP
OP
T

thom_smith

Active Member
View Badges
Joined
Jan 12, 2013
Messages
269
Reaction score
102
Location
Albany, NY
Rating - 100%
1   0   0
Starting to plumb tank
Once the sump was set in place I started assembling a swag inventory of what I needed. Check valve from BRS had arrived. I determined I did not need the Add-On Input from Trigger Systems as there in no inset or screw holes on the lip of the skimmer or refugium chambers to secure it. Then a Home Depot trip for a hole saw and bucket of plumbing fittings. An hour later after a quick bite to eat we were underway.

Started by placing tank on its back so we could secure bulkheads and determine where we needed to drill the top of the stand. Quickly realized the return is dead center of the tank right above the center brace. Attempted to move the center brace side-to-side rather than front-to-back and discovered there is about 1/8" difference in side-to-side versus front-to-back inside dimensions. Got the square out thinking it may not have been properly assembled but not so. Ended up putting the support front-to-back again and offset to the left between the return and primary overflow. Drilled the top, placed the tank and got the plumbing started.

So now that I've got the tank set in place with bulkheads positioned and visible from the top I can begin to visualize the angles from overflows/return to the appropriate position on the sump. I am immediately presented with three challenges.

* The close proximity of the Trigger fleece motor to the primary drain and the height of the motor impacts where I can put the gate valve and how I can position it. Plus the primary and secondary bulkhead inputs to the sump are so close together I don't know that I can get the Spears gate valve on the vertical rise anyway.

* The height of my VarioS 4 return pump, 1" union and hose barb pretty much dictates that I would need to make an immediate hard 90° turn in order to take advantage of the Trigger add-on input.

* Not a significant issue but the Trigger sump doesn't have a third bulkhead input for the bean emergency overflow.

So although it will be the last thing done, the return pump is the easiest and first thing solved. I'll just skip the add-on and go return pump, 1" thread union, 1" MPT to slip, check valve, reduce to 3/4" then rise with a two pairs of back-to-back 45° fittings forming a sweep and a couple more unions somewhere along the way so I can remove the entire length of pipe to clean and service the pump. That frees up the Trigger add-on input in the return chamber for my emergency overflow. Two down pretty quickly... But the primary overflow presented a rat's nest of problems. I want to use two sets of back to back 45° fittings to form a long sweep instead of a hard 90°s thinking it'll potentially reduce noise. The 45° sweeps require more height than the 90°s to make the transition. The position of the fleece filter doesn't allow the gate valve to be positioned facing the front of the tank except about the 8-10" immediately below the tank. I don't have enough length on the horizontal run to squeeze the gate valve in. Unable to come up with anything better I made some concessions. I stayed with the back-to-back 45° fittings to make the sweeps. Placed the gate valve on the vertical rise positioned toward the back of the tank and extending above the return chamber. To make space for the secondary return vertical rise clear the gate valve I came out of the sump bulkhead with and transitioned immediately to pair of 45° fittings. It doesn't look terrible but I would have preferred different. Cut, fit and glued all the drains together. Return will be done tomorrow and hopefully followed by Water Weekend.

With the drains now done I've had a few hours to second guess myself. I don't think I like the emergency drain consuming space above the return chamber and, if used, draining directly into the return chamber. High probability after sleeping on it, I will cut the emergency immediately below the tank then sweep left with multiple 45° fittings to the very back corner of the refugium chamber and free float just above water level. This will make the back corner of the return chamber where the gate valve and push connect fittings are located less busy.

Original position of center support.
20230124_210522.jpg

Holes drilled in top. Notice the hole dead center.
20230124_223532.jpg

Repositioned support. It's actually offset to the left. This is a rear view.
20230124_214217.jpg

Rear view of current drain setup which I'm second guessing the leftmost (emergency) connection.
20230126_170014.jpg
 
Last edited:
OP
OP
T

thom_smith

Active Member
View Badges
Joined
Jan 12, 2013
Messages
269
Reaction score
102
Location
Albany, NY
Rating - 100%
1   0   0
Looking at the emergency drain the next day with a fresh set lf eyes I disliked it even more. Decided to redo it and just drop it in the far corner of the refugium section. That then made the return simpler and cleaned up above the return chamber.

20230127_211638.jpg
 
OP
OP
T

thom_smith

Active Member
View Badges
Joined
Jan 12, 2013
Messages
269
Reaction score
102
Location
Albany, NY
Rating - 100%
1   0   0
Aquascape challenges
Thought this was Water Weekend. Just need to level the stand, rinse sand and assemble the aquascape. Minor setback with the aquascape. After assembling, cutting, drilling and placing rods to eventually come up with something we kind of liked we opened the E-Marco 400 container to discover the liquid acrylic polymer had leaked from the bag and appeared evaporated or also leaked from the container. Only a tiny bit remains in the bottom. Checking with local fish stores and online forums for alternatives so we can continue on Saturday.

received_2431146967063013.jpeg

received_1359661764860014.jpeg


Aquascape as it presently stands. The blue base underneath is just a fraction of an inch narrower than the tank width and accurately representative of the depth. Got a nice little shelf overhang on the far left. The pictures have a much smallet standalone rock beneath it that'll like be moved/removed. Another different style branch shelf on the left. And plenty of open area and sand surface beneath the center. About half the rock in this portion is live so we had to carefully disassemble into two smaller pieces and place back in a saltwater circulating tote. The rods kind of held together and maintained the basic shape. Sorry for the picture quality. An even worse background than my previous pictures.

20230127_210428.jpg
20230127_210448.jpg
20230127_210457.jpg
 
Last edited:
Back
Top