I'm still undecided about how to plumb the UV. Will be nice to have some way to put the UV inline with the return and add a flow meter. Alternatively use a standalone pump and recirculate the water in the return section of the sump.Are you plumbing in your UV to the overflow coming down into the sump, or just going to run it with a pump to and from the sump? I have a Red Sea S 550, and do not want to mess with the pre-plumbing or risk issues with the warranty. Thinking I'll eventually add a UV like and just run it with a pump in/from the sump.
Also, is your tank blocking your door?
Good catch on the leak! Following along.
Navigation
Install the app
How to install the app on iOS
Follow along with the video below to see how to install our site as a web app on your home screen.
Note: This feature may not be available in some browsers.
More options
You are using an out of date browser. It may not display this or other websites correctly.
You should upgrade or use an alternative browser.
You should upgrade or use an alternative browser.
IM 100 EXT with control board build
- Build Thread
- Thread starter nickng
- Start date
- Tagged users None


Finally received the replacement drain pipe from innovative marine. Great customer service from IM, and I can actually speak to a person within the company. Thanks to Brian at IM for expediting the replacement.

I've been working on designing a filter roller for mine like I did with my IM 15g AIO because I couldn't find anything close to what I wanted that would fit. I'm curious to see how you get yours working, it would be nice to have a design to base it off of, if not just purchase that Fiji one itself.
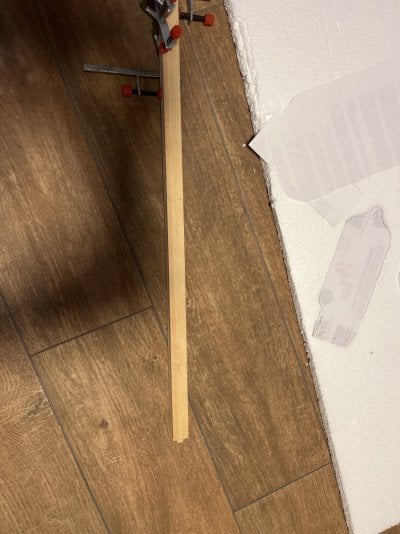
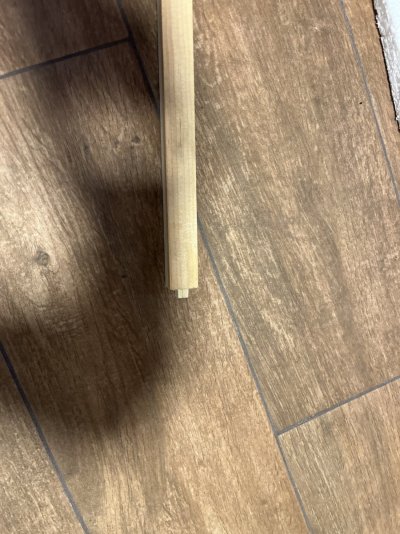
Sure I will add the updates and some pictures later. I made a couple of acrylic extension pieces to help attach the fiji cube filter. The width dimension ie 110mm is perfect to sit inside the RFS39 filter areaI've been working on designing a filter roller for mine like I did with my IM 15g AIO because I couldn't find anything close to what I wanted that would fit. I'm curious to see how you get yours working, it would be nice to have a design to base it off of, if not just purchase that Fiji one itself.

Sure I will add the updates and some pictures later. I made a couple of acrylic extension pieces to help attach the fiji cube filter. The width dimension ie 110mm is perfect to sit inside the RFS39 filter area

I did look up the dimensions on that last night as well and saw the 110mm (4.34") width would be a perfect fit for the bracket inside. By acrylic extensions I'm assuming you mean you're increasing the length of it from the 250mm. I modeled the sump in CAD a few weeks ago and believe that area is 345mm (13.6") long.
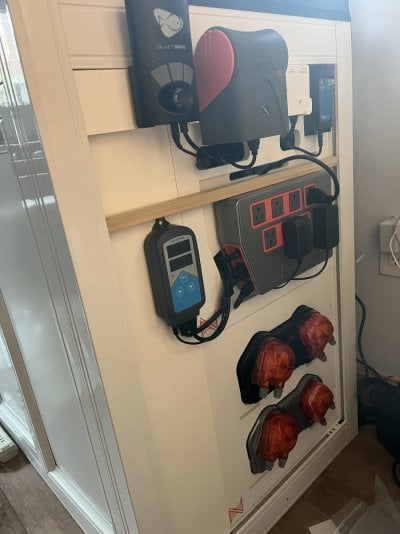
Your control board idea is nice as well. I ended up screwing a piece of black plywood to the back supports cut to shape to hang my power bars, UV light, ATO pump and a few other small things, and all the controllers are double sided taped to the inside of 3 doors.
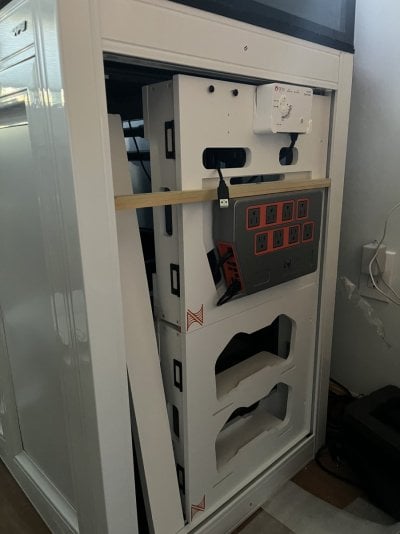
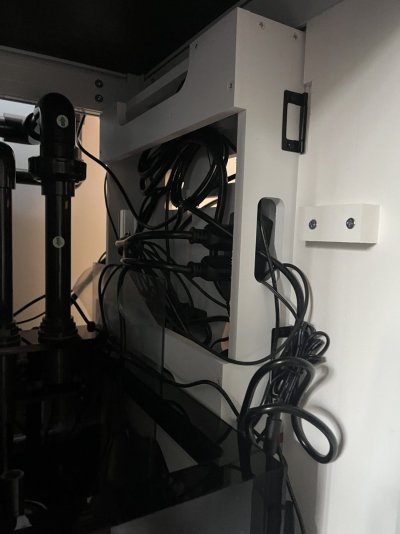
Thanks, I just about managed to squeeze the control board and all the bits and pieces into the side opening. There’s so little room in the stand after putting in the RFS 39 sump.I did look up the dimensions on that last night as well and saw the 110mm (4.34") width would be a perfect fit for the bracket inside. By acrylic extensions I'm assuming you mean you're increasing the length of it from the 250mm. I modeled the sump in CAD a few weeks ago and believe that area is 345mm (13.6") long.
Your control board idea is nice as well. I ended up screwing a piece of black plywood to the back supports cut to shape to hang my power bars, UV light, ATO pump and a few other small things, and all the controllers are double sided taped to the inside of 3 doors.
About the acrylic extension yes the 250mm plate has to be increased. And the other extension is for the height of the roller motor
I’ll verify the roller fleece filter works in the sump before posting the final dimensions of the acrylic extension used.


Nearly done with the front of the control board panel. Need to make a border trim that slots into the aluminum channels to secure the entire panel and give it a more finished look.
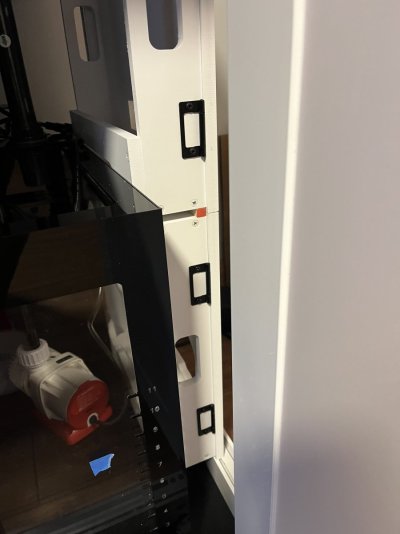
To prevent water from the sump splashing onto the electronics, I’ll cut a piece of 1/8” acrylic or abs to cover the entire back portion of the control board. This will create an isolated compartment. There’s a piece of 1/8” acrylic slotted in as a test piece.
To prevent water from the sump splashing onto the electronics, I’ll cut a piece of 1/8” acrylic or abs to cover the entire back portion of the control board. This will create an isolated compartment. There’s a piece of 1/8” acrylic slotted in as a test piece.
Attachments
fishface NJ
7500 Club Member
View Badges
NJRC Member
Hospitality Award
Water Gap Reef Club
MAC of SW Florida
Rock Pool Reef Keepers
My Tank Thread
IM should make the sump a 32" or 34"...the 39" sump takes up too much room inside the stand
Totally agree! 36" with an optional built-in fleece roller will be ideal. I went with the RFS39 simply because of the availability of the ready-made plumbing. The only weakness with the plumbing is the 3/4-inch return pipe. Wished it was a 1-inch pipe instead.IM should make the sump a 32" or 34"...the 39" sump takes up too much room inside the stand

fishface NJ
7500 Club Member
View Badges
NJRC Member
Hospitality Award
Water Gap Reef Club
MAC of SW Florida
Rock Pool Reef Keepers
My Tank Thread
I totally agree on everything you posted. I love the IM 100 tank and stand but the sump is a turnoff because it takes up too much room for me personally. I had emailed them on Friday about the next side up which is the IM 150. Only reason I was looking at it is because I could get it without the sump. I asked the weight of the tank alone (without the crate/packaging) so I would know how heavy it would be to carry....tank is 420 pounds! No way could I handle that. My floors aren't level so it would be dealing with the tank coming on and off to get the shims on. Good luck with the tank! I have been following you since you first posted.Totally agree! 36" with an optional built-in fleece roller will be ideal. I went with the RFS39 simply because of the availability of the ready-made plumbing. The only weakness with the plumbing is the 3/4-inch return pipe. Wished it was a 1-inch pipe instead.
liking the control board. I just modified an inexpensive cabinet I found. Was contemplating using a jewelry armoire and have each drawer have its own control. like one of those circular ones so it's unique. I just turned my lights back up.
Try calling IM, maybe better luck at getting just the tank without the fleece roller. If you are prepared to do the plumbing, try asking if IM can supply the plumbing parts not pre glued. That way you can adjust the pipe lengths and scoot the RFS39 sump over to the left by another 3 inch so that you get a total of 6to7 inches of free space to the right of the sump. I was going to do that but got lazy.I totally agree on everything you posted. I love the IM 100 tank and stand but the sump is a turnoff because it takes up too much room for me personally. I had emailed them on Friday about the next side up which is the IM 150. Only reason I was looking at it is because I could get it without the sump. I asked the weight of the tank alone (without the crate/packaging) so I would know how heavy it would be to carry....tank is 420 pounds! No way could I handle that. My floors aren't level so it would be dealing with the tank coming on and off to get the shims on. Good luck with the tank! I have been following you since you first posted.

By the way I came across this video about managing ich and velvet with UV. From what’s described/inferred, I’ll probably plumb the UV to take/return the water separately from/to the tank.
Ok got the tank up and running. Filled with water and testing the roller fleece.
Water flowing into the roller filter is quite loud. Audible even when cabinet doors are shut. The sound is caused by the water creating a mini waterfall as it cascades via the side rectangular openings into the filter. For now I stuffed some foam pieces to completely silence it. I went ahead and placed an order for the silencer pieces. Hopefully it solves the sound issue. Other than the sound I think the roller filter works.
https://www.fijicube.com/cdn/shop/products/ARF-20Silencer_A_1080x.png?v=1676870928
Last edited:
Similar threads

- Replies
- 2
- Views
- 134
- Replies
- 38
- Views
- 913
- Replies
- 41
- Views
- 1,849


