Wondering where I can find a nemprotect for the XF350 gyre?
Navigation
Install the app
How to install the app on iOS
Follow along with the video below to see how to install our site as a web app on your home screen.
Note: This feature may not be available in some browsers.
More options
You are using an out of date browser. It may not display this or other websites correctly.
You should upgrade or use an alternative browser.
You should upgrade or use an alternative browser.
3d Printed Aquarium Parts Archive
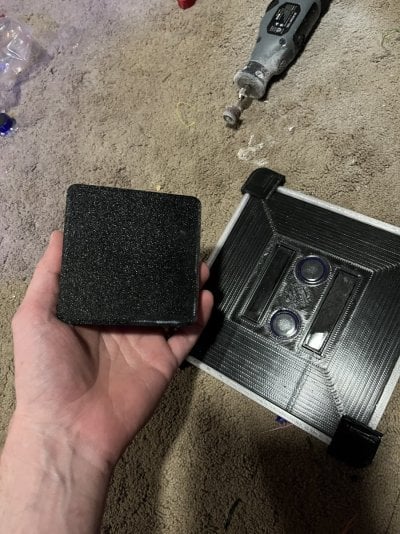
i just realized i was missing a plate for the outside magnet on the 7x7 , and a couple of the cylinder cages. there are a lot of options, and it will not cost you much to print them until you figure out what you want
Nori Feeder by D3DPT
i will circle back with directions at a later point, the idea is you can build a 50x70 , 100x70 cylinder with a bunch of different cages. i havent printed the diamond one , i moved on from it like a middle school girlfriend , and the super thin one i have printed but i will be honest you will...www.thingiverse.com
i will circle back with directions but can build a 50x70, 100x70, 5x7 plate, 7x7 plate, 1/2" options and 3/4" options (im not 100% sure on the 7x7 but if you put two N52 magnets 60x10x5 on the top and bottom and scale the outside magnet piece out so theres something ridiculous like 5-6 magnets stacked im sure it'll hold on 3/4" because I am literally right there with 2 on the inside 1 on the outside i just havent had time to do 2/2 or 2/3 2/4, etc
Mushroom Cage ! Also works with frozen food, media bags, lots of stuff

Mushroom Frozen Food Thaw Feed Make Feeding Time Easy by D3DPT
17 x 5 ceramics in the housing. epoxy. 60x10x3 mm neodymium for nano, 60x10x5 N52 for 1/2, 3/4"
You don’t need to use the housings, but I use them to speed up the process. Take care to ensure your north south magnets are facing the same way. You should be gluing epoxy to the back of the plate, and plastic to the back of the horizontal cage. Negative horizontal expansion values will increase the size of the holes, and opposite. Clips help keep the cage pulling off from extra hungries. File is on thingiverse and I would love to walk through and questions. I used to get this out of the tank, loaded, back in under 60 seconds.


- Joined
- May 26, 2016
- Messages
- 752
- Reaction score
- 670
The cylinder version is interesting, I don't know if it could stand up to fish beating on it. I think the lever effect would make it easy to knock off the wall. if it was weighed down and a line leading to maybe an outside attachment it could reasonably sit on the bottom.i just realized i was missing a plate for the outside magnet on the 7x7 , and a couple of the cylinder cages. there are a lot of options, and it will not cost you much to print them until you figure out what you want
Last edited:
- Joined
- May 26, 2016
- Messages
- 752
- Reaction score
- 670
Why not just pause the print, insert the magnet and then seal it in with the rest of the printYou don’t need to use the housings, but I use them to speed up the process. Take care to ensure your north south magnets are facing the same way. You should be gluing epoxy to the back of the plate, and plastic to the back of the horizontal cage. Negative horizontal expansion values will increase the size of the holes, and opposite. Clips help keep the cage pulling off from extra hungries. File is on thingiverse and I would love to walk through and questions. I used to get this out of the tank, loaded, back in under 60 seconds.


not reef safe unfortunately and i dont want to mess with N52 magnets flying around my precious printers oh manWhy not just pause the print, insert the magnet and then seal it in with the rest of the print
i had , out of pure laziness , about 7 or 8 of them that i was rotating on a 125 with a bunch of hungry fish. one in the middle one on either side. i got tired of taking the 4 minutes to load it, and decided i wanted to quicken the process. what do you mean be the lever effect ?The cylinder version is interesting, I don't know if it could stand up to fish beating on it. I think the lever effect would make it easy to knock off the wall. if it was weighed down and a line leading to maybe an outside attachment it could reasonably sit on the bottom.
- Joined
- May 26, 2016
- Messages
- 752
- Reaction score
- 670
By lever I mean you have a long shape attached at a center focal point. The amount of force needed to dislodge it is tied to the length. So a big fish hitting the end could knock it off the wall.i had , out of pure laziness , about 7 or 8 of them that i was rotating on a 125 with a bunch of hungry fish. one in the middle one on either side. i got tired of taking the 4 minutes to load it, and decided i wanted to quicken the process. what do you mean be the lever effect ?
so in little kid lemonade stand terms what you mean is the magnets would be better off at the top, or the bottom, or one on top and bottom?By lever I mean you have a long shape attached at a center focal point. The amount of force needed to dislodge it is tied to the length. So a big fish hitting the end could knock it off the wall.
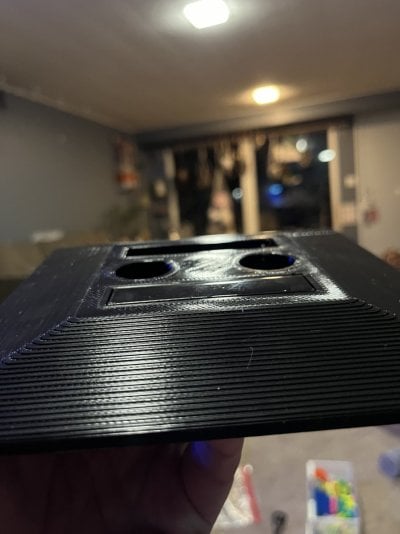
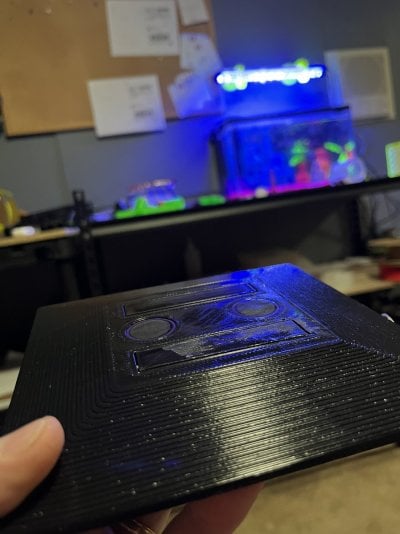
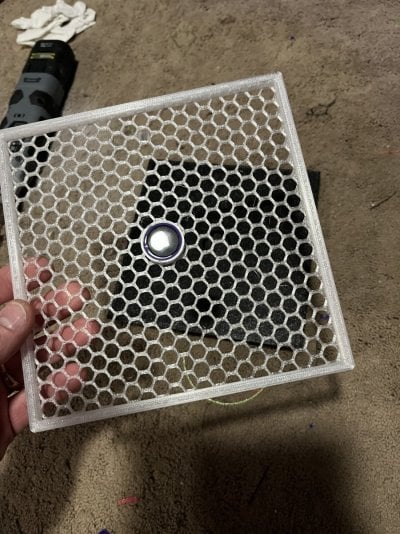
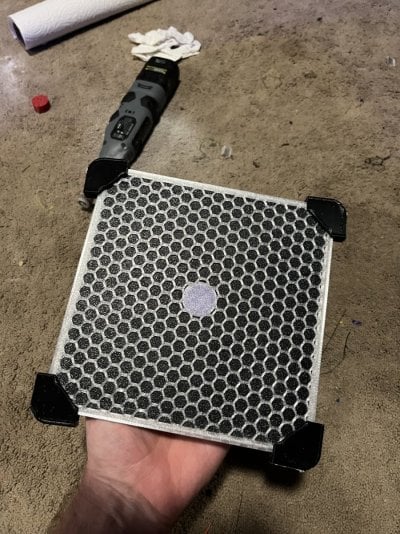
Anyone know of 3D print light diffuser for Viparspectra lights ? Something like this ?

 www.bulkreefsupply.com
Wanting something more to hold a piece of diffuser in place rather than keeping light from bleeding out. I was using magnets super glued to piece of frosted acrylic but they kept coming off.

Light Diffuser for Jump 65W LED
Improved Light Aesthetics, Spread, & Coverage Produces a homogeneous blend of color Improves spread and coverage Includes two diffuser layers for customized results Gives better control over PAR reduction Reduces shimmering and shadows Prevents unwanted light leaks Easy to install clip-on...
Wanting something more to hold a piece of diffuser in place rather than keeping light from bleeding out. I was using magnets super glued to piece of frosted acrylic but they kept coming off.
Last edited:
if you can let me know the dimensions of the light and the relative locations to a fixed point (i like to start at corners) of the cooling parts of the light i can get one out pretty quicklyAnyone know of 3D print light diffuser for Viparspectra lights ? Something like this ?

Light Diffuser for Jump 65W LED
Improved Light Aesthetics, Spread, & Coverage Produces a homogeneous blend of color Improves spread and coverage Includes two diffuser layers for customized results Gives better control over PAR reduction Reduces shimmering and shadows Prevents unwanted light leaks Easy to install clip-on...www.bulkreefsupply.com
Wanting something more to hold a piece of diffuser in place rather than keeping light from bleeding out. I was using magnets super glued to piece of frosted acrylic but they kept coming off.
not sure if anyone is around at this point in the night , but i will have a "Nori Feeder Sausage Time" thread here tonight, start to finish how to print, settings , blah blah, it is only what I do, not what you should do. I fully and extremely encourage you to figure out how the pieces will work for you in your situation. you may scale pieces up and down without losing a relative 60x10x5 mm shape to place the magnets, as well as many of the slicers being premade with a measure tool, and if not you can buy an add on. dont sleep on doing a significant amount of your work in the slicer. they are wonderful tools. would it be preferential as its own thread or a single comment on this post, i am currently printing the pieces and should be built over the course of the next second all nighter of this week nowAnyone have a good nori feeder? I printed one that worked ok but was thinking maybe we could design a better model.
Cat Rack
Sorry if it’s been asked, but 28 pages……
Any suggestions for an “adequate” 3D printer?
Any suggestions for an “adequate” 3D printer?
you will receive 18 million 453 thoushand and 69 answers. find someone who you can see what they have made with a printer they make it with. ask them about it. they will tell you what they like about it and what they dont. i shall go first.
tonight i went to micro center for my , now seemingly weekly 7:53 trip so I can make it there by 8:53 to have 7 minutes to grab another printer. I purchased Ender 3 V3 KE , which I will not be buying any other printer until I stop liking this one. It is easy to put together as long as when you are attaching the U shape to the part that sits on the table, it will have a little black piece you have to put through the little hole thingy. do that, and have your wife or someone sit there and just hold it and DO NOT PULL OR TOUCH ANYTHING , you need to hang it off a table so you can attach the little black thingy to the other little black thingy. then there is one taped on the back left, un tape it , match the two little thingys on top to the two on bottom and push it in to the what I "think is the y axis motor, but it is on the back left and it is silver. back right is fine. three screws will hold in the frame on either side. tighten one lightly. tighten the other side the same. tighten first side tight. tighten second side tight. tighten third side very tight. we are no longer "leaving them loose" because these printers are now so efficient they fly around and shake your computer screen while you type this unless you have a nice stable table to work from. go to menards they are 179 and you can fit up to 5 printers on one. I only have 4 because at this point i cant keep them all printing what they need to print.
$255 - you do not need to buy a different bed, hot end, anything if the 100% reason you are purchasing your hobby asset is to use it for the hobby. if you want to print white dogs with brown eyes and know literally nothing about the settings, pay 1200 for a printer that will print your two color eye ball dogs, and you can afford it, the bambu people will surely plead their case.
my case is i spend 255 on a printer that i have chosen. what i believe, a quality company that has the proper financial and more importantly ethical current stance on what they believe the hobby should be all about. it may have taken them until about February of 2024 , but I will be the only person that says dont sleep on a creality printer if you want to make fish tank things
to be extra clearyou will receive 18 million 453 thoushand and 69 answers. find someone who you can see what they have made with a printer they make it with. ask them about it. they will tell you what they like about it and what they dont. i shall go first.
tonight i went to micro center for my , now seemingly weekly 7:53 trip so I can make it there by 8:53 to have 7 minutes to grab another printer. I purchased Ender 3 V3 KE , which I will not be buying any other printer until I stop liking this one. It is easy to put together as long as when you are attaching the U shape to the part that sits on the table, it will have a little black piece you have to put through the little hole thingy. do that, and have your wife or someone sit there and just hold it and DO NOT PULL OR TOUCH ANYTHING , you need to hang it off a table so you can attach the little black thingy to the other little black thingy. then there is one taped on the back left, un tape it , match the two little thingys on top to the two on bottom and push it in to the what I "think is the y axis motor, but it is on the back left and it is silver. back right is fine. three screws will hold in the frame on either side. tighten one lightly. tighten the other side the same. tighten first side tight. tighten second side tight. tighten third side very tight. we are no longer "leaving them loose" because these printers are now so efficient they fly around and shake your computer screen while you type this unless you have a nice stable table to work from. go to menards they are 179 and you can fit up to 5 printers on one. I only have 4 because at this point i cant keep them all printing what they need to print.
$255 - you do not need to buy a different bed, hot end, anything if the 100% reason you are purchasing your hobby asset is to use it for the hobby. if you want to print white dogs with brown eyes and know literally nothing about the settings, pay 1200 for a printer that will print your two color eye ball dogs, and you can afford it, the bambu people will surely plead their case.
my case is i spend 255 on a printer that i have chosen. what i believe, a quality company that has the proper financial and more importantly ethical current stance on what they believe the hobby should be all about. it may have taken them until about February of 2024 , but I will be the only person that says dont sleep on a creality printer if you want to make fish tank things
1) attach black thingy
2) tighten screws to what I think is "gantry" but the U shape
3) then do the plugging in of your motors
MAKE SURE IF YOU LIVE IN THE GREAT STATE OF AMERICA you switch to 115 on the back or you will have to maybe go back to micro center not that i ever figured that out the hard way
Similar threads
- Replies
- 20
- Views
- 1,038
California Aquarium Controller ATO Lighting Return Pumps Powerheads Misc. Pumps Skimmers Filters UV RO/DI Dry Rock Suppliments Testing Heaters Plumbing Miscellaneous Dosing Dry Goods
Brand New Reef Octopus Skimmer, Trident, DOS, Aqua UV Sterilizer, Hanna, etc. NEW ITEMS ADDED
- Price: Varies
- Shipping Available
- Replies
- 29
- Views
- 1,890
- Replies
- 4
- Views
- 160
- Price: $10,000
- Shipping NOT Available
- Replies
- 8
- Views
- 302
- Price: $3500
- Shipping NOT Available
- Replies
- 3
- Views
- 334


