OP
OP
Vivid Creative Aquatics

Vivid Creative Aquatics

Upgrade Your Flow!
View Badges
Joined
Oct 12, 2017
Messages
1,517
Reaction score
2,166
Location
Phoenix, AZ
Rating - 0%
0   0   0
how far does the system have to sit from the wall with the plumbing and overflow box
The plumbing sticks out about 8.5 to 9in , but we have it sitting in near the front windows in our lobby - so it's about 22 inches between the tank and the wall/windows.

for this build, the space was less of a concern than if it where sitting in my living room at home. If that where the case, i think I would have tried to make it a but more compact.

20210909_102458.jpg
 
OP
OP
Vivid Creative Aquatics

Vivid Creative Aquatics

Upgrade Your Flow!
View Badges
Joined
Oct 12, 2017
Messages
1,517
Reaction score
2,166
Location
Phoenix, AZ
Rating - 0%
0   0   0
Thank you for this great topic!
It was my inspiration for wanting a Melev's reverse check valve myself.
Looking forward to a post where you test this siphon break :)

Yme
I have actuality tested the Reverse Chekc Valve Setup already - spoiler alert.... it works! :p

I've been so busy this past week, i have not had a chance to gather up the photos and videos to post about it - but i will this weekend.

The tank right now is just quietly sittin gon the fornt lobby and doing it's tyhing while it cycles and is getting ready for the livestock.
 
OP
OP
Vivid Creative Aquatics

Vivid Creative Aquatics

Upgrade Your Flow!
View Badges
Joined
Oct 12, 2017
Messages
1,517
Reaction score
2,166
Location
Phoenix, AZ
Rating - 0%
0   0   0
Adding a little bio diversity to the tank today.

It's so sterile - never really started a tank like this before. So I scooped some sand from both the Display tank and fuge from the house tank and added this muck to the sandbed in the new tank.

Turned the tank a bit cloudy, but I'm sure it will clear out soon enough :)
20210910_072525.jpg
20210910_080854.jpg
 
OP
OP
Vivid Creative Aquatics

Vivid Creative Aquatics

Upgrade Your Flow!
View Badges
Joined
Oct 12, 2017
Messages
1,517
Reaction score
2,166
Location
Phoenix, AZ
Rating - 0%
0   0   0
Time to start thinking about lighting.

I want the light mounting apparatus to be as minimalist as possible, so a rack that spans the tank is out. I conaiderd hanging a rack over the tank, but the drop ceiling complicates that a bit.

So, I decided on a cateler light rack. It's simple and nearly disappears. And the best part is, I was able to build this using left over pieces from a previois project.

20210912_153148.jpg


The main challenge for this rack was attaching it to the tank. Options included drilling a few holes in the stand, which would be easy, but I hate doing it, of I didn't need to.

20210912_111618.jpg


3D Printing for the win

So I came up with a design that would mount the rack, without drilling holes and use a 3D printed strap to hold the cantilever in place.
20210913_083920.jpg


Quickly printed up a prototype and tried it out
20210912_151940.jpg


The strap goes around the steel beam aluminum extrusion. The nut keeps it attached.


20210912_153114.jpg
20210912_153052.jpg


The start keeps the rack from falling over, while the weight (which isn't much) rests 9n the glass

20210912_162447.jpg


The end result is a simplist lightbrack suitable to hold up a single, and capable light.

20210912_153131.jpg


20210912_153148.jpg


I mounted a si gle Radion XR15 I had laying around just to see the tank under some light. It's not the light I'll end up with bit really love the way it looks under light

20210912_192707.jpg
 
OP
OP
Vivid Creative Aquatics

Vivid Creative Aquatics

Upgrade Your Flow!
View Badges
Joined
Oct 12, 2017
Messages
1,517
Reaction score
2,166
Location
Phoenix, AZ
Rating - 0%
0   0   0
The first fish are in the tank!

The purple dotty back is from a 5-gallon nano we have here at the office. So he's loving it now with so much space. The small leopard wrasse is from a local fish store. He was added last night and is already doing his thing.


The fish from the 125-gallon home tank will be moving into this tank soon - that list included:

- Copperband Butterfly
have had this fish for at least 5 years - one of my favorite

- Large Yellow Corris Wrasse
martue and has a nice soft rainbow coloration happening on the face. great fish

- Desjardini Salefin Tang
still sort of a juvenile. i aquarium this fish 4 or 5 months ago as a rather small/young fish. Its grown pretty rapidly

- Springeri Damsel
had this fish for at least 7, maybe 8 years. he's set in his ways, so hopefully he makes the move OK

- Large Yellow Watchman and Tirger Postal shrimp pair
these two have been together for a while. These will be the last ones to make the move as I'll likely need to tear down that tank to catch them

hope to have them all moved over within a week or two.
 
OP
OP
Vivid Creative Aquatics

Vivid Creative Aquatics

Upgrade Your Flow!
View Badges
Joined
Oct 12, 2017
Messages
1,517
Reaction score
2,166
Location
Phoenix, AZ
Rating - 0%
0   0   0
First water change after the initial cycle. Swapping out about 30 gallons.

Total water volume on the system after rock/sump displacement and, including the sump at running volume, - the total water volume in the system is about 130 gallons. So it's about a 23 to 25% water change.

Later water changes will be much smaller than that, but the first one is usually large

20210918_175525.jpg
20210918_175435.jpg
 
Last edited:
OP
OP
Vivid Creative Aquatics

Vivid Creative Aquatics

Upgrade Your Flow!
View Badges
Joined
Oct 12, 2017
Messages
1,517
Reaction score
2,166
Location
Phoenix, AZ
Rating - 0%
0   0   0
VCA-134-Gallon-Cube.jpg


Big update - we officially settled on the light. We opted for the Neptune SKY. I went with a single SKY light and positioned about 14in above the water and centered to the left and right but slightly forward to provide a bit more light the front of the tank.

I have to say, I am very happy with the blanket of light this single fixture is casting over the tank - shadows are silky smooth and and there is no visible color separation. Visually the tank is lit from corner to corner.

Fuul View - 2021-09-25_131655.jpg


check out this video

I forgot to mentions - I also have most of the fish from the old system moved over. the only ones missing are the springie damsel, and the watchman goby and his pistol shrimp buddy - you'll see the rest of the fish in the video above
 
OP
OP
Vivid Creative Aquatics

Vivid Creative Aquatics

Upgrade Your Flow!
View Badges
Joined
Oct 12, 2017
Messages
1,517
Reaction score
2,166
Location
Phoenix, AZ
Rating - 0%
0   0   0
Can we get a video of the reverse check valve setup in action next time you shut it off/on? Im super curious.

Tank looks awesome
Yes - i keep meaning to do that. I just demonstrated it for a visitor the other day. The biggest challenge is i don't always have an assistant here to help out when I'm ready to shoot a video in the late afternoons. The valve works so quick, i need to someone to shut it off while I'm Filming.

I'll find a way to get hat done before the weekend - even if I have to ask the UPS guy to help - LOL

20210928_115249.jpg
 
OP
OP
Vivid Creative Aquatics

Vivid Creative Aquatics

Upgrade Your Flow!
View Badges
Joined
Oct 12, 2017
Messages
1,517
Reaction score
2,166
Location
Phoenix, AZ
Rating - 0%
0   0   0
Can we get a video of the reverse check valve setup in action next time you shut it off/on? Im super curious.

Tank looks awesome
here a quick impromptu demo of the reverse Check Valve setup on my system. Mine seems o be a little different than ones i have seen, and I think that's because I chose to place the valve high above the horizontal run. Because of the slow startup of the DC pump, it never fills with water - but rather fills with air before pressurizing.

I think this will actually be desirable because it will have less chance of stuff growing on the valve that might cause it to get stuck closed.

take a look at the video and post your questions below.


kenbennedy

Active Member
View Badges
Joined
Jun 5, 2021
Messages
172
Reaction score
197
Location
Houston
Rating - 0%
0   0   0
here a quick impromptu demo of the reverse Check Valve setup on my system. Mine seems o be a little different than ones i have seen, and I think that's because I chose to place the valve high above the horizontal run. Because of the slow startup of the DC pump, it never fills with water - but rather fills with air before pressurizing.

I think this will actually be desirable because it will have less chance of stuff growing on the valve that might cause it to get stuck closed.

take a look at the video and post your questions below.

That's really interesting to see in action. I was expecting a lot of water squirting out of the valve when priming the returns.

What would have been the disadvantage to a more typical check valve between the return bulkhead and pump? I think I see ball valves on the returns, so presumably you would be able to get to it for maintenance.

My build is similar with a small sump and returns below the surface by several inches, I am trying to figure out the return line setup that would suit me best.

Thanks for the video!
 
OP
OP
Vivid Creative Aquatics

Vivid Creative Aquatics

Upgrade Your Flow!
View Badges
Joined
Oct 12, 2017
Messages
1,517
Reaction score
2,166
Location
Phoenix, AZ
Rating - 0%
0   0   0
That's really interesting to see in action. I was expecting a lot of water squirting out of the valve when priming the returns.

What would have been the disadvantage to a more typical check valve between the return bulkhead and pump? I think I see ball valves on the returns, so presumably you would be able to get to it for maintenance.

My build is similar with a small sump and returns below the surface by several inches, I am trying to figure out the return line setup that would suit me best.

Thanks for the video!

To be honest - i was expecting a more forceful shutting of the valve as well, when we first fired it up.

Because the valve is the highest point and the pump has a Slow-start feature, that most DC pumps have, the flow wants to go to the outlets first, due to gravity. If the valve was at the same level as the horizontal section of the return pipe, then it probably would slam shut, since the valve would be pressurized before the outlets.

Like I said - i like this configuration better since the valve itself will likely never get stuck closed due to growth on the valve. Plus with it being the highest point, the vacuum that is created as the water rushes back to the sump down the main return line really pulls hard on the valve and forces it to open.

The main reason I didn't go with a more traditional check-valve setup is that I have always been hesitant to rely on a check valve to stop water from passing it. Inevitably they always end up with a small trickily of water when closed due to gunk on the valve. or they out-right fail. it's a matter of when, not if.

In this configuration, a failed (stuck open) valve is exactly what you want, so i figured it would be a safer way to rely on a check valve.
 

r4rlee

Community Member
View Badges
Joined
Sep 21, 2021
Messages
77
Reaction score
117
Location
vancouver canada
Rating - 0%
0   0   0
IMG_20210427_123545_027.jpg The VCA 134-Gallon Cube - Random Flow Generator Powered Mixed Reef!

The first of two new offices tanks are officially under way, and I can’t wait to share it here on Reef-2-Reef

Our goal with this tank is to build a mixed reef tank with a unique flow solution that utilizes just Random Flow Generator® Nozzles to flow the entire tank.

Here are the initial details:

The Display Tank – 134 Gallons
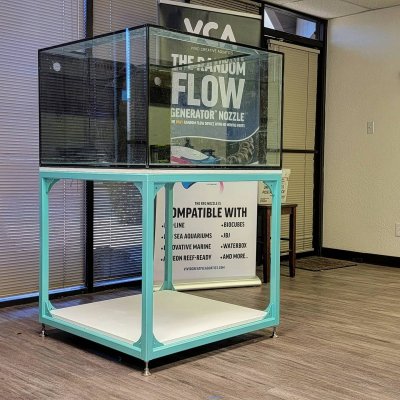
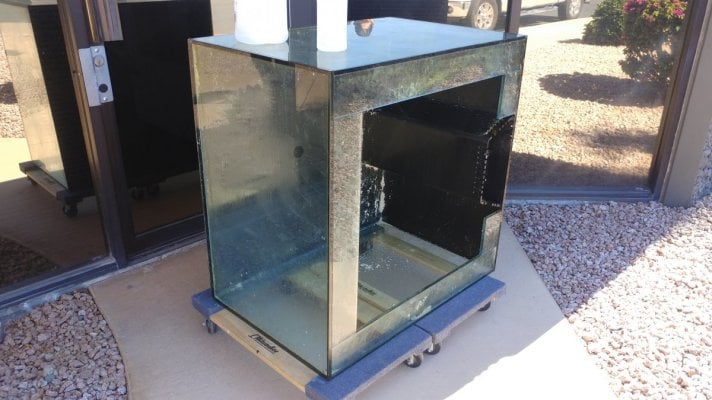
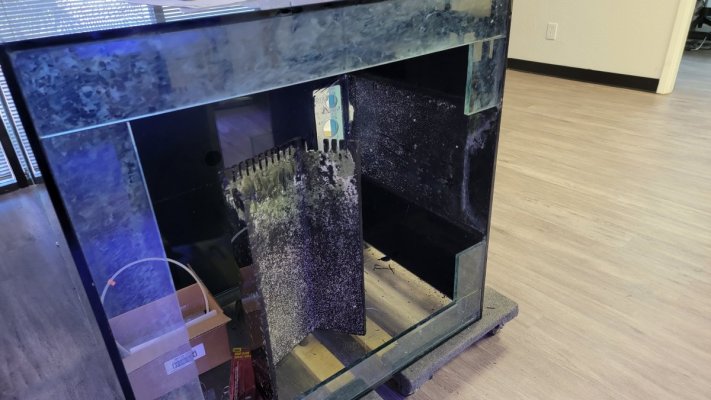
The Display Tank started out as a used Lemar 34x34x24 cube tank that we acquired from a local hobbyist - why build brand new when you can recycle – right?

The original configuration had the center overflow positioned on the back wall, with the standard three holes drilled in the bottom – two 1in holes for return lines and a single 1.5in hole for the drain.

The first task was to remove the back overflow box and prep the existing holes for the closed loop.

20210221_124650.jpg 20210324_110259.jpg

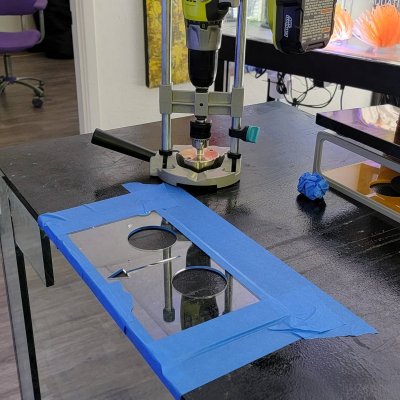
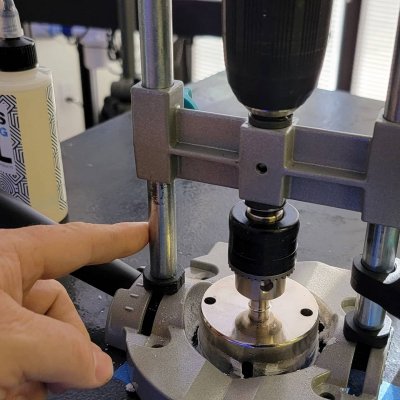
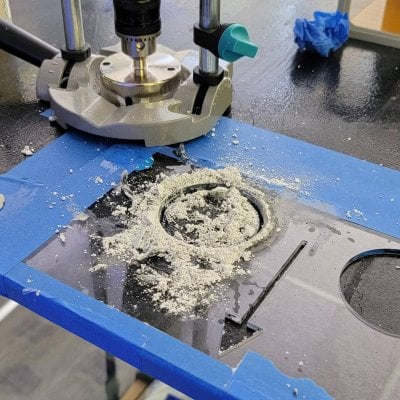
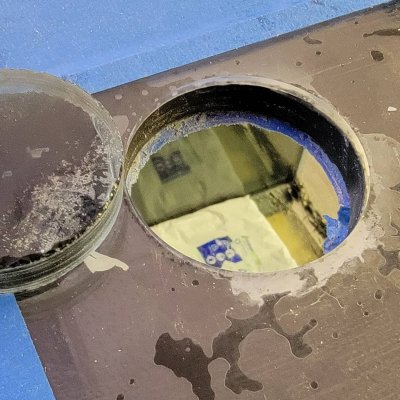
Next – we needed to drill 4 new holes – two for the returns and two for the EShopps Eclipse Overflow box. We did not have a way of running a continuous flow of water over the drill bit, without making a huge mess in the front lobby, so we use Glass Cutting Oil. Worked well. The process made some free sand. It if were not for the oil, I probably could have used it in a small nano tank.


IMG_20210423_095813_781.jpg IMG_20210423_095813_805.jpg IMG_20210423_095813_830.jpg IMG_20210423_095813_845.jpg


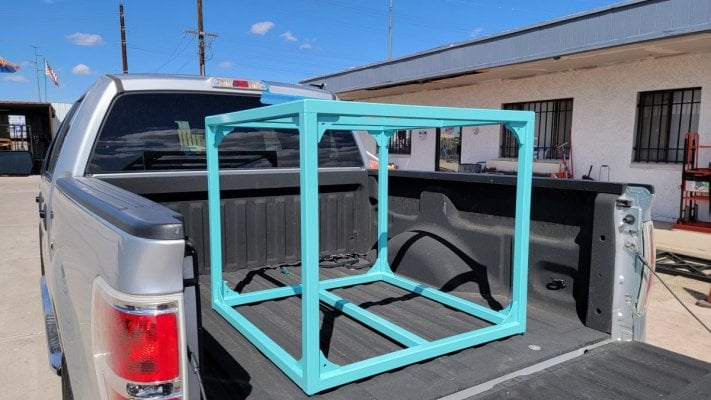
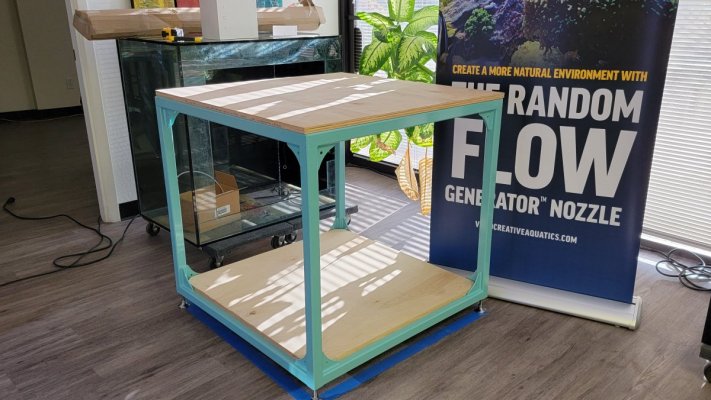
20210316_140223.jpg The Custom Steel Stand

The stand is a custom steel stand constructed out of 1 1/2" tube steel with 3/8 inch wall thickness. It’s pretty heavy duty, while still maintaining a minimalist appearance. We had it powder coated with an Aqua Blue gloss finish.


20210317_170903.jpg 20210316_145514.jpg

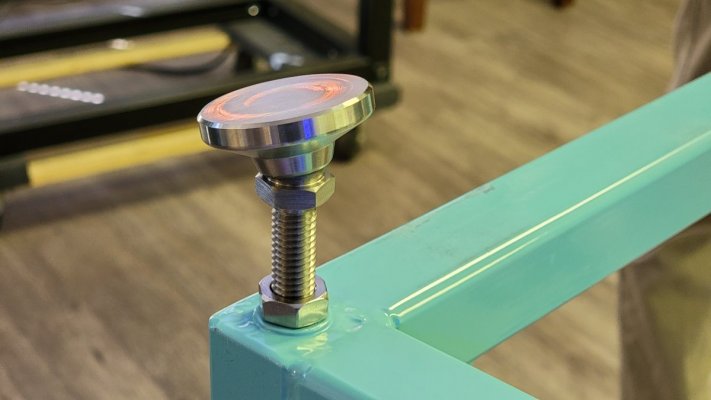
We added a 3/4in Burch plywood base and platform. The floor in tour office suite is severely uneven. You can see it, but it because very obvious when you try and level a tank. So I designed the stand to use heavy duty leveling feet.


The first Challenge - the size of the tank vs the size of the door
One of the first challenges with this tank was the physical size of the tank in relationship to the size of the front door to our office. The maximum door width is 32 inches wide. The tank came in on its side with no problem. However, the stand had a limitation of 32 inches as a max dimension. As a result, the stand is a little shorter than I would have liked.

The height of the steel stand is 32 inches. The adjustable feet add another 3 inches to the overall height. The final height of the stand is 35in. Add to that the 3/4in birch board used as the base under the tank and the top of the tanks sits just shy of 60in tall.
20210427_120104.jpg


The Dual Closed Loop - with Shared Drain

This build features a dual closed loop with shared drain. This will provide most of the flow in this tank and will be created using two of our 1in RFGS100LL Random Flow Generators®

This proved to be the second major challenge. The original design was to have the pumps mounted underneath the tank, upside down and out of the way. However, the sheer size of some of the plumbing fittings such as 1 1/2in elbows and Union Ball Valves made that nearly impossible.

The second challenge was being able to supply both pumps from a single drain. The drain is 1 1/2 inches which is more than enough for a single pump, but may be a bit restrictive for dual pumps. The biggest issue was friction caused by high velocity of flow through this pipe which could then lead to cavitation as the two pumps worked against one another for supply. To get around that and to minimize friction, we needed to reduce the velocity through the pipe.

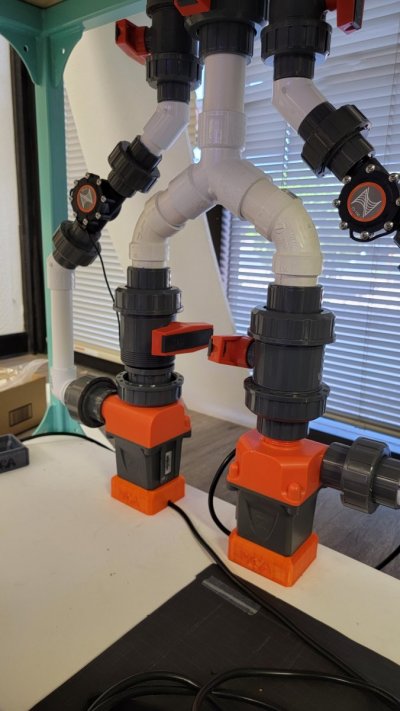
With the help of friend who knows more than I do about friction and flow, we came up with this design that uses a 60 degree 3-way Y to split the drain and create two separate runs leading to each pump. This effectively reduces the velocity in the sections leading to the pumps and minimizes the chances of starving either of the pumps.

20210705_174330.jpg


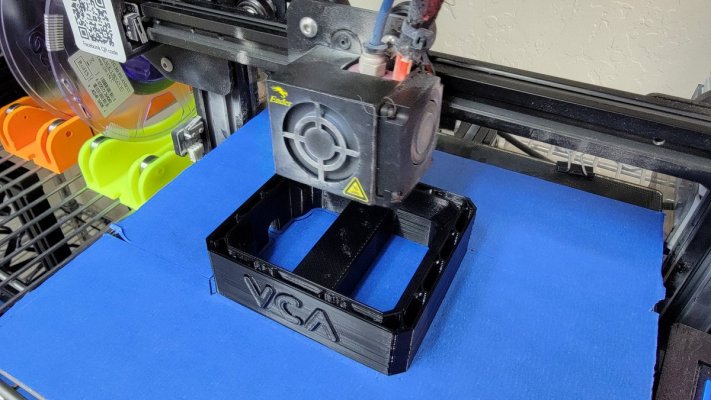
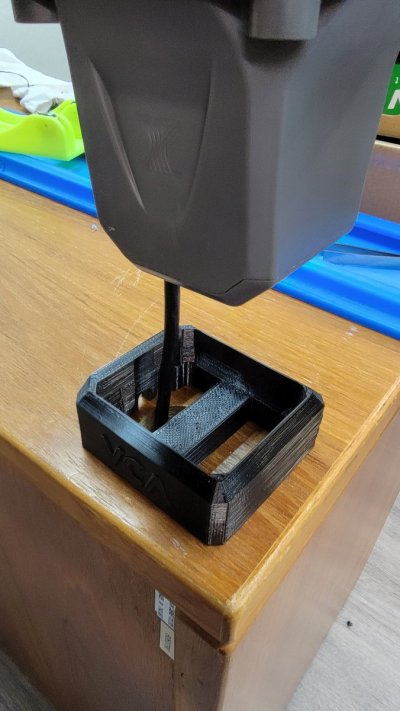
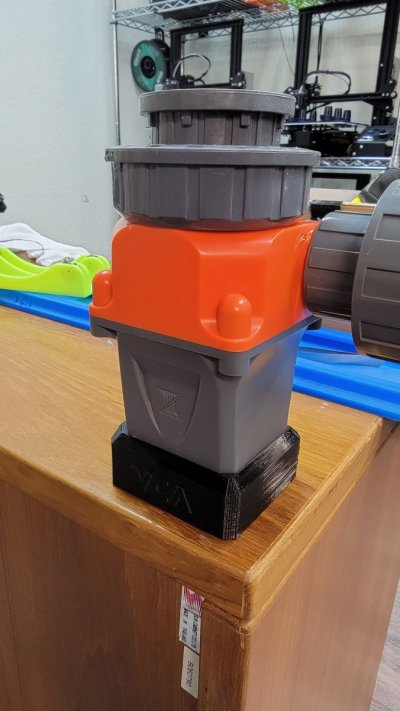
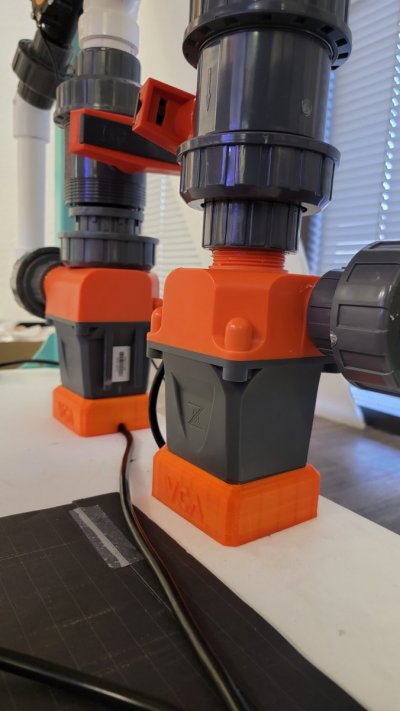
I mounted the pumps vertically to facilitate better flow into the inlet, but that presented a challenge. We didn't want to leave them dangling and unsupported. So, I designed and 3D printed these bases. The base helps to support the pumps and secure it in place. it also take stress off the plumbing. Once everything is done, I'll drill a hole underneath them and rout the wires underneath the platform so they are out of site.


20210705_130839.jpg

20210705_134824.jpg 20210705_134816.jpg 20210707_112122.jpg 20210707_112128.jpg


In our initial testing, the dual closed loop with shared drain design seems to work quite well. Both pumps can be run at 100% without any apparent issue. We’ll share some flow numbers once we get the Apex hooked up. Here are some videos of the iniitial flow testing.


The Flow Plan
The primary flow will be handled with this dual close loop. Each side of the loop is powered by its own Cor20 return pump. These will then be controlled through a Neptune Apex to vary the speed of each loop. The plan here is to slowly alternate the power between the two pumps at opposite intervals. So for instance over the 12 hour period the left pump will ramp from 80% down to 20%, while the right side will ramp up from 20% to 80%.

1626829967033.png


This will hopefully create a sort of switching dominate current inside the tank. At the peak while the left side is at 80% and the right side is at 20%, the dominant current will be going in a general clockwise direction around the tank. Mid-day will be 50% power on both loops, so just chaotic randomized motion. Then towards the end of the day, the general flow direction will switch to a counter-clockwise direction.

A Reverse Check Valve Design
Returns are going to be kind of interesting because we want to feature another unique setup here a swell. We needed a way to run a undersized sump, and still be able to drop the return lines well below the water line without fear of back siphon and an overflow. Every 1 inch of water level in the display tank is approx 5 gallons of water. So we drew inspiration from Marc Levinson of Melev's reef reverse check valve design.

Reverse check valve is interesting because it will break the siphon almost instantly when power is cut to the return pump. But you need to configure it correctly to work. Basicly the main lien that feed the two returns needed to be ABOVE the returns, and the valve needs to be either inline or above that. Here's what i have planned:

1626830131868.png


Basically, you place a check valve in reverse at the highest point within your plumbing. Pressure from the return pump presses on the check valve and closes it allowing water to then be routed to the return line.

When power to the pumps is cut, the pressure releases and allows the check valve to then open. Once the valve opens, it draws in air and breaks the siphon.

This will allow me to accomplish the two things i needed

First I'll be able to drop the return lines, which will also have RFG nozzles as far below the waterline as I like.

Second it would allow me to run a slightly undersized sump, giving me more room for other equipment underneath the tank. This is important because a cube set up is generally a little more difficult to deal with than your more common rectangular setup in terms of placing equipment.


Stay Tuned
So that's where we're at so far. The tank sits at about 3/4 of the way full of water as we test the closed loops. Comment below and let me know what you think . And stay tuned as we progress with this build. Next up is the sump design
Very nice where did you get the tank at
 
OP
OP
Vivid Creative Aquatics

Vivid Creative Aquatics

Upgrade Your Flow!
View Badges
Joined
Oct 12, 2017
Messages
1,517
Reaction score
2,166
Location
Phoenix, AZ
Rating - 0%
0   0   0
Very nice where did you get the tank at
the tank itself was a used tank I picked up from a local hobbyist. its an older 134-gallon Lemar brand aquarium. The stand is of my own deign, that i had a local metal worker make for me and the sump is also my design that i had Titan Aquatic Exhibits, located here in Chandler AZ, build for me.
 

HAVE YOU EVER KEPT A RARE/UNCOMMON FISH, CORAL, OR INVERT? SHOW IT OFF IN THE THREAD!

  • Yes!

    Votes: 32 45.7%
  • Not yet, but I have one that I want to buy in mind!

    Votes: 9 12.9%
  • No.

    Votes: 26 37.1%
  • Other (please explain).

    Votes: 3 4.3%
Back
Top