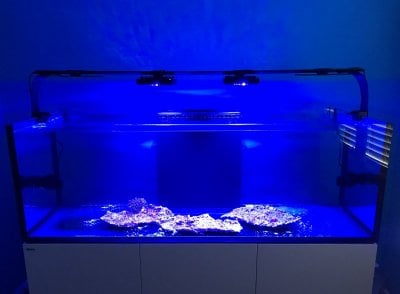
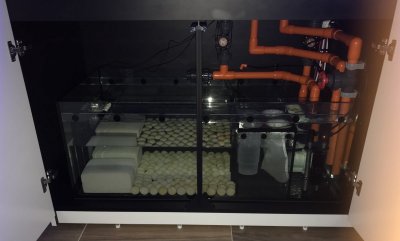
Reefer Deluxe XXL 750 Build

Rspsturgis

Community Member
View Badges
Joined
Jul 20, 2019
Messages
29
Reaction score
19
Location
Santa Ana
Rating - 0%
0   0   0
Actually I wanted to ask you to just verify that the R42221 part fits both the 2 drains and 2 returns on the new 750 v3 because I have searched on here and found a way to use part R42221 and not worry about dropping down in size.
I also found the adapters here because the unions he listed are on a site that requires 100$ minimum order.

And sorry for so many posts on your thread but I think this one would help you and others.
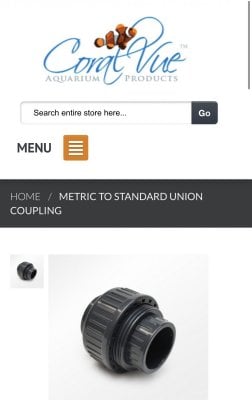
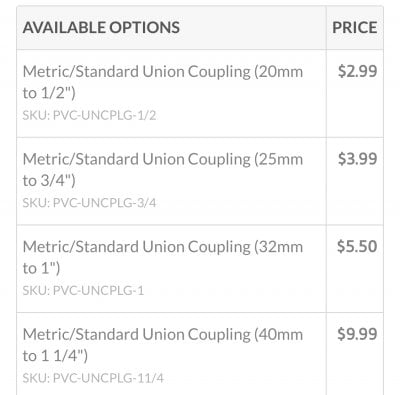
I purchased the 32mm to 1” unions from Coralvue for $5.50 ea. They do slip over the R42221 plastic which is cheap. Randy seems successful so far with his method. Without the 750v3 in hand I can not yet confirm the R42221 is the best approach but I gather it I is a nice hack.

4A479074-322A-4E20-BE00-FF2037C2F5A9.jpeg C6C0F774-0DE5-44E8-A970-BB829F6A35E1.jpeg
 

Manose

Valuable Member
View Badges
Joined
Sep 19, 2018
Messages
1,895
Reaction score
4,478
Location
Johnson City, Tn
Rating - 100%
1   0   0
I purchased the 32mm to 1” unions from Coralvue for $5.50 ea. They do slip over the R42221 plastic which is cheap. Randy seems successful so far with his method. Without the 750v3 in hand I can not yet confirm the R42221 is the best approach but I gather it I is a nice hack.

4A479074-322A-4E20-BE00-FF2037C2F5A9.jpeg C6C0F774-0DE5-44E8-A970-BB829F6A35E1.jpeg
Coralvue was out of stock so I am getting them from here https://flexpvc.com/cart/agora.cgi?p=PVC-Fittings-Metric-Adapters&p_id=8697-032&xm=on&ppinc=detail. If the R42221 fits on the drains and returns I will be golden if not then I will just cut them and use the 32mm adapter.
 

AZMSGT

2500 Club Member
View Badges
Joined
May 6, 2019
Messages
3,988
Reaction score
7,897
Rating - 0%
0   0   0
Red Sea R42222 is the one for the 750xxl FYI! THE r42221 is the smaller one.
No, they are looking at using the part to modify their systems. 42222 doesn’t unscrew. 42221 does unscrew.Also they are asking about the New 750. It’s got all new plumbing.
 
OP
OP
ReefKeeperElite

ReefKeeperElite

Active Member
View Badges
Joined
Nov 17, 2015
Messages
365
Reaction score
348
Location
SF Bay Area
Rating - 0%
0   0   0
Actually I wanted to ask you to just verify that the R42221 part fits both the 2 drains and 2 returns on the new 750 v3 because I have searched on here and found a way to use part R42221 and not worry about dropping down in size.
I also found the adapters here because the unions he listed are on a site that requires 100$ minimum order.

And sorry for so many posts on your thread but I think this one would help you and others.
Sorry for the late reply, no problem about the posts.
Yes, the R42221 fits all the connectors, drains and returns.
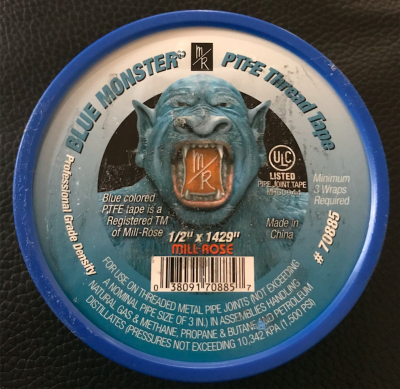
I use this tape for the fittings...

Screen Shot 2020-01-23 at 8.08.16 AM.png
 
OP
OP
ReefKeeperElite

ReefKeeperElite

Active Member
View Badges
Joined
Nov 17, 2015
Messages
365
Reaction score
348
Location
SF Bay Area
Rating - 0%
0   0   0
Controller box is done!

This took much longer than anticipated, but I put high priority on getting this right. My first build (15 years ago) was done quickly, wires unorganized, and looking at it day to day just made me feel unorganized. I believe a polished and organized look also impacts how we feel about our tanks, and the tighter everything looks, the prouder we are, which leads to better husbandry.

The controller box is divided into four sections. The main panels are made of 1/4” acrylic, and connected by living hinges, so that they act like a trifold. This will allow for easy access to the sides for any maintenance.

Controller Box.png


The panels are:
  1. Water change panel (left)
  2. Element dosing panel (right)
  3. Control panel (back)
  4. Shelf (top)
The first two will also hold the Vectra and Vortech controllers.

On the water change panel, the top DOS is for RODI (white), and SW (blue), and the bottom DOS is for MG (red), and WW (black). The holders to the right of the DOS are for my Vectras, still to be installed.

Here is the back of the water change panel:

Water Change Panel.png


The lines on the upper left are outputs to the sump, except WW (black) which is being input from the sump to a wall outlet, and on to an outside drain. The inputs for RODI and SW are coming from storage tanks on the other side of the wall, and the input for MG is coming from a dosing container behind the tank. The DOS using 1Link cables, which go to the upper EB832 on the control panel.

On the element dosing panel, the top DOS is for Alk dosing (white), and CA dosing (blue). The bottom DOS is for nutrient dosing of Reef Energy A and B. The holders to the left of the DOS are for my Vortechs, still to be installed.

Here is the back of the element dosing panel:

Dosing Panel.png


All outputs feed to the sump through the connectors at the upper right of the control panel. The inputs for Alk (white) and CA (blue) are coming from dosing containers behind the tank. The DOS uses 1Link cables which go the lower EB832 on the control panel.

On the control panel, my Apex head unit will control it all, and will provide primary temp, PH, salinity, and ORP readings. The top FMM module reads FS-100 flow from the returns, and FS-25 flow from the SW and WW lines. They will be programmed to send alerts when flow is not as expected, e.g. low flow through the SW or WW lines will abort automatic water changing.

The bottom FMM module reads water level from two optical sensors to trigger and shut off the ATO, and leak detection sensors to be placed around the control box. The WXM module will be used to control my Radions and Vortechs. The PL1 module (not shown, currently on my established tank) to provide secondary temp, and PH readings.

The top EB832 will provide 1Link power to the DOS on the water change panel, and power to other equipment. The bottom EB832 will provide 1Link power to the DOS on the element dosing panel, and power to other equipment.

Here is the back of the control panel:

Controller Panel.png


The lines on the upper right are outputs to the sump, except the WW line (black) which comes in from the sump. The MG (red), Alk (white), and CA (blue) lines are in the middle, input from dosing containers behind the tank. The lines on the left are RODI (white), SW (blue) and WW (black) lines, coming through the wall from storage containers, and out to a side yard drain for the waste.

And with the shelf, tucked nicely into the cabinet! My Trident will go in the middle once I decommission my old tank and all livestock has moved to the Reefer.

Installed with Shelf.png


Nice access to the back of the control panel, dosing containers, and RODI/SW/Waste line feeds:

Back Access.png
 

shnapper20

Community Member
View Badges
Joined
Jan 19, 2018
Messages
93
Reaction score
35
Location
victoria australia
Rating - 0%
0   0   0
Controller box is done!

This took much longer than anticipated, but I put high priority on getting this right. My first build (15 years ago) was done quickly, wires unorganized, and looking at it day to day just made me feel unorganized. I believe a polished and organized look also impacts how we feel about our tanks, and the tighter everything looks, the prouder we are, which leads to better husbandry.

The controller box is divided into four sections. The main panels are made of 1/4” acrylic, and connected by living hinges, so that they act like a trifold. This will allow for easy access to the sides for any maintenance.

Controller Box.png


The panels are:
  1. Water change panel (left)
  2. Element dosing panel (right)
  3. Control panel (back)
  4. Shelf (top)
The first two will also hold the Vectra and Vortech controllers.

On the water change panel, the top DOS is for RODI (white), and SW (blue), and the bottom DOS is for MG (red), and WW (black). The holders to the right of the DOS are for my Vectras, still to be installed.

Here is the back of the water change panel:

Water Change Panel.png


The lines on the upper left are outputs to the sump, except WW (black) which is being input from the sump to a wall outlet, and on to an outside drain. The inputs for RODI and SW are coming from storage tanks on the other side of the wall, and the input for MG is coming from a dosing container behind the tank. The DOS using 1Link cables, which go to the upper EB832 on the control panel.

On the element dosing panel, the top DOS is for Alk dosing (white), and CA dosing (blue). The bottom DOS is for nutrient dosing of Reef Energy A and B. The holders to the left of the DOS are for my Vortechs, still to be installed.

Here is the back of the element dosing panel:

Dosing Panel.png


All outputs feed to the sump through the connectors at the upper right of the control panel. The inputs for Alk (white) and CA (blue) are coming from dosing containers behind the tank. The DOS uses 1Link cables which go the lower EB832 on the control panel.

On the control panel, my Apex head unit will control it all, and will provide primary temp, PH, salinity, and ORP readings. The top FMM module reads FS-100 flow from the returns, and FS-25 flow from the SW and WW lines. They will be programmed to send alerts when flow is not as expected, e.g. low flow through the SW or WW lines will abort automatic water changing.

The bottom FMM module reads water level from two optical sensors to trigger and shut off the ATO, and leak detection sensors to be placed around the control box. The WXM module will be used to control my Radions and Vortechs. The PL1 module (not shown, currently on my established tank) to provide secondary temp, and PH readings.

The top EB832 will provide 1Link power to the DOS on the water change panel, and power to other equipment. The bottom EB832 will provide 1Link power to the DOS on the element dosing panel, and power to other equipment.

Here is the back of the control panel:

Controller Panel.png


The lines on the upper right are outputs to the sump, except the WW line (black) which comes in from the sump. The MG (red), Alk (white), and CA (blue) lines are in the middle, input from dosing containers behind the tank. The lines on the left are RODI (white), SW (blue) and WW (black) lines, coming through the wall from storage containers, and out to a side yard drain for the waste.

And with the shelf, tucked nicely into the cabinet! My Trident will go in the middle once I decommission my old tank and all livestock has moved to the Reefer.

Installed with Shelf.png


Nice access to the back of the control panel, dosing containers, and RODI/SW/Waste line feeds:

Back Access.png
Following
 
OP
OP
ReefKeeperElite

ReefKeeperElite

Active Member
View Badges
Joined
Nov 17, 2015
Messages
365
Reaction score
348
Location
SF Bay Area
Rating - 0%
0   0   0
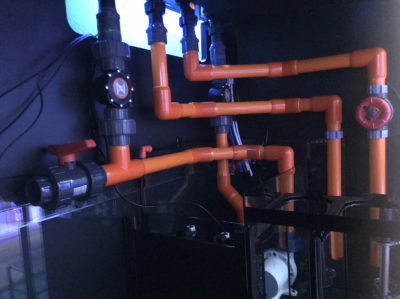
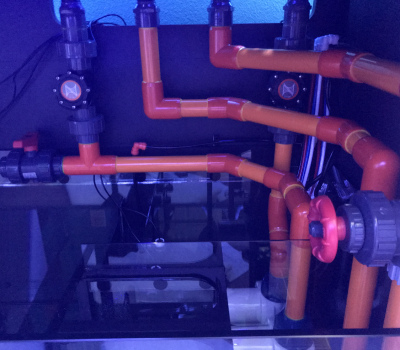
Primary plumbing is done. Have also designed and cut the manifold plumbing, but am proceeding with leak testing this weekend.

I decided to diagonal around the second return pump. I didn’t see any way around this, as I wanted flow sensors on both returns, and have them operate independently. I will adjust the flow on the return which also feeds the manifold to compensate, and have both return outlets in unison.

Screenshot 2020-03-13 at 1.18.58 PM.png Screenshot 2020-03-13 at 2.48.30 PM.png
 
OP
OP
ReefKeeperElite

ReefKeeperElite

Active Member
View Badges
Joined
Nov 17, 2015
Messages
365
Reaction score
348
Location
SF Bay Area
Rating - 0%
0   0   0
Leak testing completed today, all plumbing connections look good! So filled the tank with 120G RODI, attached a couple of old Turbelles (still waiting on the MP40’s) and a heater, and brought salinity to 35 PPT using about 3/4 bucket of Red Sea blue.

While mixing I found time to install my RMS track and two XR30 G4’s in the middle of the track. My two G3’s will go on the left and right when I transfer my existing reef to the 750.

Tomorrow I will do a 75G water change on my existing reef, and put the old water into the 750, along with live rock and media blocks and balls that have been seeding in my QT for the past 3 months.

Screenshot 2020-03-14 at 2.50.13 PM.png
 
OP
OP
ReefKeeperElite

ReefKeeperElite

Active Member
View Badges
Joined
Nov 17, 2015
Messages
365
Reaction score
348
Location
SF Bay Area
Rating - 0%
0   0   0
75G water transfer completed, along with some live rock, a bit of sand from my current reef, and half of my biomass. Everything went beautifully, and the tank is purring like a kitten after some pump speed and throttle adjustments. This was a huge milestone, and after so many delays since starting the project last July, a big relief to start to see results.

Will monitor for a few weeks and keep an eye on parameters.
In the meantime, will put together the manifold.

IMG_2325.jpg IMG_2328.jpg
 
OP
OP
ReefKeeperElite

ReefKeeperElite

Active Member
View Badges
Joined
Nov 17, 2015
Messages
365
Reaction score
348
Location
SF Bay Area
Rating - 0%
0   0   0
Having performed a large water change on my existing reef, and putting that water into the 750, has really accelerated the process. The biomass that had been transferred to the 750 has helped immensely as well. I have zero nitrites or ammonia, and nitrates were around 2. I felt comfortable to proceed after just a few days.

First I setup the ATO using the RODI coming from my storage tank to the top left DOS on the water change panel (white line). I didn't set up any DOS intervals, only the program below. It just checks if both optical sensors are not wet, and if not, turns on the DOS for a minimum of 2 minutes, then rest for at least 10 minutes. This has been working well for now, but will work on a more refined program later.

ATO Program.png


Then I setup the AWC using the SW coming from my storage tank to the top right DOS on the water change panel (blue line), and the bottom right DOS on the water change panel (black line) for the WW. The schedule I configured for both SW and WW is below, which simultaneously pulls in 5G of SW, and removes 5G of WW. It is a little loud, so I have it run from midnight to 6AM.

AWC Schedule.png


Really love the AWC. It will free up my Saturday mornings to spend time with the family, rather than moving buckets of RO, making SW, heating and testing. All I need to do now is make RO once during the week, turn the valve to transfer 35G to the SW storage tank, and add salt to 35ppt. I wake up every morning to a fresh 5G water change! To help keep the SW fresh for the week, I've put an MP10w at the bottom of the SW storage, and set it up on the Apex to stir the SW for 5 minutes every 4 hours.

SW Circulation.png


SW Circulation Schedule.png


I monitor the DOS activity for SW and WW to ensure all is being transferred in an out as expected, and check the flow sensors to ensure water is moving through the SW and WW lines as expected. I still need to write some code to stop the AWC if the readings on either line are showing zero flow.

Water Change Activity.png


Flow Sensor Activity.png


I also moved the Trident to the 750 cabinet, and started monitoring my foundation elements (will manually monitor my existing reef for a couple weeks). I've setup the Trident to perform controlled dosing of MG (red line), with a target of 1400, and will setup controlled dosing for Alk and CA as I get further down the road. So far the Trident has been adding a little bit more than my 10ml per day target (11.2ml per day as shown above), since my MG is a little below my 1400 target, so looks to be performing as expected.

Trident Install.png


Dosing Container Setup.png


Since I felt so good about the water quality and stability of the system in general, I decided to transfer a couple of samples to the 750 a couple days ago. I went with some trumpet coral. They have been doing quite well, and even had tentacles out big time on the first night. This gives me great confidence to continue to move more livestock, but will do this gradually over the coming weeks.

Trumpet Sample.png
 
OP
OP
ReefKeeperElite

ReefKeeperElite

Active Member
View Badges
Joined
Nov 17, 2015
Messages
365
Reaction score
348
Location
SF Bay Area
Rating - 0%
0   0   0
Been kinda down lately due to Covid and being out of work, but wanted to provide an update.

Still have a lot of tasks to perform, but the bulk of the move from my old reef to the 750 is done.

All equipment is in place except for the 2 MP40’s, which I would have gotten by now if I still had steady income. It would be nice to have all permanent fixtures in place, but I have to move on and make due with what I have.

Aside from that, a lot of smaller tasks still to perform, such as cord management, making a screen top, and adding the rest of the live rock (currently in QT) to the 750.

I’ll be sure to provide an update as things progress. As of now, just trying to keep my head up and take one day at a time.

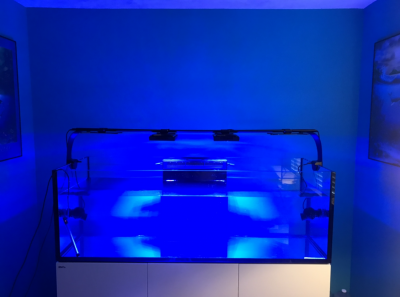
Main Display:

F5756D6B-C094-46D7-A389-8981A61E29CD.jpeg


QT and LR to be moved:

EC9CE62C-4076-468F-B5F9-B36843E8B2BC.jpeg


Old Reef:

65A748B6-7645-431F-995A-405202F06735.jpeg
 
OP
OP
ReefKeeperElite

ReefKeeperElite

Active Member
View Badges
Joined
Nov 17, 2015
Messages
365
Reaction score
348
Location
SF Bay Area
Rating - 0%
0   0   0
Finally got all my LR transferred. A little over a year since starting the build, and the tank transfer is complete.

Biggest lesson learned is not to rely on precisely matching tank parameters from old reef to new, and to quarantine and acclimate all fish regardless. As some of you are aware, my emperor angel did not make it. Others did, but I think I just got lucky with those.

https://www.reef2reef.com/threads/sick-emperor-angel.730759/

My takeaway is that I will now be diligently following a strict quarantine process before moving anything into my DT, quite similar to what Humblefish has outlined a while back.


I’d rather be extra safe than extra depressed moving forward. Losing a fish that you love and have grown attached to is such a pain in the ****.

1596490743268.jpeg
 

HAVE YOU EVER KEPT A RARE/UNCOMMON FISH, CORAL, OR INVERT? SHOW IT OFF IN THE THREAD!

  • Yes!

    Votes: 32 45.7%
  • Not yet, but I have one that I want to buy in mind!

    Votes: 9 12.9%
  • No.

    Votes: 26 37.1%
  • Other (please explain).

    Votes: 3 4.3%
Back
Top