reef-pi :: An opensource reef tank controller based on Raspberry Pi.

Bigtrout

Valuable Member
View Badges
Joined
Dec 16, 2018
Messages
1,189
Reaction score
2,826
Rating - 0%
0   0   0
I have a cheap probe that I encased in heatshrink and silicone. I put some silicone in the heatshrink and then inserted the probe. Applied the heatgun and watched the heatshrink do it's thing and squeeze the excess silicone out. I let the silicone cure and then tested the probe against a bare one for comparison purposes. Performed exactly the same as the bare one.

In 3D printing, some people sometimes recommend making a glue to get ABS prints to adhere to a glass bed. You dissolve ABS scraps in acetone and use this mixture as a glue. I dipped one of my probes into this mixture and let dry. I gave it 5 coats and it is still working perfectly. No signs of coming away from the plastic cable insulation.
I have tested the cheap probes vs the nice drok ones. The cheap probes were ok. The drok probes were alot more consistent with each other and with my calibrated ntc probe. The cheap probes were hit or miss.
 
OP
OP
Ranjib

Ranjib

7500 Club Member
View Badges
Joined
Apr 16, 2016
Messages
9,848
Reaction score
17,081
Location
Pleasant Hill, Concord
Rating - 0%
0   0   0
I dont think your probes are going bad...a blip like that means the i2c bus asked for data and receieved a bad data reading. The temp reading is a signed number, so if one byte doesnt come thru correctly it gives a large erroneous reading because one of the bits is for positive or negative....bus timing? Interference from something else? Loose wire?
I have had reef pi up since xmas and have had 2 weird readings like this in February, but have not had another like it since.
But temp sensor is based on one wire, not i2c. And there’s Crc checksum for ensuring data integrity...I don’t know what’s the cause of these anomalous reading though
 

Bigtrout

Valuable Member
View Badges
Joined
Dec 16, 2018
Messages
1,189
Reaction score
2,826
Rating - 0%
0   0   0
Yes, i meant onewire, but ive done some reading on this and the big negative readings seem to point to some type of data corruption.
Like I mentioned I had 2 weird readings like this 2 months ago a few days apart, and nothing since. And nothing has been changed on the temp probes.

Maybe it was orcs, lol.
 

ph123uk

Active Member
View Badges
Joined
Jan 3, 2019
Messages
191
Reaction score
304
Rating - 0%
0   0   0
If you are using a Pi 3, they are quite power hungry. Make sure your power supply is putting out 2.5A. if not, you will get the "under voltage or under power" alert even if it is getting 5V. (Which it probably isn't if it is not getting enough current)

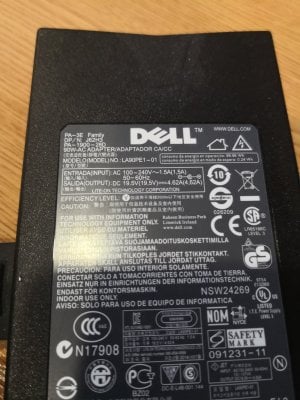
Hi, IM using a pi2 and i'm using a 19.2v Dell Laptop PSU with 4.7a :) - we believe it may possibly be the relay is drawing the power from the Pi GPIO and dropping the voltage, I will test tonight and possibly run a separate 5v cable to the relay :)

IMG_20190125_140444.jpg
 

Des Westcott

Well-Known Member
View Badges
Joined
May 29, 2018
Messages
646
Reaction score
1,035
Location
Durban - South Africa
Rating - 0%
0   0   0
Hi, IM using a pi2 and i'm using a 19.2v Dell Laptop PSU with 4.7a :) - we believe it may possibly be the relay is drawing the power from the Pi GPIO and dropping the voltage, I will test tonight and possibly run a separate 5v cable to the relay :)

IMG_20190125_140444.jpg


OK. Pi2 then. They want 2Amps. The 19.2V and 4.7A from the Dell power supply is irrelevant, because the Pi is powered by the Buck converter. If the Buck converter is only putting out 1A, it doesn't matter how many Amps the Dell unit is capable of supplying.
 

ph123uk

Active Member
View Badges
Joined
Jan 3, 2019
Messages
191
Reaction score
304
Rating - 0%
0   0   0
OK. Pi2 then. They want 2Amps. The 19.2V and 4.7A from the Dell power supply is irrelevant, because the Pi is powered by the Buck converter. If the Buck converter is only putting out 1A, it doesn't matter how many Amps the Dell unit is capable of supplying.

Sorted it now it seems, as soon as I went headless and unplugged my Wireless / Bluetooth keyboard and mouse combo - I no longer get the error - presume the puck isn't giving the rated 3a MAX or even the 2a its meant to, but as long as its stable, Im happy now.
 

bishoptf

Valuable Member
View Badges
Joined
Jan 1, 2019
Messages
1,349
Reaction score
1,724
Location
Missouri
Rating - 0%
0   0   0
Sorted it now it seems, as soon as I went headless and unplugged my Wireless / Bluetooth keyboard and mouse combo - I no longer get the error - presume the puck isn't giving the rated 3a MAX or even the 2a its meant to, but as long as its stable, Im happy now.

I was going to add I've had bucks that I adjust without a load on them to 5.1v but when it had a load applied the voltage would be less. What I guess I'm trying to say is that the buck converters are so cheap that some may be better than others and to test the voltage under a load.

Glad you were able to sort it out.

:)
 

b4tn

Valuable Member
View Badges
Joined
Jun 17, 2015
Messages
1,673
Reaction score
2,244
Location
Columbia MD
Rating - 0%
0   0   0
Is there an easy way to build the power, temp, ato, pH and dosing all on one raspberry pi? Does anyone have a guide for this? If not is there a way to link all of these so they can be seen and controlled in one dashboard?

I did mine all in one box. The only thing that is remote is the two doser motors. I didnt do PH but I dont think I would have had any issues adding it.
 

AquaRaider44

#Reef4Life
View Badges
Joined
Apr 19, 2019
Messages
526
Reaction score
823
Location
Brevard County
Rating - 0%
0   0   0
I did mine all in one box. The only thing that is remote is the two doser motors. I didnt do PH but I dont think I would have had any issues adding it.
The guides show pH and dosing separate from the rest so I am not sure how it would need to be wired up to work all in one. Or just use one gui to control all of them.
 

High ICP

Active Member
View Badges
Joined
Apr 4, 2019
Messages
300
Reaction score
256
Rating - 0%
0   0   0
The one in the above image is the very first version of the controller. Its using a wooden handmade housing (Im really bad at wood works), it powers one of my pico (fluval spec III). Here are some details:
- Main controller board: raspberry pi 2
- 8 channel sain smart relay, two of them are connected to two perstaltic pumps (mounted at right side of the housing), they are used of dosing/ATO
- There are 6 110V AC outlet mounted at the bottom. Return, powerhead (coralia pico evolution), stock LED, heater all are connected to the AC sockets.
- In the front, it has a 7" LCD screen (from Adafruit), can be switch on/off using the controller UI.

Below is the image of internals of the housing, Note: I have gutted a 6 port extension to repurpose its surge protection electronics. It also had two 5V 1 A USB outlets, which i use to power the raspberry Pi as well as the display. The ancillary breadboard on front panel hosts a MCP3008 and an L293D IC for sensor and high voltage PWM controls
20170101_161629.jpg
20170101_161633.jpg
Looks like you could use a cigar box for a housing

Like some nice Churchills
 

b4tn

Valuable Member
View Badges
Joined
Jun 17, 2015
Messages
1,673
Reaction score
2,244
Location
Columbia MD
Rating - 0%
0   0   0
The guides show pH and dosing separate from the rest so I am not sure how it would need to be wired up to work all in one. Or just use one gui to control all of them.

I used the guides to build mine. While the guides are separate you will find that you can build each one onto the same raspberry. I had to use a larger than recommended power supply to support it all. Here is the diagram from my build thread.

https://www.reef2reef.com/threads/another-reef-pi-build.506894/page-4#post-5445777
 

trackerit

Community Member
View Badges
Joined
Apr 11, 2019
Messages
71
Reaction score
137
Rating - 0%
0   0   0
hello, after assembling my reefpi, the ph module which was working correctly, by mistake I have connected only tx and rx, the 5v and the gnd do not connect them, now that I have reconnected the led of the module ph ezo, turn blue and green and blink between green and blue, the command sudo i2cdetect -y 1 the whole table comes out in 00, will it have been damaged? What other tests can I do?

forget to say that now the module does not work just blinks between green and blue
 
OP
OP
Ranjib

Ranjib

7500 Club Member
View Badges
Joined
Apr 16, 2016
Messages
9,848
Reaction score
17,081
Location
Pleasant Hill, Concord
Rating - 0%
0   0   0
Is there an easy way to build the power, temp, ato, pH and dosing all on one raspberry pi? Does anyone have a guide for this? If not is there a way to link all of these so they can be seen and controlled in one dashboard?
I am using three builds with power , temp , ato combined. Dosing and ph are independent modules. Theres is no limitation in the software, you are fine on that side, but you have to be extra careful on the circuit side of things. With so many components involved you have to design the power supply unit carefully and add a lot of passives (capacitors, resistors etc) for safety. I always have issues with pwm signals getting bad in complex circuits, i mostly think its due to my primitive circuit setups. The same configuration works just fine on pico board, which is designed by theatrus and has whole lotta passives.
 
OP
OP
Ranjib

Ranjib

7500 Club Member
View Badges
Joined
Apr 16, 2016
Messages
9,848
Reaction score
17,081
Location
Pleasant Hill, Concord
Rating - 0%
0   0   0
I have a very old version of reefpi. Its 1.5.

Id like to upgrade to the newest but what is the best way to proceed?
Take a screenshot of your setup (for reference during new version configuration) and then stop reef-pi, delete the database and install the latest version and re-setup everything. Unfortunately the 2.0 version has a lot of new things (multiple ato, temp sensor etc) and the database is not compatible.

https://reef-pi.github.io/additional-documentation/upgrade/
 
OP
OP
Ranjib

Ranjib

7500 Club Member
View Badges
Joined
Apr 16, 2016
Messages
9,848
Reaction score
17,081
Location
Pleasant Hill, Concord
Rating - 0%
0   0   0
I have a very old version of reefpi. Its 1.5.

Id like to upgrade to the newest but what is the best way to proceed?
Curious, how long its been running? 1.5 is almost a year old release :-0),
 
OP
OP
Ranjib

Ranjib

7500 Club Member
View Badges
Joined
Apr 16, 2016
Messages
9,848
Reaction score
17,081
Location
Pleasant Hill, Concord
Rating - 0%
0   0   0
The guides show pH and dosing separate from the rest so I am not sure how it would need to be wired up to work all in one. Or just use one gui to control all of them.
The guide shows it because it refers to my own build (all the images etc). I dont think there will be any issue in running them combined. Just make sure you have ample power, and wiring etc are proper.
 
OP
OP
Ranjib

Ranjib

7500 Club Member
View Badges
Joined
Apr 16, 2016
Messages
9,848
Reaction score
17,081
Location
Pleasant Hill, Concord
Rating - 0%
0   0   0
hello, after assembling my reefpi, the ph module which was working correctly, by mistake I have connected only tx and rx, the 5v and the gnd do not connect them, now that I have reconnected the led of the module ph ezo, turn blue and green and blink between green and blue, the command sudo i2cdetect -y 1 the whole table comes out in 00, will it have been damaged? What other tests can I do?
stop reef-pi and use the python library provided by atalas scientific to check if the ezo circuit is configured to work in i2c mode and that you can read data. if not, configure it to work in i2c mode and then start reef-pi again. atals scientific ezo documentation details the steps
 
Back
Top