Migration from 110g Reef Savvy to RedSea Reefer-S G2+ 550

Bhuddafunk

Community Member
View Badges
Joined
May 22, 2014
Messages
27
Reaction score
15
Location
Saint Petersburg, FL
Rating - 0%
0   0   0
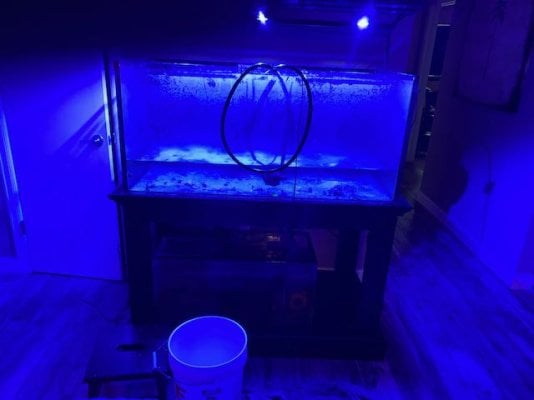
Well this has certainly been a long time coming as I'm finally replacing my 110g Reef Savvy which I've had for about 10 years now. Honestly, it has been a great tank but it is time to move on and get past some of the earlier mistakes such as scratching the entire side of the tank when first aquascaping. I can't tell you how long it took to get over that mistake emotionally even thought the scar still remains. So I'll start this journey by documenting my current tank setup as well as the steps and procedures for moving my entire reef from the current environment to the new RedSea tank. I've done something similar prior when moving from my 46g bow front to the Reef Savv tank; however, in that case all the sand, water and live rock were moved making the new tank pretty much no hassle. On top of that, I was able to have both tanks setup at the same time as the Reef Savvy was going to be placed in a different part of my living room. No go here, this is a complete tank replacement as the new RedSea tank needs to be in the same spot as the Reef Savvy. Due to a handfuls of happily fat Aptasia I will be constructing a new live rock structure utilizing a negative space design. Oh, so much fun this is going to be. Well without further ado may I present the start of the journey:

Current Tank
In the Tank
  • (1) Hippo Tang
  • (1) Scopes Tang (Will be replaced with Purple Tang)
  • (3) Lg. blue/green Chromis
  • (1) Leopard Wrasse (Will be replaced with smaller wrasse or Mandarin)
  • (1) Aptasia eating Filefish (Will be replaced as it doesn't eat aptasia and nibble a bit elsewhere)
  • (3) Lyretail Anthais
  • (2) Damsels
  • Many, many, SPS, LPS and Softies. (SPS will be fragged from the rocks to created new colonies)
Above the Stand
IMG_1228.jpeg

  • 110g Customer built Reef Savvy Rimless Tank (3/4 inch Glass 48x24x22)
  • Custom furniture quality stand (dang this thing is heavy)
  • 48" Reef Brite Hybrid LED lightning system with 3 Kessil A360-X Tuna Blue (Kassil's are controlled via the Kessil app and the Reef Bride is controlled via my Apex)
  • (2) Vortech MP40's (Mobius App controlled)
Under the Stand
IMG_1223.jpeg

  • Sump 34 Gallon
  • Kessil H-80 Refugium light
  • Reef Octopus 150 S Skimmer
  • Apex Controller
  • Apex EB8
  • Apex Cor15 Return
  • Apex ALD
  • Apex DoS (Coral Food)
  • Tunze 5017 ATO

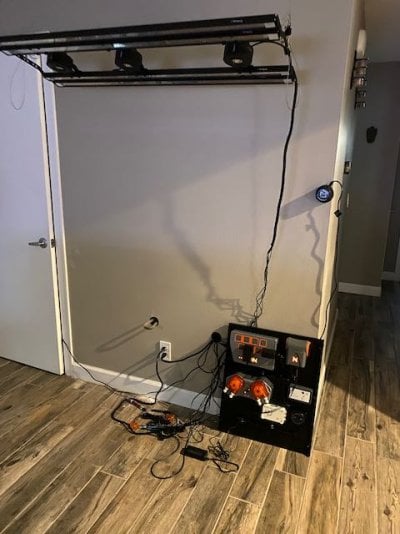
Behind the Stand
So I'm a bit fortunate with the tanks current location as it sits on a wall that is exterior to the master closet in my bedroom so I can hide additional equipment here.
IMG_1224.jpeg

  • Controllers for the MP40's located in here
  • Apex EB-8
  • Apex PM-1 Module for Ca reactor pH
  • Carbon Doser
  • Kamoer dosing pump for the Ca reactor
  • Reef Octopus VarioS CR140 5.5 DC Calcium Reactor
Now that this build thread is established all I need to do is wait on the new tank which should be here tomorrow. I'll add more images and thoughts based on the shipping and unpacking of the new tank.
 
Last edited:

CasperOe

In it to win it!
View Badges
Joined
Feb 14, 2022
Messages
3,261
Reaction score
5,736
Location
Glasgow, United Kingdom
Rating - 0%
0   0   0
And all we need to do is to wait for more updates! :cool: Thanks for sharing with us, looks like you're well under way already! The migration from one tank to another is a scary process, the rewards are high though when you get it right. Keep it up- and happy reefing!
 
OP
OP
B

Bhuddafunk

Community Member
View Badges
Joined
May 22, 2014
Messages
27
Reaction score
15
Location
Saint Petersburg, FL
Rating - 0%
0   0   0
The new tank arrived two days ago, got to hand it to RedSea they certainly know how to pack something to avoid breakage. I would imagine practice has made perfect for them. Breaking down the packaging was pretty straight forward but apparently there was an issue with the serial number of the tank which is preventing me from registering at this time so I'll have to do a support case. Some observations as I built the stand:
  1. Overall the instructions were adequate, there was one area in the very beginning that kept me stumped for a bit.
  2. I'm keeping the wooden shipping box to use as a stand for my aquascaping design
  3. I'm keeping the top half of the shipping box that the cabinet internal components came in. I'll place this on the above shipping crate so that I can build my aquascape directly in front of the new tank so that I can take size and location into consideration.
  4. I decided to remove the thin plastic panels that they provide for the back of the cabinet. I don't see the purpose in these as I will have more freedom without for plumbing and cables. I plan on using a chiller in the cabinet as well so these would just cause more heat which would increase water temperature in the sump and therefore in the tank.
  5. The limited space in the cabinet for the sump is going to make for some interesting possibilities from an equipment standpoint. Going to watch some YouTube this weekend to see how other are arranging their sump areas. I'm pretty spoiled with all the real estate that I have now under cabinet for my current display tank.
Next update should include the sump and the tank installed on and below the cabinet with all plumbing. I should also be starting on the aquascaping this weekend.

IMG_1233.jpeg
IMG_1236.jpeg
IMG_1239.jpeg
IMG_1240.jpeg
IMG_1241.jpeg
 
OP
OP
B

Bhuddafunk

Community Member
View Badges
Joined
May 22, 2014
Messages
27
Reaction score
15
Location
Saint Petersburg, FL
Rating - 0%
0   0   0
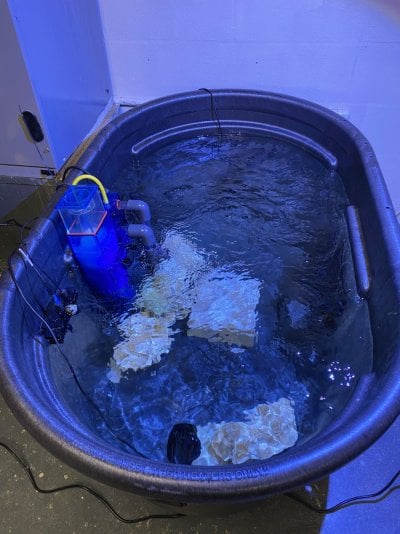
Finally getting around to providing an update on the build thread. This thread will start with the pond that I have now running garage. Using some existing equipment I’m running the pond with a hang on skimmer, 2 Apex Wav pumps, and heater. Added two Green Chromis to help cycle the pond. I have a 8x8 bio-block as well as a bunch of ceramic balls in the pond that I’m planning on moving into the new tanks sump. I was going to add the block to the refugium chamber with my Cheato and add the ceramic balls to the media baskets that I’ll use for filtration. Lighting is current 1 Kessil A160WE which should be enough light to get me by. My plan is to move all my coral and fish to the pond for a period of 1-2 weeks as I methodically breakdown the old tank and replace with the new.

IMG_1269.jpeg

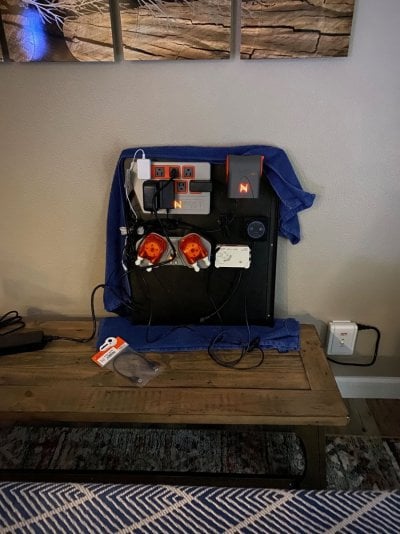
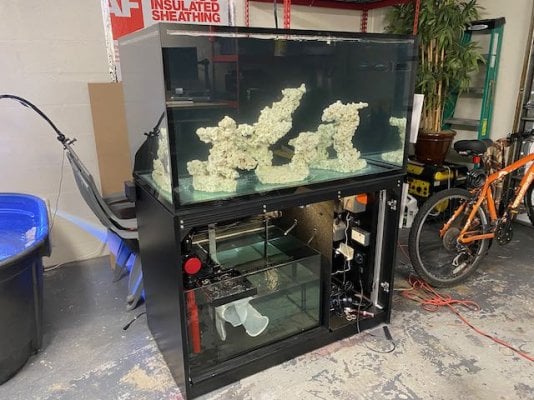
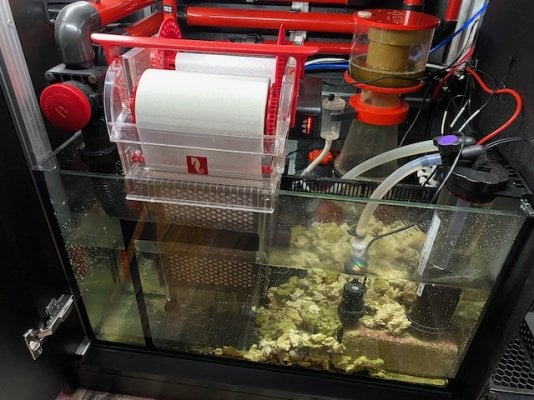
Tank stand is fully built, and I was able to get a few friends to help me get the tank lifted on to the stand. Was originally not going to use the thin back walls on the cabinet to help with airflow; however, realized these 3 thin panels provide a good deal of stability from a horizontal rocking standpoint. Installed the sump and all the plumbing so that I can do a water test of the tank while it is still in the garage. Started mounting some new gear on the equipment slider to be mounted inside the cabinet to include Apex Pro, Apex DoS, EB-8, Reef Octopus skimmer controller mount (still using skimmer on current display tank), Sicce SDC-9 return pump controller. I'm currently waiting on shorter Apex cables so I'll start the wire management after they arrive.

IMG_1271.jpeg
IMG_1295.jpeg
 
Last edited:

IceRain29

Active Member
View Badges
Joined
Jan 28, 2018
Messages
117
Reaction score
246
Location
Toronto
Rating - 0%
0   0   0
nice, this is the perfect size for an aquarium not too big and not too small, you are going to love the eurobrace!
 
OP
OP
B

Bhuddafunk

Community Member
View Badges
Joined
May 22, 2014
Messages
27
Reaction score
15
Location
Saint Petersburg, FL
Rating - 0%
0   0   0
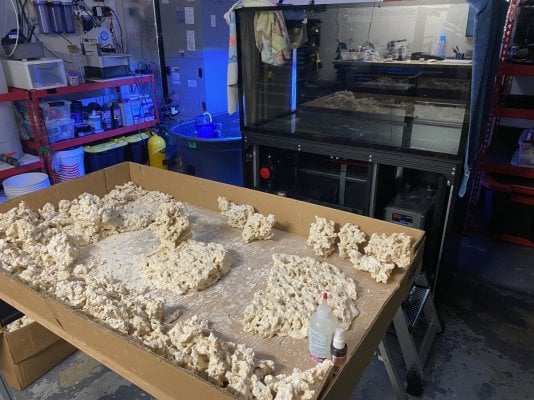
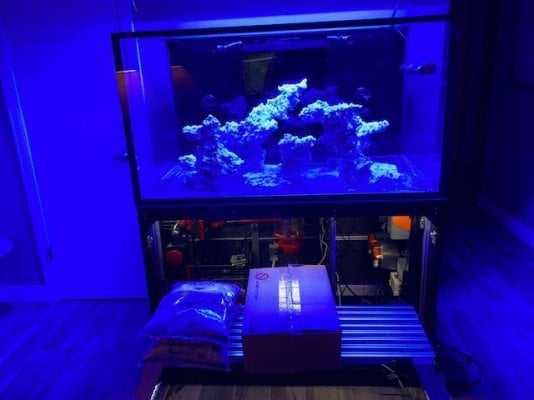
Aqua-scaping is complete, moved it into the tank to keep it out of the way while I continue to work on the undercabinet lighting, controller board and its cable management. Started fragging Acro and moving corals based on when they have aptasia or not. Any coral plates or plugs with Aptasia goes into a 10g I have setup with Berghia nudibranchs deployed for cleanup. Anything that is clean or clears the nudibranch tank goes into my frag tank or into the garage pond. I’m leaning on my frag tank more than the pond with the more expensive corals as I dose the frag tank as well as provide aminos. I did tank the chance of putting a large red chalice in the pond tank to see how it does. My frag tank is certainly jammed up at the moment can't wait to get this stuff migrated into the new tank.
IMG_1316.jpeg

IMG_1311.jpeg

IMG_1310.jpeg


Hopefully the return pump/water test goes well this upcoming weekend.
 
OP
OP
B

Bhuddafunk

Community Member
View Badges
Joined
May 22, 2014
Messages
27
Reaction score
15
Location
Saint Petersburg, FL
Rating - 0%
0   0   0
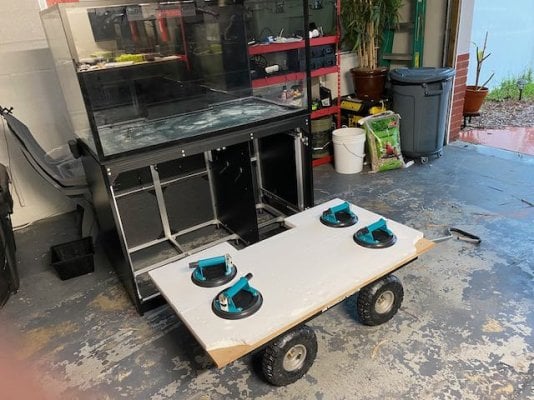
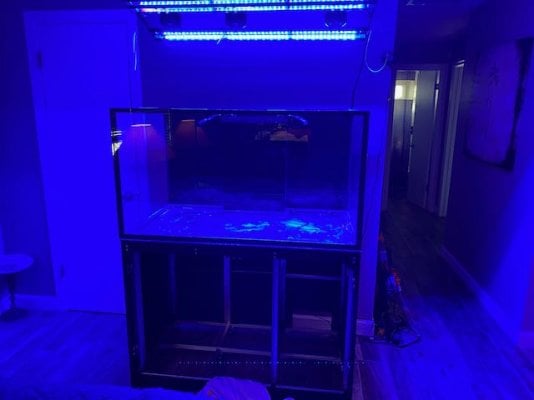
Well, it's certainly been a while. Truth is I kind of suck when it comes to updating the status of the build. The tank is no longer a new build but has been in place since the second week of January. Unfortunately, I have been dealing with water chemistry issues which has caused many of my corals to either bleach out our need to be moved back into the frag tank. Here are some catchup pictures as well as a picture of the Reefmat 1200 I just installed. Originally I didn't want to do the reefmat as filter socks work just fine if you clean them on a regular basis; however, I thinking of doing more travel this year and I'm attempting to get all my tanks in a position where I can leave them for 7-10 days. The 3 areas I'm focusing on are migration from socks to reefmat, which greatly extends the time between roll changes/sock changes. Secondly, plumbing my skimmer cup to a 1 gallon container, this should allow for a greater period in between cleaning the skimmer cups. Currently I have to dump and clean every 3 days. Finally, getting the Apex feeder working correctly which will allow me to also extend the period without direct tank intervention. Purchasing the glass suction cups and gorilla cart made this tank move a breeze and reduced anxiety during the change out. I'll be cleaning the glass this weekend and doing a water change so I'll upload some pictures of the current livestock sometime in the next few days.
 

Attachments

  • IMG_1332.jpeg
    IMG_1332.jpeg
    100.1 KB · Views: 65
  • IMG_1352.jpeg
    IMG_1352.jpeg
    58.3 KB · Views: 64
  • IMG_1357.jpeg
    IMG_1357.jpeg
    48.8 KB · Views: 50
  • IMG_1360.jpeg
    IMG_1360.jpeg
    100.3 KB · Views: 50
  • IMG_1362.jpeg
    IMG_1362.jpeg
    59 KB · Views: 58
  • IMG_1367.jpeg
    IMG_1367.jpeg
    68.1 KB · Views: 53
  • IMG_1451.jpeg
    IMG_1451.jpeg
    187.5 KB · Views: 55
Back
Top