OP
OP
Kristopher Conlin

Kristopher Conlin

2500 Club Member
View Badges
Joined
Mar 29, 2019
Messages
2,995
Reaction score
19,870
Location
Michigan
Rating - 0%
0   0   0
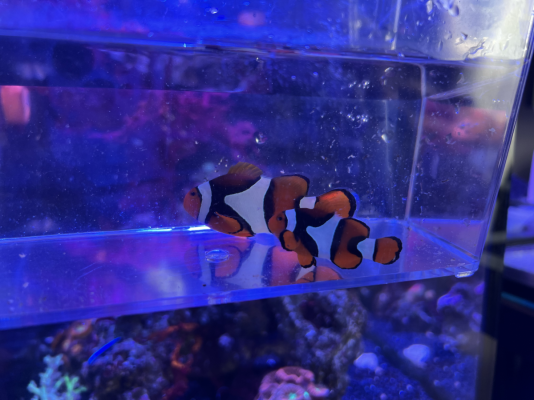
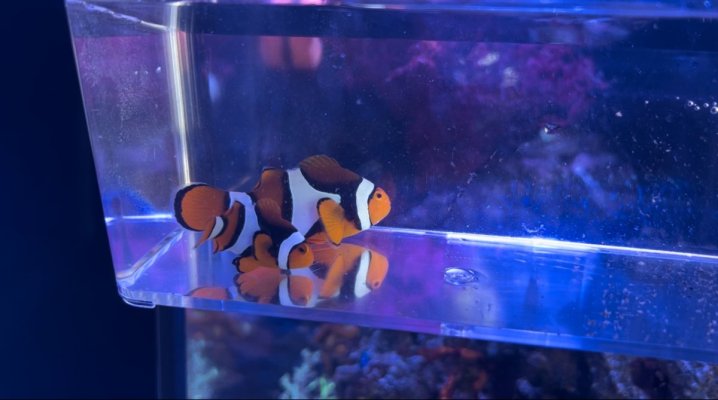
I just realized my clowns had spawned! While cleaning the tank today I almost scraped them off the overflow. I have no idea how many days they have been there and actually now realize why they were not coming out from under the return nozzle. I don't think I am ready to attempt this but would love to try! If I can't get everything ready for this batch - how long before they spawn again and then how many days before they hatch? I have been reading everything I can. And THANK YOU for this post and the links! So very helpful.
Wow that's so exciting!! It can be a lot to learn and a lot to buy to get ready in such a short period of time. But luckily if you keep your clowns well fed and happy they should spawn again shortly. Mine seem to lay about 3 days after the previous eggs hatch. The eggs themselves usually hatch from 8 to 10 days after being laid.

Here is a good picture example of the eggs as they mature. They tend to get very silvery right before they hatch.

sanjay1ed.jpg
 

RaisingKane

Active Member
View Badges
Joined
Nov 10, 2019
Messages
107
Reaction score
104
Rating - 0%
0   0   0
Wow that's so exciting!! It can be a lot to learn and a lot to buy to get ready in such a short period of time. But luckily if you keep your clowns well fed and happy they should spawn again shortly. Mine seem to lay about 3 days after the previous eggs hatch. The eggs themselves usually hatch from 8 to 10 days after being laid.

Here is a good picture example of the eggs as they mature. They tend to get very silvery right before they hatch.

sanjay1ed.jpg
WOW. OK this is amazing! Looking at these images---I might be at day 1-2. They are very orange and tiny balls. There MIGHT be time to get something set up and try to raise them. I feel so bad for the little fish who is constantly tending to them - chasing away all the fish and the cleaner shrimp, just to have them all become tank snacks. :)
 

Salty_Taste

Active Member
View Badges
Joined
Nov 13, 2022
Messages
214
Reaction score
323
Location
Bay Area
Rating - 83.3%
5   1   0
I'm truly grateful for this post! I recently re-homed a spawning pair of PNG True Percula Clownfish and have been asking around if there are any threads of documentation.

We appreciate your hard work in creating this thread! I hope to begin this journey over the next year and document my results:
PNG True Percs Spawning Thread
PNG True Perc Spawning Clutch
 

Attachments

  • tempImageVR66EO.png
    tempImageVR66EO.png
    1.4 MB · Views: 114
  • IMG_0698.jpg
    IMG_0698.jpg
    97.9 KB · Views: 164

RaisingKane

Active Member
View Badges
Joined
Nov 10, 2019
Messages
107
Reaction score
104
Rating - 0%
0   0   0
I don't know what day I am on because this was a surprise, but the eggs have now turned a dark grey color and have been like that for about two days. I don't see any eyes or silvery refections. Its almost impossible to get a photo due to the location. Thoughts? They are still tending to them 24/7.
 
OP
OP
Kristopher Conlin

Kristopher Conlin

2500 Club Member
View Badges
Joined
Mar 29, 2019
Messages
2,995
Reaction score
19,870
Location
Michigan
Rating - 0%
0   0   0
I don't know what day I am on because this was a surprise, but the eggs have now turned a dark grey color and have been like that for about two days. I don't see any eyes or silvery refections. Its almost impossible to get a photo due to the location. Thoughts? They are still tending to them 24/7.
The silver of the eyes is reflective so if they are in a shaded spot it may be hard to see. When it was getting close to hatch night I would turn off the flow just before lights off and check to see if I saw any fry hatching 15ish minutes after light out by shining a light near the surface. Just be careful not to shine lights in the eggs as it will stop them hatching for a while.

My eggs consistently hatched in day 10 but yours could be different.
 

RaisingKane

Active Member
View Badges
Joined
Nov 10, 2019
Messages
107
Reaction score
104
Rating - 0%
0   0   0
The silver of the eyes is reflective so if they are in a shaded spot it may be hard to see. When it was getting close to hatch night I would turn off the flow just before lights off and check to see if I saw any fry hatching 15ish minutes after light out by shining a light near the surface. Just be careful not to shine lights in the eggs as it will stop them hatching for a while.

My eggs consistently hatched in day 10 but yours could be different.
OK Thank you! I have been turning all the pumps off after lights out for the last couple nights since they turned grey and checking. I'm sure I may be a few days off. I discovered them earlier this week so I might be only on day 5-6.
 

RaisingKane

Active Member
View Badges
Joined
Nov 10, 2019
Messages
107
Reaction score
104
Rating - 0%
0   0   0
I was able to get in there and get this video. I can see eyeballs (I think)! LOL


Oh! and my clowns are Frostbite clowns, maybe thats why they are so grey??
 
Last edited:

jmichaelh7

2500 Club Member
View Badges
Joined
May 29, 2020
Messages
3,868
Reaction score
1,966
Location
Hanford ca
Rating - 50%
1   1   0
I slightly panicked for a second when I first saw a bunch of little orange dots in my aquarium right next to my ocellaris clownfish and their anemone. My immediate thought was that it was some weird algae or pest. A few seconds later I realized my clowns had laid eggs!

20220731_111335.jpg
Screenshot_20221130-002744_Gallery.jpg


I thought it was pretty cool and wasn't planning on trying to raise them but my wife was absolutely determined that I do everything I could to save them. "They are our babies!" she said. I had about 8 days until they hatched so I began to do a ton of research. I'm going to do my best to distill everything I've learned and share what helped me be successful and link to the resources and products that I used. Hopefully this helps some other reefers out that want to give breeding a shot!


I initially found Bahama Llama Corals YouTube channel and his clownfish breeding adventure. Through him I found @Reef Nutrition. Their products are an absolute necessity and I shortly bought the Breeder Pack and a zoaplankton harvesting sieve from them. You will also want to pick up a sponge filter if you don't already have one and start it cycling for later.

PACK_clownfish_roticlean_2048x2048.png


The breeder pack has almost everything you need to start culturing rotifers which will be the first food for your clownfish fry. The other things you will need for this are a food grade 5 gallon bucket, a brush for cleaning the bucket, a small aquarium heater and optionally an air pump with airline and a wash bottle (makes rinsing the rotifers before feeding much easier). You will want to buy these things in advanced as it takes some time for the rotifer population to grow to the point that it can be harvested. The rotifers tend to reproduce faster at lower salinity levels of around 1.011. I would keep a 5 gallon bucket next to the culture that I would use to refill when I would harvest. I found it easiest to fill it about a quarter full of 1.026 saltwater and add rodi til it read 1.011. They will need to be fed RG Complete(this is part of the breeder pack) at least twice a day but ideally more. I did my best to feed 2 ml when I woke up, right before I left for work, when I got home from work, and before bed for a total of 8 mls a day. I would occasionally supplement with additional feedings of the rotigreen omega also included in the kit and the rotifers seemed to love it. Once the culture is established after about 3 days you will need to start harvesting about 25% of the culture a day using the sieve, scrub the inside of the culture bucket and wash the filter daily. Make sure you don't turn the flow off or you will harvest too many rotifers as they float to the top which could potential crash your culture. Reef Nutrition has a video covering the process with a different kit but the process is almost the same.


The rotigreen omega will come in a plastic bag and the majority of it will need to be frozen. You get a very large amount in the pack. I used an ice cube tray to freeze it and then put the cubes into ziploc bags. I would thaw one or two a week in a little glass jar in my fridge to use for tinting (explained below) and water changes. You will need to add some saltwater to the container of thawed Rotigreen to thin the consistency as it won't mix well undiluted. On the packaging it states you can add it directly from the bag. Do NOT do this. It can poor out very quickly and if you add too much to your fry tank it can kill the entire clutch.


You will also want to set up a tank to put the fry in once they hatch. For this I used a basic 10 gallon aquarium with a lid and a desk lamp. You will want to make the bottom of the tank white for easier observation by either painting it or using paper taped to the bottom glass. It will also need three sides painted black or covered in a black material. For the front have a black plastic you can remove for viewing. I used a black trash bag cut to size with painters tape to hold it in place. The fry will be attracted to light so you will only want a light source coming from the top of the tank so they won't injure themselves by bumping into the glass sides. This is also prevent SFS or "sudden fright syndrome" where they can literally be scared to death. Try to resist the urge to constantly check on them and when you do, move slowly. It is best to put the tank in a low traffic area. I set mine up in a bedroom closet. The light will need to be left on 24/7 for the first few weeks to help the fry hunt the rotifers or they will starve to death. The aquarium will need an appropriately sized heater and ideally two airlines one on each end of the tank dialed back with an air valve. You want some flow to oxygenate the water and circulate the rotifers for fry to hunt, but not too much to send the fry on a rollercoaster ride. Just a few bubbles a second.


678738590(1).jpg


On hatch day I did a 3 gallon water change on the parents tank and put that water into the fry tank so they wouldn't be shocked by parameter swing when moved. I then added a harvest of rotifers and did what's callied "tinting the water" . Or added the rotigreen omega til the water is a greenish tint and is opaque. This serves two purposes. One to serve as food for the rotifers so they remain nutritious to the fry. And second to cloud the water so the fry are shielded from bright light and give them some depth perception. If you notice all the little fry huddled in a corner or swimming very quickly in circles its too bright and needs more tint. You want to tint so they are free swimming and hunting for the rotifers. The sponge filter will eventually be added to this tank but not until after day 15ish once the larval clownfish go through metamorphosis and become juvenile clownfish.


Now that I could feed the fry and had a proper home prepared, it was time to catch them on hatch night! If they stay in the parents tank they will not survive. For me they laid eggs on live rock that I couldn't remove. If you get them to spawn on a tile or clay pot this step is significantly easier as your can remove the entire pot or tile on hatch night and put it into the fry tank. However it can still be done if they laid eggs on something you can't remove. You will need a Vossen Larval Trap, airline tubing with a valve to slow down the bubbles and an air pump. A YouTuber named Luis Perez has a great video on how to use this as well as a full series on clownfish breeding. I learned a lot from his videos.

IMG_6283.jpg


On hatch night you will want to shut off all the flow right before the lights turn off so the fry won't be killed by the powerheads or sucked down the overflow. About 30 minutes after the lights turn off the eggs will begin to hatch. If any light shines on them they will stop hatching and you will need to wait for a while after lights turn off again. If the tank stays in complete darkness most of the fry will have hatched after about two hours. Once that time has passed you can turn on the light included in the trap as well as the bubble stream to gently pull the fry in.


20220726_000502.jpg


There always seems to be a few that are too quick for the trap. After I had caught all but the last few I removed the trap and brought the light close to the surface and used a small cup by hand to scoop out the fry.


20220726_003057.jpg


Once they are all caught you will want to introduce them to the fry tank now stocked with rotifers and tinted with rotigreen omega. I slowly dipped in the trap and let the water come slowly through the sieve. Once it had mixed a bit I very slowly tipped the trap to release the fry into the tank.


20220727_172719.jpg


The next 15 days are the most crucial and require the most attention. Try your best to clear your schedule of any major commitments. I canceled a summer vacation. For the next 15 days you will be making sure that there is enough rotifers for the fry to eat and keeping them nutritiously full of phyto using the rotigreen omega. It is recommended to use a microscope to count how many rotifers are in 1 ml of water with 10 per ml is the goal. I personally didn't use a microscope and just counted how many I saw in 1ml of fry tank water pulled into my pipette. You can add more rotifers when you do your daily harvests if needed to get to the correct density. Once the rotifer population is established in the fry tank they will quickly eat the rotigreen in the water so you will need to monitor and continually add more to tint it enough. I noticed the rotifer population eventually got to the point that I no longer had to add any additional rotifers. Just feed them more rotigreen into the fry tank to keep an appropriate density. If you want to continue to keep your 5 gallon bucket culture of rotifers alive you can use the harvests to feed your display tank corals and small critters instead until you have a new batch of fry to feed. In the few days after hatch you may lose some fry and these will need to be siphoned out along with the buildup on the bottom of the tank. I used a piece of ridged airline tubing with regular airline attached like a mini gravel vacuum to clean the bottom daily. To add water back I used a BRS kalk dripper kit on a gallon container of saltwater pre tinted with rotigreen. You want to drip this in slowly to not shock the fry.


The fry will eat mostly rotifers for the next 10 to 15 days. However you will want to follow this chart from reef nutrition of when to introduce the different sized peletized food.

tdo_clownfish_feeding_chart_ad057247-6d3a-4554-8f0f-0ce8abc60e65_200x@2x (1).png


From now on you will be doing daily water changes of about 50% keeping an eye on ammonia and dosing something like Seachem Prime or ChlorAM-X to detoxify the ammonia build up. I personally added Prime according to the directions to the gallon of tinted saltwater I dripped into the fry tank each day. I kept the tank about half full during this stage to increase the density of rotifers and to use less saltwater during water changes. As the fry grew I slowly increased the water volume to fill the entire tank.


You will also need to feed the appropriate sized TDO pellets according to the chart daily starting about day 3. I would feed at the same time I introduced a harvest of rotifers so the fry would hopefully associate it with food.

20220821_193310.jpg


This is essentially the routine for the next 15 or so days. Keep the water tinted and full of rotifers. Keep on top of daily water changes to keep ammonia down and the tank clean of the accumulated filth on the bottom. Around day 15 they will start going through metamorphosis and get their first stripe. This is the point your work keeping the water clean and full of nutritious food during the first two weeks will pay off in how many fry make it through the transition. This was my favorite part of the whole process. Watching them try to learn to swim like adults in a little S pattern was incredibly cute and really fun to watch.


Once they go through metamorphosis and get their stripe everything becomes much much easier. You can finally add the cycled sponge filter to manage ammonia. They will begin weaning off rotifers at this point so you will want to start feeding the appropriate TDO in small amounts several times a day. You will still want to keep up on daily water changes as the rotifers will begin to die since you are no longer tinting with rotigreen and will need to be siphoned off the bottom.


At this point the process is essentially the same as taking care of adult clownfish besides much more frequent feeding. Just continue to follow the chart for the recommended TDO pellet size and enjoy your tiny clownfish! After about 4 months I was able to switch to feeding two to three times a day.

20221025_212132.jpg


This was everything that I could think of to share about breeding baby clownfish. If i think of other tips I will add them as needed but I believe I covered the most important parts. I know this was a long read but I hope that this post could help at least one person. This is a long process and it takes a lot of time, patience and dedication. But it truly does pay off and it is very rewarding to watch the babies grow into clowns. I am by no means an expert breeder, I just wanted to share my experience and what worked for me. It is exciting and awesome and good luck to anybody who takes a crack at it!
Is this package from reef nutrition the only way to go?
 
OP
OP
Kristopher Conlin

Kristopher Conlin

2500 Club Member
View Badges
Joined
Mar 29, 2019
Messages
2,995
Reaction score
19,870
Location
Michigan
Rating - 0%
0   0   0
Is this package from reef nutrition the only way to go?
I'm sure there are other products available. You can buy rotifers from many places and make a culture system out of parts from home depot. I'm not sure where to source the food after rotifers. However Reef Nutrition makes it very easy but putting everything you need in kits.

If you like to diy you certainly could save some money and piece everything together yourself. If you try it share it with us!
 

jmichaelh7

2500 Club Member
View Badges
Joined
May 29, 2020
Messages
3,868
Reaction score
1,966
Location
Hanford ca
Rating - 50%
1   1   0
I'm sure there are other products available. You can buy rotifers from many places and make a culture system out of parts from home depot. I'm not sure where to source the food after rotifers. However Reef Nutrition makes it very easy but putting everything you need in kits.

If you like to diy you certainly could save some money and piece everything together yourself. If you try it share it with us!
i just ordered the kit.

Now i need to remove the coral and sps attached to that rock so i can place in the 10g.
 

Spicy Reef

Well-Known Member
View Badges
Joined
May 22, 2021
Messages
723
Reaction score
1,418
Location
Seattle
Rating - 0%
0   0   0
My clowns laid their first batch, I'm caught off guard. thanks for sharing all this info. trying to catch the larvae, I don't think they will service this contraption but I have to try something, too many predators in the tank. going to attempt tile for the next round...
 
OP
OP
Kristopher Conlin

Kristopher Conlin

2500 Club Member
View Badges
Joined
Mar 29, 2019
Messages
2,995
Reaction score
19,870
Location
Michigan
Rating - 0%
0   0   0
My clowns laid their first batch, I'm caught off guard. thanks for sharing all this info. trying to catch the larvae, I don't think they will service this contraption but I have to try something, too many predators in the tank. going to attempt tile for the next round...
Wow that's pretty cool!

The bubble look pretty fast. Do you have an air valve to slow them down a bit?
 

Spicy Reef

Well-Known Member
View Badges
Joined
May 22, 2021
Messages
723
Reaction score
1,418
Location
Seattle
Rating - 0%
0   0   0
Wow that's pretty cool!

The bubble look pretty fast. Do you have an air valve to slow them down a bit?
Fortunately they did not hatch last night. That's the only speed that will lift enough (I think) given the size and shape of that tube. Today is day 9, I'm making another that covers the eggs more thoroughly and I can slow down the air. problem is, this is at the center of a 150 gallon with strong waterflow. I have my doubts I can get it to work but next stop is tile then I can just pull it.

I had thoughts of using a turkey baster tonight to pull them... my gut tells me that's a bad Idea????
 
OP
OP
Kristopher Conlin

Kristopher Conlin

2500 Club Member
View Badges
Joined
Mar 29, 2019
Messages
2,995
Reaction score
19,870
Location
Michigan
Rating - 0%
0   0   0
Fortunately they did not hatch last night. That's the only speed that will lift enough (I think) given the size and shape of that tube. Today is day 9, I'm making another that covers the eggs more thoroughly and I can slow down the air. problem is, this is at the center of a 150 gallon with strong waterflow. I have my doubts I can get it to work but next stop is tile then I can just pull it.

I had thoughts of using a turkey baster tonight to pull them... my gut tells me that's a bad Idea????
I would stick to the tube and bubbles over a turkey baster. I would be ready for when the lights turn off and shut off all power heads and returns to help them be pulled into the tube.
 

jmichaelh7

2500 Club Member
View Badges
Joined
May 29, 2020
Messages
3,868
Reaction score
1,966
Location
Hanford ca
Rating - 50%
1   1   0
I slightly panicked for a second when I first saw a bunch of little orange dots in my aquarium right next to my ocellaris clownfish and their anemone. My immediate thought was that it was some weird algae or pest. A few seconds later I realized my clowns had laid eggs!

20220731_111335.jpg
Screenshot_20221130-002744_Gallery.jpg


I thought it was pretty cool and wasn't planning on trying to raise them but my wife was absolutely determined that I do everything I could to save them. "They are our babies!" she said. I had about 8 days until they hatched so I began to do a ton of research. I'm going to do my best to distill everything I've learned and share what helped me be successful and link to the resources and products that I used. Hopefully this helps some other reefers out that want to give breeding a shot!


I initially found Bahama Llama Corals YouTube channel and his clownfish breeding adventure. Through him I found @Reef Nutrition. Their products are an absolute necessity and I shortly bought the Breeder Pack and a zoaplankton harvesting sieve from them. You will also want to pick up a sponge filter if you don't already have one and start it cycling for later.

PACK_clownfish_roticlean_2048x2048.png


The breeder pack has almost everything you need to start culturing rotifers which will be the first food for your clownfish fry. The other things you will need for this are a food grade 5 gallon bucket, a brush for cleaning the bucket, a small aquarium heater and optionally an air pump with airline and a wash bottle (makes rinsing the rotifers before feeding much easier). You will want to buy these things in advanced as it takes some time for the rotifer population to grow to the point that it can be harvested. The rotifers tend to reproduce faster at lower salinity levels of around 1.011. I would keep a 5 gallon bucket next to the culture that I would use to refill when I would harvest. I found it easiest to fill it about a quarter full of 1.026 saltwater and add rodi til it read 1.011. They will need to be fed RG Complete(this is part of the breeder pack) at least twice a day but ideally more. I did my best to feed 2 ml when I woke up, right before I left for work, when I got home from work, and before bed for a total of 8 mls a day. I would occasionally supplement with additional feedings of the rotigreen omega also included in the kit and the rotifers seemed to love it. Once the culture is established after about 3 days you will need to start harvesting about 25% of the culture a day using the sieve, scrub the inside of the culture bucket and wash the filter daily. Make sure you don't turn the flow off or you will harvest too many rotifers as they float to the top which could potential crash your culture. Reef Nutrition has a video covering the process with a different kit but the process is almost the same.


The rotigreen omega will come in a plastic bag and the majority of it will need to be frozen. You get a very large amount in the pack. I used an ice cube tray to freeze it and then put the cubes into ziploc bags. I would thaw one or two a week in a little glass jar in my fridge to use for tinting (explained below) and water changes. You will need to add some saltwater to the container of thawed Rotigreen to thin the consistency as it won't mix well undiluted. On the packaging it states you can add it directly from the bag. Do NOT do this. It can poor out very quickly and if you add too much to your fry tank it can kill the entire clutch.


You will also want to set up a tank to put the fry in once they hatch. For this I used a basic 10 gallon aquarium with a lid and a desk lamp. You will want to make the bottom of the tank white for easier observation by either painting it or using paper taped to the bottom glass. It will also need three sides painted black or covered in a black material. For the front have a black plastic you can remove for viewing. I used a black trash bag cut to size with painters tape to hold it in place. The fry will be attracted to light so you will only want a light source coming from the top of the tank so they won't injure themselves by bumping into the glass sides. This is also prevent SFS or "sudden fright syndrome" where they can literally be scared to death. Try to resist the urge to constantly check on them and when you do, move slowly. It is best to put the tank in a low traffic area. I set mine up in a bedroom closet. The light will need to be left on 24/7 for the first few weeks to help the fry hunt the rotifers or they will starve to death. The aquarium will need an appropriately sized heater and ideally two airlines one on each end of the tank dialed back with an air valve. You want some flow to oxygenate the water and circulate the rotifers for fry to hunt, but not too much to send the fry on a rollercoaster ride. Just a few bubbles a second.


678738590(1).jpg


On hatch day I did a 3 gallon water change on the parents tank and put that water into the fry tank so they wouldn't be shocked by parameter swing when moved. I then added a harvest of rotifers and did what's callied "tinting the water" . Or added the rotigreen omega til the water is a greenish tint and is opaque. This serves two purposes. One to serve as food for the rotifers so they remain nutritious to the fry. And second to cloud the water so the fry are shielded from bright light and give them some depth perception. If you notice all the little fry huddled in a corner or swimming very quickly in circles its too bright and needs more tint. You want to tint so they are free swimming and hunting for the rotifers. The sponge filter will eventually be added to this tank but not until after day 15ish once the larval clownfish go through metamorphosis and become juvenile clownfish.


Now that I could feed the fry and had a proper home prepared, it was time to catch them on hatch night! If they stay in the parents tank they will not survive. For me they laid eggs on live rock that I couldn't remove. If you get them to spawn on a tile or clay pot this step is significantly easier as your can remove the entire pot or tile on hatch night and put it into the fry tank. However it can still be done if they laid eggs on something you can't remove. You will need a Vossen Larval Trap, airline tubing with a valve to slow down the bubbles and an air pump. A YouTuber named Luis Perez has a great video on how to use this as well as a full series on clownfish breeding. I learned a lot from his videos.

IMG_6283.jpg


On hatch night you will want to shut off all the flow right before the lights turn off so the fry won't be killed by the powerheads or sucked down the overflow. About 30 minutes after the lights turn off the eggs will begin to hatch. If any light shines on them they will stop hatching and you will need to wait for a while after lights turn off again. If the tank stays in complete darkness most of the fry will have hatched after about two hours. Once that time has passed you can turn on the light included in the trap as well as the bubble stream to gently pull the fry in.


20220726_000502.jpg


There always seems to be a few that are too quick for the trap. After I had caught all but the last few I removed the trap and brought the light close to the surface and used a small cup by hand to scoop out the fry.


20220726_003057.jpg


Once they are all caught you will want to introduce them to the fry tank now stocked with rotifers and tinted with rotigreen omega. I slowly dipped in the trap and let the water come slowly through the sieve. Once it had mixed a bit I very slowly tipped the trap to release the fry into the tank.


20220727_172719.jpg


The next 15 days are the most crucial and require the most attention. Try your best to clear your schedule of any major commitments. I canceled a summer vacation. For the next 15 days you will be making sure that there is enough rotifers for the fry to eat and keeping them nutritiously full of phyto using the rotigreen omega. It is recommended to use a microscope to count how many rotifers are in 1 ml of water with 10 per ml is the goal. I personally didn't use a microscope and just counted how many I saw in 1ml of fry tank water pulled into my pipette. You can add more rotifers when you do your daily harvests if needed to get to the correct density. Once the rotifer population is established in the fry tank they will quickly eat the rotigreen in the water so you will need to monitor and continually add more to tint it enough. I noticed the rotifer population eventually got to the point that I no longer had to add any additional rotifers. Just feed them more rotigreen into the fry tank to keep an appropriate density. If you want to continue to keep your 5 gallon bucket culture of rotifers alive you can use the harvests to feed your display tank corals and small critters instead until you have a new batch of fry to feed. In the few days after hatch you may lose some fry and these will need to be siphoned out along with the buildup on the bottom of the tank. I used a piece of ridged airline tubing with regular airline attached like a mini gravel vacuum to clean the bottom daily. To add water back I used a BRS kalk dripper kit on a gallon container of saltwater pre tinted with rotigreen. You want to drip this in slowly to not shock the fry.


The fry will eat mostly rotifers for the next 10 to 15 days. However you will want to follow this chart from reef nutrition of when to introduce the different sized peletized food.

tdo_clownfish_feeding_chart_ad057247-6d3a-4554-8f0f-0ce8abc60e65_200x@2x (1).png


From now on you will be doing daily water changes of about 50% keeping an eye on ammonia and dosing something like Seachem Prime or ChlorAM-X to detoxify the ammonia build up. I personally added Prime according to the directions to the gallon of tinted saltwater I dripped into the fry tank each day. I kept the tank about half full during this stage to increase the density of rotifers and to use less saltwater during water changes. As the fry grew I slowly increased the water volume to fill the entire tank.


You will also need to feed the appropriate sized TDO pellets according to the chart daily starting about day 3. I would feed at the same time I introduced a harvest of rotifers so the fry would hopefully associate it with food.

20220821_193310.jpg


This is essentially the routine for the next 15 or so days. Keep the water tinted and full of rotifers. Keep on top of daily water changes to keep ammonia down and the tank clean of the accumulated filth on the bottom. Around day 15 they will start going through metamorphosis and get their first stripe. This is the point your work keeping the water clean and full of nutritious food during the first two weeks will pay off in how many fry make it through the transition. This was my favorite part of the whole process. Watching them try to learn to swim like adults in a little S pattern was incredibly cute and really fun to watch.


Once they go through metamorphosis and get their stripe everything becomes much much easier. You can finally add the cycled sponge filter to manage ammonia. They will begin weaning off rotifers at this point so you will want to start feeding the appropriate TDO in small amounts several times a day. You will still want to keep up on daily water changes as the rotifers will begin to die since you are no longer tinting with rotigreen and will need to be siphoned off the bottom.


At this point the process is essentially the same as taking care of adult clownfish besides much more frequent feeding. Just continue to follow the chart for the recommended TDO pellet size and enjoy your tiny clownfish! After about 4 months I was able to switch to feeding two to three times a day.

20221025_212132.jpg


This was everything that I could think of to share about breeding baby clownfish. If i think of other tips I will add them as needed but I believe I covered the most important parts. I know this was a long read but I hope that this post could help at least one person. This is a long process and it takes a lot of time, patience and dedication. But it truly does pay off and it is very rewarding to watch the babies grow into clowns. I am by no means an expert breeder, I just wanted to share my experience and what worked for me. It is exciting and awesome and good luck to anybody who takes a crack at it!
thank you for sharing your experience.
 

jmichaelh7

2500 Club Member
View Badges
Joined
May 29, 2020
Messages
3,868
Reaction score
1,966
Location
Hanford ca
Rating - 50%
1   1   0
Congrats! I’m on day 5 with my hatch. I’m scared to do a water change as I heard you can wipe out fry by inadvertently increasing free ammonia due to raising ph, so planning to just drip parent tank water in this first week and then syphon bottom at the end of first week. Any advice? Ammonia is at 1.5ppm currently.
You can add seachem prime. How did your hatching do?
 

Spicy Reef

Well-Known Member
View Badges
Joined
May 22, 2021
Messages
723
Reaction score
1,418
Location
Seattle
Rating - 0%
0   0   0
?... I have another hatch laid on a pot, I'm going to transfer the pot to a tank I have prepared for the hatchlings... I feel 90% confident they will hatch tonight. If they do not, should I put them back in with the parents the next morning or should I leave them in the hatch tank w/ the airstone?

ps... follow up I have one baby clown still swimming around from the harvest I used the pipe contraption to extract them... so... success... I don't know. will keep you posted if I can keep it alive :)
 

F i s h y

2nd In Command.
View Badges
Joined
Jan 28, 2020
Messages
10,298
Reaction score
62,444
Location
Indiana
Rating - 0%
0   0   0
?... I have another hatch laid on a pot, I'm going to transfer the pot to a tank I have prepared for the hatchlings... I feel 90% confident they will hatch tonight. If they do not, should I put them back in with the parents the next morning or should I leave them in the hatch tank w/ the airstone?

ps... follow up I have one baby clown still swimming around from the harvest I used the pipe contraption to extract them... so... success... I don't know. will keep you posted if I can keep it alive :)
I would leave them in your brooding tank.
 
Back
Top