Got my setup plumbed into the basement (pics!!)

Engloid

Valuable Member
View Badges
Joined
Mar 26, 2010
Messages
2,082
Reaction score
315
Location
Tennessee
Rating - 0%
0   0   0
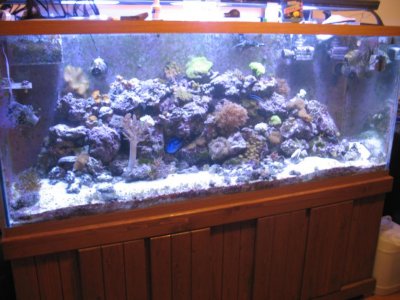
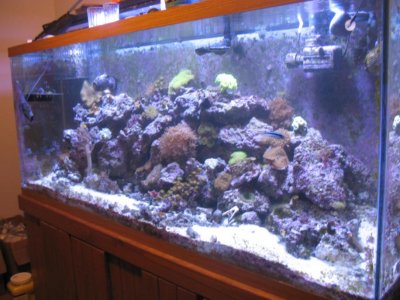
Here's the setup upstairs:
220g display
55g in stand, setups as refugium (half water flow goes through on the way to basement)
Korallin calcium reactor
Eheim canister, used as phosphate reactor
about 400lbs live rock
three 250w MH bulbs (in Coralife fixture with night LED's)
blue hippo tang
kole tang
copperband butterfly
cleaner wrasse
ocellaris clown
maroon clown
dragon goby
yellow watchman goby with shrimp
mandarin dragonette
2 4 stripe damsels (heading for a new home)
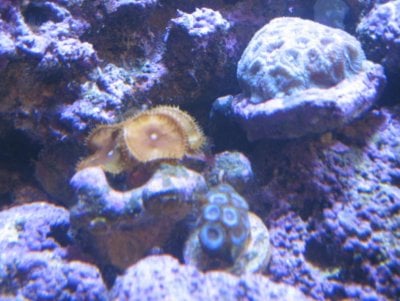
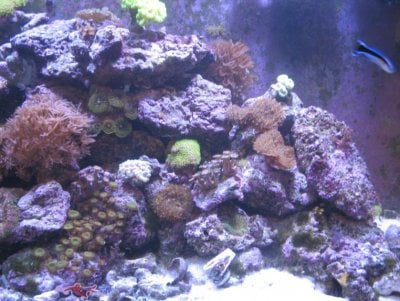
about 20+ types of corals (mainly zoas and palys, some candy canes)
6" mini carpet anemone
6-7" rock anemone
a few more

Downstairs:
Two 55g drums
chiller
MRC-3 skimmer

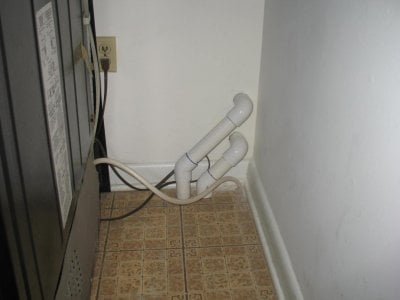
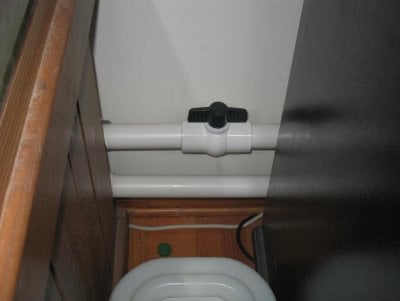
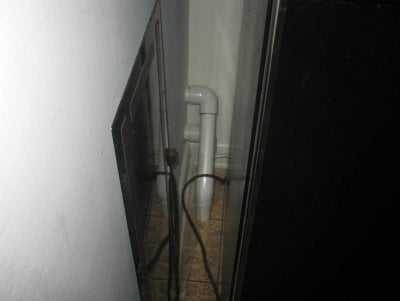
PICS (toe forum screwed up the order, so I will list in order of flow)

#2 This is on the side of the tank, showing that I have a supply shutoff upstairs, handy in case of an emergency. Below it is the drain line, both are 1.5" pvc.

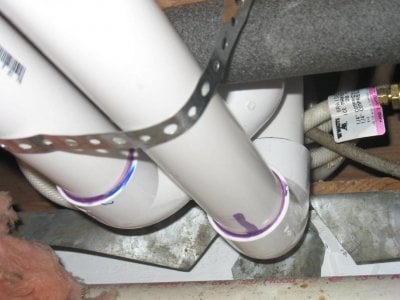
#1 & #3 Since I have REAL hardwood in the living room, I didn't want to drill through it. Instead, I went through into the kitchen. The pipes go through the wall and into the floor, in the space next to the fridge...so it's not really noticeable at all, especially after stashing a broom in there. The kitchen floor was 3/4" particle board, on top of 3/4" planks, set diagonally. Nice linoleum, huh?
 

Attachments

  • IMG_3780.jpg
    IMG_3780.jpg
    81.9 KB · Views: 193
  • IMG_3801.jpg
    IMG_3801.jpg
    82.5 KB · Views: 195
  • IMG_3781.jpg
    IMG_3781.jpg
    80.6 KB · Views: 176
OP
OP
E

Engloid

Valuable Member
View Badges
Joined
Mar 26, 2010
Messages
2,082
Reaction score
315
Location
Tennessee
Rating - 0%
0   0   0
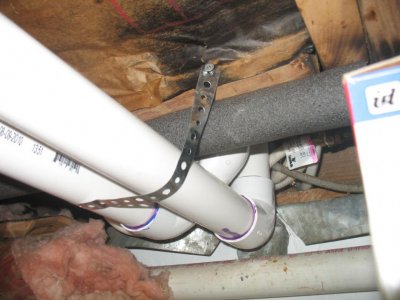
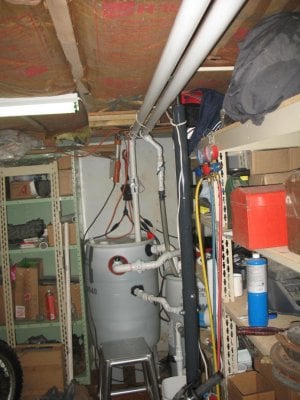
As the pipes come through the floor, due to location in the floor joists, I had to do some tricky stuff with 45's and 90's. These pics show that part, and the long runs, sloped down to the 55g drums.
 

Attachments

  • IMG_3797.jpg
    IMG_3797.jpg
    89.9 KB · Views: 183
  • IMG_3782.jpg
    IMG_3782.jpg
    85.7 KB · Views: 168
  • IMG_3798.jpg
    IMG_3798.jpg
    93 KB · Views: 189

ToXIc

2500 Club Member
View Badges
Joined
Feb 27, 2011
Messages
4,002
Reaction score
67
Location
TN
Rating - 0%
0   0   0
Look good but why didn't you put the fuge into the basement also and use the space under the tank for daily storage?

Also what part in TN are you? Are you part of MTRC?
 
OP
OP
E

Engloid

Valuable Member
View Badges
Joined
Mar 26, 2010
Messages
2,082
Reaction score
315
Location
Tennessee
Rating - 0%
0   0   0
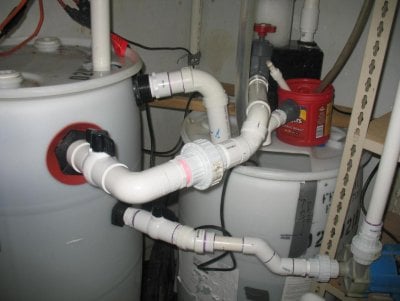
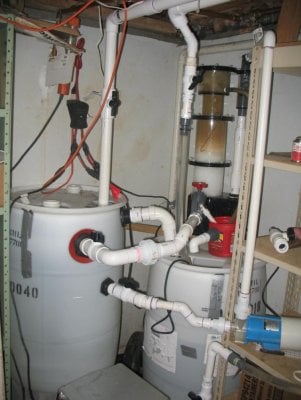
These pics show the two sump drums. Both supply and return pipes have valves so I can shut them off and not have to drain the entire pipes before doing any work on things. Each drum's inlet has a sock filter, which can be pretty easily removed. Overflow due to filter clogging is also taken care of also, since the filters are fully inside the drums, but above water level.

Flow goes from the left one, gravity draining to the one on the right. The first one has about 5 gallons of bioballs in it. I know they're not all that popular with saltwater, but I had them leftover and figured I'd throw them in. Off to the right, you can see the blue pump for the skimmer. Since the pics, I plumbed in the chiller also. All bulkheads have valves on the outside so I can perform any work without draining them. I also like to use unions so I can take things apart without cutting the pvc. Unlike many people though, I like to use threaded valves. Why? Cause I can always use them again in another application or configuration. I used only teflon tape for thread sealing, and ALWAYS use primer/cleaner before cementing the pvc.

Conveniently enough, the basement has a sump that is in the very corner...which allowed me to put a safety overflow straight down into it to prevent the possibility of accidental overflows in the house. Inside the drum on the right is a Mag 24 pump. It's rated at 1100gph at 13foot head. If you look closely, you can see that I cannot even open the valve fully.

The skimmer has a drain that feeds to the red coffee can. In the event that the skimmer freaks out, it will drain back into the sump...preventing another possibility for disaster.
 

Attachments

  • IMG_3800.jpg
    IMG_3800.jpg
    83.2 KB · Views: 178
  • IMG_3799.jpg
    IMG_3799.jpg
    88.1 KB · Views: 200
Last edited:
OP
OP
E

Engloid

Valuable Member
View Badges
Joined
Mar 26, 2010
Messages
2,082
Reaction score
315
Location
Tennessee
Rating - 0%
0   0   0
Look good but why didn't you put the fuge into the basement also and use the space under the tank for daily storage?

Also what part in TN are you? Are you part of MTRC?
It's a 55g refugium, which would take up a good bit of my storage space in the room downstairs. With it being a 220g tank, there's plenty of storage space in the stand, even with a 55g under there. Not only that, but putting it under the display allows me to use gravity to feed water in and drain out...no pumps needed. If I put it in the basement, I would have had to either get another pump, or put it up higher than the drums. Combining all three of these "cons" made me decide to just leave it in the stand, at least for now.

My three balasts are stacked up on one end, calcium reactor and phosphate reactor are in the middle where access isn't all that good anyway...leaving the area in front of the doors open for food and other things. Both reactors will eventually go in the basement also.

I'm in the ETRC, and I'm in Knoxville.

Oh, I forgot to mention that the fuge also has chaeto, sand bed, snails, a sock filter, and a light for growing the chaeto. Along with the other livestock, I have a sand sifting star, probably 120 hermit crabs and 30 astria snails.
 
Last edited:
OP
OP
E

Engloid

Valuable Member
View Badges
Joined
Mar 26, 2010
Messages
2,082
Reaction score
315
Location
Tennessee
Rating - 0%
0   0   0
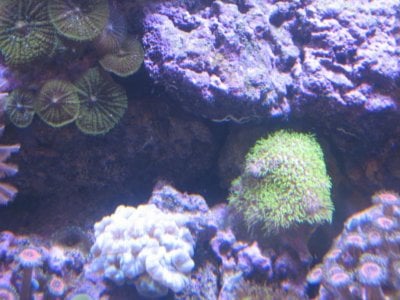
More pics. I'm not that good at taking pictures of the aquarium.
 

Attachments

  • IMG_3813.jpg
    IMG_3813.jpg
    90.6 KB · Views: 215
  • IMG_3810.jpg
    IMG_3810.jpg
    90.7 KB · Views: 180
  • IMG_3808.jpg
    IMG_3808.jpg
    97 KB · Views: 186
  • IMG_3807.jpg
    IMG_3807.jpg
    93 KB · Views: 183
  • IMG_3812.jpg
    IMG_3812.jpg
    92.5 KB · Views: 173

ToXIc

2500 Club Member
View Badges
Joined
Feb 27, 2011
Messages
4,002
Reaction score
67
Location
TN
Rating - 0%
0   0   0
Looks good....

And I see spidy loves it also.... Lolz
 
OP
OP
E

Engloid

Valuable Member
View Badges
Joined
Mar 26, 2010
Messages
2,082
Reaction score
315
Location
Tennessee
Rating - 0%
0   0   0
Looks good....

And I see spidy loves it also.... Lolz
At first, I thought maybe I had caught a spiderman in a reflection. My 4yo son is a spiderman fanatic, so he's got probably everything that's made with spiderman on it. I then looked at the pics and saw the sticker. I had forgotten he put that sticker on there.
 

Runner

Grandmaster Sparky
View Badges
Joined
Jul 18, 2007
Messages
566
Reaction score
23
Location
East TN
Rating - 0%
0   0   0
Nice basement setup. Now that you started drilling holes in the floor, does your wife think you are certifiable yet? :)

I've always had mine on a slab, so my only creativity was to punch a conduit through the wall behind my tank and put ballasts in the next room.
 
OP
OP
E

Engloid

Valuable Member
View Badges
Joined
Mar 26, 2010
Messages
2,082
Reaction score
315
Location
Tennessee
Rating - 0%
0   0   0
Nice basement setup. Now that you started drilling holes in the floor, does your wife think you are certifiable yet? :)
Thanks. the wife wasn't that happy about holes in the wall, but preferred it over holes in hardwood.

I am working on an ATO setup that uses a refridgerator solenoid and a JBJ ATO switch to shut off the water supply to my RO setup. It will be in the basement too. I ran into an issue the other day though, after I installed a gauge in the water line. My house pressure reducing valve had messed up and was bleeding pressure. The gauge had passed its max of 100psi and was probably sitting at about 110-115psi!!! No wonder I had a couple faucets dripping!! I put in a new PRV and all is good now, set it at 60psi.

I've always had mine on a slab, so my only creativity was to punch a conduit through the wall behind my tank and put ballasts in the next room.
They do make hole saws to drill into concrete. :D You also can go through walls and put sumps, and chillers and stuff in another room. It's nice having a "mechanical room" for the fish tank. I find that it's much easier keeping temps down with it circulating water to the basement and back up. The chiller's not having to work as hard as I though it would with about 400 gallons in the setup.
 

TriMax

Valuable Member
View Badges
Joined
Jul 25, 2009
Messages
1,104
Reaction score
20
Rating - 0%
0   0   0
Looks good Spenser. Makes me a little more than envious when I see all that plumbing. Me and my no-plumbing tanks wish we had some. It is not the fault of the tanks that I do not, of course.:bigsmile:
 
OP
OP
E

Engloid

Valuable Member
View Badges
Joined
Mar 26, 2010
Messages
2,082
Reaction score
315
Location
Tennessee
Rating - 0%
0   0   0
Looks good Spenser. Makes me a little more than envious when I see all that plumbing. Me and my no-plumbing tanks wish we had some. It is not the fault of the tanks that I do not, of course.:bigsmile:

Get all the parts and I'll help you out with it. I did all this in about 4-5 evenings. Of course, several trips to the hardware stores can drag things out.
looking good - that's pretty ambitious mate!
Thanks. It went a little easier than I though. One thing I messed up is the drain from the first drum to the second. I drilled up high, where the drum is curved, and it meant that the pipe isn't horizontal. This traps some air up in the elbow and it doesn't drain nearly what it should. I will eventually fix this somehow.
 

copper

Active Member
View Badges
Joined
Jul 30, 2009
Messages
224
Reaction score
0
Rating - 0%
0   0   0
Holy PVC Spencer! Impressive set up.
I vote we have next meeting at Eddie's with Spenser doing a plumbing demo. , or bring in a motivational speaker!!
 

TriMax

Valuable Member
View Badges
Joined
Jul 25, 2009
Messages
1,104
Reaction score
20
Rating - 0%
0   0   0
This weekend my wife, kids and I are participating in the Village Green Subdivision Garage/Yard sale. I am hoping to have a lot more room in the garage when it is over. :bigsmile:

Maybe, after that, I will invite Janie over to boss everybody around and Spenser to do all the work. Maybe then, it will get done. :squigglemouth:

Thanks for the encouragement folks. :angel:

Eddie
 
OP
OP
E

Engloid

Valuable Member
View Badges
Joined
Mar 26, 2010
Messages
2,082
Reaction score
315
Location
Tennessee
Rating - 0%
0   0   0
Holy PVC Spencer! Impressive set up.
I vote we have next meeting at Eddie's with Spenser doing a plumbing demo. , or bring in a motivational speaker!!
It's easy stuff, really. I pretty much get an idea in my head and "wing it" as I go, so there's not a lot to demonstrate. You can get virtually any angle you need with 45's and 90's. I do all the copper work too. A lot of people think it's tough, but once you do it, it's very easy.

Overall, for my first aquarium "plumbing" job, I'm pretty pleased with it. In looking at the setup Travis had, I picked up one thing that helped me. He had one bulkhead near the top of the drum that was an emergency overflow. On the outside of it was an elbow and it went straight through the floor to drain outside the house. I did similar, but ran it into a sump that drains the basement under the slab. Yesterday, the hose came loos from my return pump, stopping the flow to the tank. Basically, it was like I lost power, and the emergency overflow worked fine. I will fine tune and determine the right water level so that it doesn't get that high next time.

The biggest hassle of a plumbing job like this is the numerous runs back and forth to get parts. The best thing to do is buy about $200 in parts, use what you need, and return the rest. Most fittings are the same price at Home Depot or Lowes...but you can sometimes find the more expensive things like valves will be quite a bit cheaper at one place than the other. I think I saved about $4 per valve at Lowes. Some of the specialty hose barbs may have to be gotten at the Aquarium. Bulkheads...only reasonable price is at the Aquarium. HD and Lowes don't have them and the big suppliers have to order them, and will charge you about 2-3 times as much.

Last night, I hooked up my RO setup, with an icemaker solenoid. The ABJ ato unit would supply power to the solenoid which would open up and allow water flow TO the RO setup, and RO water to my sump. This eleminates problems that the auto shut off valves seem to have where they don't want to shut off the wastewater, by shutting off the supply to the RO unit. It worked well...but after a couple trial runs, the solenoid crapped out. I think I got a defective one, and they will replace it when I go by there friday.

Sometimes I think it's a curse to be able to type farily quickly...I tend to write books.
 

copper

Active Member
View Badges
Joined
Jul 30, 2009
Messages
224
Reaction score
0
Rating - 0%
0   0   0
Correct me if I have this wrong, but if the power goes off, the tank overflow drains out the emergency drain. Then when power comes back on will the ATO replace that loss with fresh ro?
 
OP
OP
E

Engloid

Valuable Member
View Badges
Joined
Mar 26, 2010
Messages
2,082
Reaction score
315
Location
Tennessee
Rating - 0%
0   0   0
Correct me if I have this wrong, but if the power goes off, the tank overflow drains out the emergency drain. Then when power comes back on will the ATO replace that loss with fresh ro?
Two answers:
1) YES. For now, yes, it will work that way. however, it's not enough loss that the ATO will cause any significant change in salinity. Even before adding the two drums and piping, I could add 4-5 gallons of RO water and salinity would not even be but about .0005 changed.

2) NO. Once I determine the amount of rise from a power outage, I will adjust the float switches so that it will not even rise to the point of the emergency drain. Therefore, the emergency drain won't even be needed for a power outage. It will only be for some unforseen reason...in which case the house's sump pump will pump the water out of the house just like it does when it rains heavily. This pump is equipped with check valve, and 1.5" pipe.
 
OP
OP
E

Engloid

Valuable Member
View Badges
Joined
Mar 26, 2010
Messages
2,082
Reaction score
315
Location
Tennessee
Rating - 0%
0   0   0
This weekend my wife, kids and I are participating in the Village Green Subdivision Garage/Yard sale. I am hoping to have a lot more room in the garage when it is over. :bigsmile:

Maybe, after that, I will invite Janie over to boss everybody around and Spenser to do all the work. Maybe then, it will get done. :squigglemouth:

I don't know that I'd be all that good at doing a "demo"....but if you buy up a bunch of parts, and place your tanks where you want them, I'll help plumb it all up.
 
Back
Top