- Joined
- Oct 22, 2019
- Messages
- 57
- Reaction score
- 46
Howdy there!
I’m a little late to the game on getting my tank build posted in this thread considering that it has been up and running for almost 6 months (only two weeks away from the half-year checkpoint!)
Anyway, I still wanted to get it posted and show the progress and maybe inspire some folks to bring some of the creativity that we place in decorating the inside of our tanks to the outside!
I first became interested in keeping a reef tank about a year ago. I had been on a pretty consistent rotation of having a freshwater tank every time I moved to a new place, but I didn’t enjoy the limitations of color and variety that came with a small freshwater build. That’s when I decided to take the leap of faith into the saltwater world! Living in a relatively small house, I knew that I didn’t have the space for a humongous tank, nor the budget (maybe a more important limitation than the space, haha). So, being that I couldn’t make a completely surrounded large display tank with a huge sump underneath, I decided to go with the nano option to save me a little space. Being a designer and having an innate desire to have everything as neat and tidy as possible, I decided to build my own surround that suited the space for the proposed tank and the overall design of my house. That being said, I placed my order for the Fluval Evo 13.5 and got to work on building the stand as I waited for it to arrive. I knew that given the crisp corner on the end of the tank, I wanted to show off the clean edge while hiding all of the utilitarian elements of the aquatic hobby (i.e. filtration, lights, cables, tubes, etc.) so I did just that! My tank stand cost me about $7 dollars which was the cost of the nails and screws used to hold it together. I made a simple base from 2x4’s and covered that in pallet boards, all of which I was gifted from a construction site’s scrap pile. I made sure to leave enough room on the rear to clean the back glass and on the side to easily monitor the filtration compartments.
[Side note on the Fluval Evo: I know that this is definitely not the best nano reef system on the market but in my history of keeping aquatic life, I have always been drawn to Fluval’s clean lines and simple designs. Also, I have never had a single problem (knock-on-pallet-wood) with any of their systems in the past.]
Moving on...knowing that I would need easy access to the tank, I made the entire top section and surround on the sides removable in one piece so that I can simply lift it off of the base and have 360 degree working space. (I also attached the stand to the wall just to remove any possibility that it fall over).
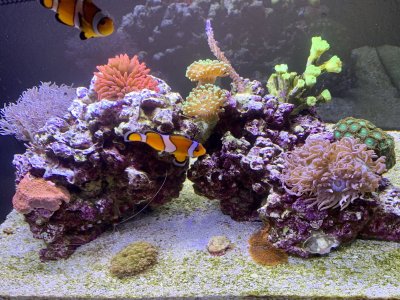
After the system arrived along with the live rock and live sand that I orderedI eagerly threw everything together and waited as the cycling process began. My tank cycled very quickly (about two weeks) and after triple checking all the parameters I decided to start off with some easy starter fish (my two clowns) and a simple clean-up crew to get a head start on maintenance. Once everything was going well, I slowly started to add in more inhabitants, giving everything more than enough time to balance out before adding new life to the tank. I also still keep up with a strict weekly 20% water change that is required of such a small system.
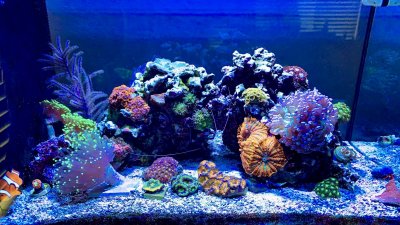
After a couple months, I did a small upgrade to the filtration by placing some extra bio foam and carbon and zeolite crystal in the third chamber and everything is going great! I added some coral in the third month, and even though this was a little early according to my research, my parameters were spot on so I decided to go ahead and place some easier starter corals to get things rolling. I bought a small Duncan frag to begin that had two small heads and a small piece of orange montipora. The Duncan put on TEN new heads in the last two months and the monti has tripled in size. The latest additions are a small green candy cane frag and some simple zoas.
(I’m now dealing with a slight GHA bloom but I am working to get that cleared up, gotta love hitchhikers!)
All in all, this has been a great learning experience and I’m so glad that I decided to start a saltwater tank. I just can’t wait to move at some point in the future and have enough room to get a larger system started.
(I am attaching some pictures that show the overall build, the storage space below, and the lid removed.)


