OP
OP
tippin.turtle

tippin.turtle

Active Member
View Badges
Joined
Nov 8, 2019
Messages
220
Reaction score
382
Rating - 0%
0   0   0


After watching and commenting on a video by Reef Bum on youtube
I was challenged by a viewer to "show" my tank.
I gladly accepted without hesitation;)
Sadly, there is still misinformation being distributed for public consumption; even by
sponsored individuals, that is simply "not true".
Reef Bum had experienced a "failed tank" when utilizing dry Marco rock and thus will
disparage it's use.
You can have a fabulous tank with dry rock you've brought to "life" yourself rather than
harvesting rock from the ocean which is filled with pests and other organisms that may be
detramental to your reef tank.
Reefing is a slow journey which should be enjoyed at every step, even when it comes to rock.
Happy reefing! :)
 
Last edited:
OP
OP
tippin.turtle

tippin.turtle

Active Member
View Badges
Joined
Nov 8, 2019
Messages
220
Reaction score
382
Rating - 0%
0   0   0
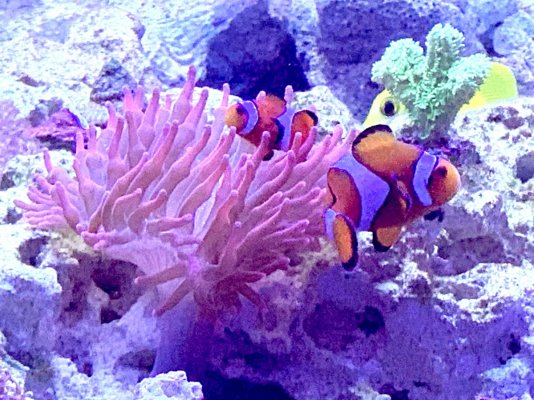
Peek-a-boo with a clown :)

IMG_E1031.JPG
 
OP
OP
tippin.turtle

tippin.turtle

Active Member
View Badges
Joined
Nov 8, 2019
Messages
220
Reaction score
382
Rating - 0%
0   0   0
(update): Battled a horrible outbreak of turf algae. I have never had turf algae and have no ideal
where it came from. Strangely it was only growing on a batch of Marco "base" rock as all my other rock was absent of it. The smaller pieces I left within the tank and was treated with 3% hydrogen peroxide which put a quick end to it existence. Have added new corals and have been loading videos to gauge coral growth as the system ages.
 

Lost in the Sauce

BANGERANG!!!!
View Badges
Joined
Feb 10, 2021
Messages
18,889
Reaction score
91,596
Location
Southern California
Rating - 0%
0   0   0
Thank you. I thought they looked like seedling size net pots but thought I was crazy. I've got to run to the Hydra store today for pH down anyways. I'll definitely pick up be picking up a few of those. Love your build, OCD, attention to detail!. Thanks for bringing us along.

And I'm right there with you. There is No reason this hobby needs to be this expensive
 
OP
OP
tippin.turtle

tippin.turtle

Active Member
View Badges
Joined
Nov 8, 2019
Messages
220
Reaction score
382
Rating - 0%
0   0   0
Thank you. I thought they looked like seedling size net pots but thought I was crazy. I've got to run to the Hydra store today for pH down anyways. I'll definitely pick up be picking up a few of those. Love your build, OCD, attention to detail!. Thanks for bringing us along.

And I'm right there with you. There is No reason this hobby needs to be this expensive
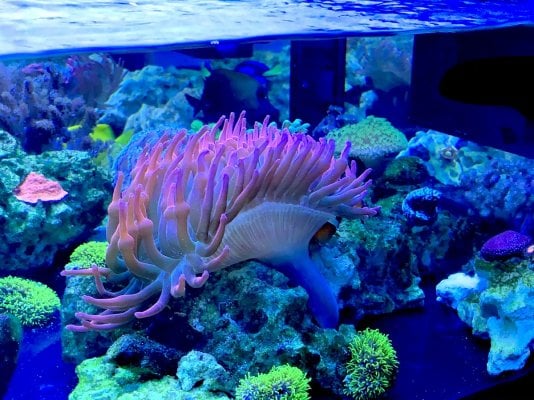
No problem and thanks for the compliment! Here's my tank today and couldn't be happier about how things are coming along.
 

ReeferJay86

Active Member
View Badges
Joined
Jun 12, 2020
Messages
236
Reaction score
165
Rating - 0%
0   0   0
Any new updates.... nvm my page refreshed. This makes me want to get a low boy even more.
 

theocorals537

Community Member
View Badges
Joined
Feb 2, 2021
Messages
96
Reaction score
66
Location
Massachusetts
Rating - 0%
0   0   0
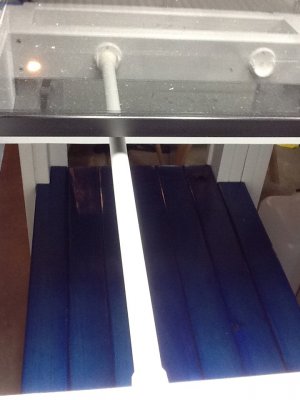
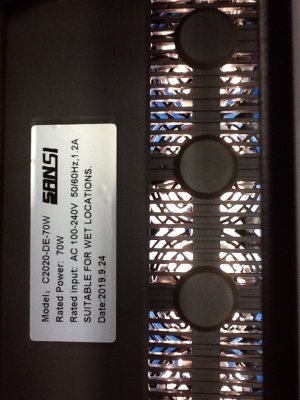
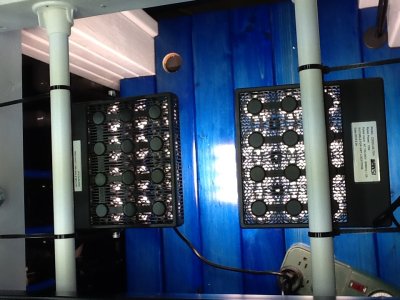
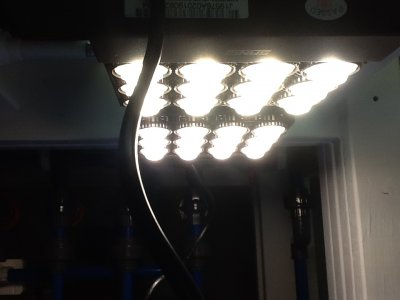
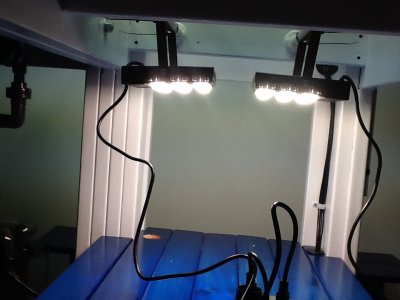
I just received my refugium lights(Sansi 70W) in the mail, and man they are monsters! No fans, cool to the touch, and pump out some serious light! And they're waterproof! I haven't seen anyone use them as of yet for a refugium, but I suspect they will be more than adequate. Suspect one would have been plenty but would like to explore how much Chaeto a fella can grow with serious light power...lol.
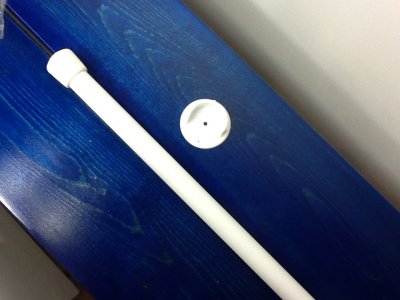
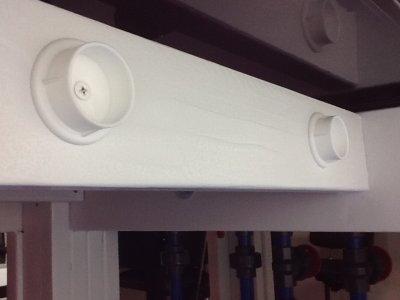
I went with some dow rods, zip ties, and closet hangers as a means to mount them within the stand canopy. A little cord management and I think i'll be able to cross this off my "too do" list.

IMG_2240.JPG IMG_2241.JPG IMG_2243.JPG IMG_2244.JPG IMG_2251.JPG IMG_2250.JPG IMG_2252.JPG
I absolutely love this setup. Coming from a union pipefitter and pipe welder, this piping looks sweet. Keep it up
 
OP
OP
tippin.turtle

tippin.turtle

Active Member
View Badges
Joined
Nov 8, 2019
Messages
220
Reaction score
382
Rating - 0%
0   0   0
Any new updates.... nvm my page refreshed. This makes me want to get a low boy even more.
I'm really enjoying mine. Initially was just going to be a frag tank but quickly changed my mind into adding rock instead. I placed large dry Marco base rock at first but many pieces of that bloomed with turf algae which I had never had before and found it to be impossible to remove. Pulled the majority of that rock out and began gluing my frags to smaller pieces of rock instead. As the corals grow and develop I'll try to fashion a more suitable "aquascape" of sorts. Having only 9 inches of water depth makes this endeavor a bit more challenging and fun at the same time. I'm hoping to achieve something unique and a bit more radical from the "norm".
I never would have imagined how much fun this was going to be when I purchased these tanks.
I hope you find a tank that inspires you as much as these have for me.
 
OP
OP
tippin.turtle

tippin.turtle

Active Member
View Badges
Joined
Nov 8, 2019
Messages
220
Reaction score
382
Rating - 0%
0   0   0
I absolutely love this setup. Coming from a union pipefitter and pipe welder, this piping looks sweet. Keep it up
I appreciate your kind words. This is my first attempt at plumbing and found it most enjoyable. I messed up a few pieces here and there along the way and did some minor revisions of my initial setup. It does everything I want/need it to do and added room for expansion should the need arise. I just wish I had another tank so I had an excuse to plumb more!
 
OP
OP
tippin.turtle

tippin.turtle

Active Member
View Badges
Joined
Nov 8, 2019
Messages
220
Reaction score
382
Rating - 0%
0   0   0
So I just wanted to do an update on my CO2 scrubber for those who have been following or for whomever is curious.
Having the 5 inch canister as a "water trap" plumbed before the CO2 media chamber I was still accumulating moisture in the media chamber; requiring the need to empty more often than I liked.
Having some old pre filter sponges on hand I decided to see if applying that to the inlet aspect of the water trap would help absorb any moisture making its way to the media chamber.
I'm happy to report that by adding the sponge the moisture has been greatly reduced and would recommend this sponge to anyone running this same setup.
So far I've been averaging 30 days before needing to replace the CO2 media with this arrangement.
I'm not sure if this will extend the life of the media but not having to drain excess moisture is a real plus!
IMG_1194.JPG
IMG_1193.JPG
IMG_1195.JPG

1620349227219.png
 
OP
OP
tippin.turtle

tippin.turtle

Active Member
View Badges
Joined
Nov 8, 2019
Messages
220
Reaction score
382
Rating - 0%
0   0   0
So glad you told me about your build page! Keep the updates coming!
You're welcome! Hope my build has been an inspiration and would love to see what you do with yours. I'll make another video at some point in time. I've been trying to grow out what I have, and add more corals as I go. These "Instagram" "internet" tanks take time to develop if you're buying 3/4 inch frags as I do. :) My videos on YouTube have really just been for documenting my tanks progression as corals grow and as a means to show my results with my current regime. Also, some what helpful to the "nay sayers" on forums like this one and others.:p
So many give advice or have opinions, and are quick to tell another that they are wrong or have no idea what they are talking about; with no proof/evidence that they have a successful reef tank of their own. It's truly crazy!;Woot
The one thing I can say about this build which separates it from all my previous tanks is the foresight to foresee possible issues and having the equipment in place to deal with it whenever that need arises. Being able to run carbon, gfo, bio pellets, a refugium for bio media and macro algae. A calcium reactor, dosing pump, secondary pump, and although not the best; a battery backup. All pieces of gear to keep the system humming and the inhabitants happy and healthy. These are all things I could not reasonably include or accommodate in my previous "all in one" tank.
I guess we all want one of those beautiful tanks we see on the internet and I am just as guilty.
I'm hoping to get there someday, even though I only have nine inches of water depth to do it in.
Zoo Meds low boy is unique and I'm hoping to turn mine into something that will make someone scratch their head in disbelief and say "thats amazing"...LOL!:)
Start a build thread if you haven't already. They are fun to revisit from time to time and a great way to share your journey with others.
I appreciate you following along in mine and with any luck; there will be more to come!
 

Razorp

Active Member
View Badges
Joined
Jul 23, 2020
Messages
223
Reaction score
316
Location
nacogdoches
Rating - 0%
0   0   0
You're welcome! Hope my build has been an inspiration and would love to see what you do with yours. I'll make another video at some point in time. I've been trying to grow out what I have, and add more corals as I go. These "Instagram" "internet" tanks take time to develop if you're buying 3/4 inch frags as I do. :) My videos on YouTube have really just been for documenting my tanks progression as corals grow and as a means to show my results with my current regime. Also, some what helpful to the "nay sayers" on forums like this one and others.:p
So many give advice or have opinions, and are quick to tell another that they are wrong or have no idea what they are talking about; with no proof/evidence that they have a successful reef tank of their own. It's truly crazy!;Woot
The one thing I can say about this build which separates it from all my previous tanks is the foresight to foresee possible issues and having the equipment in place to deal with it whenever that need arises. Being able to run carbon, gfo, bio pellets, a refugium for bio media and macro algae. A calcium reactor, dosing pump, secondary pump, and although not the best; a battery backup. All pieces of gear to keep the system humming and the inhabitants happy and healthy. These are all things I could not reasonably include or accommodate in my previous "all in one" tank.
I guess we all want one of those beautiful tanks we see on the internet and I am just as guilty.
I'm hoping to get there someday, even though I only have nine inches of water depth to do it in.
Zoo Meds low boy is unique and I'm hoping to turn mine into something that will make someone scratch their head in disbelief and say "thats amazing"...LOL!:)
Start a build thread if you haven't already. They are fun to revisit from time to time and a great way to share your journey with others.
I appreciate you following along in mine and with any luck; there will be more to come!
I have a build thread for my office tank which is a 36 gallon bowfront with nothing but hang on equipment! I will do one with the low boy as well. It will probably be a while because we have a second child on the way, and i want this build to be done right. Which means saving and finding deals on sumps, plumbing, lighting , skimmers, etc. etc. lol. Very much like you did. I do want to keep mine nice and simple and pretty open space wise. Very little rock, with lots of softies to start and potentially a nice big carpet nem centerpiece.
 
OP
OP
tippin.turtle

tippin.turtle

Active Member
View Badges
Joined
Nov 8, 2019
Messages
220
Reaction score
382
Rating - 0%
0   0   0
Didn't like the commercial options currently available. Most I felt were overpriced and some did not have a round or cone shaped bottom. Obviously, having a round bottom isn't required to culture phytoplankton but having never cultured it before I wanted the most optimum conditions for success.
This is what I was able to piece together and I must say I like it better than what was offered by the retailers. Guess you could say its a "lava lamp" design. I like it! :p
Cost me $150.00 to construct with the 2L boiling flask comprising the bulk of the expense.
It's my "fish room" so I wanted something that was easy to clean, out of the way, and looked ok; not sketchy or weird. :)
This is day 4 of my first culture.

IMG_1400.JPG
IMG_1398.JPG
IMG_1410.JPG
 
Back
Top