Waterbox 35.1 Cube

OP
OP
Jdubyo

Jdubyo

Active Member
View Badges
Joined
Aug 23, 2018
Messages
196
Reaction score
248
Rating - 0%
0   0   0
It looks nice! The rock layout is cool, gives a lot of space for fishes to swim instead of creating a divide.
How much space is there from the front glass to the overflow area in the back?

Thank you! I appreciate that. I am hoping to create a nice home for the fish as well as the coral. :)

The depth is about 13.5 inches excluding the overflow.

Not sure why but the pictures make the rock look a lot closer to the glass than it actually is. Maybe it’s just the glare of the reflection. There is probably about a 2 inch gap between the rock and the glass in the rear and that is the tightest area. Gotta leave room for cleaning!
 

Erik the Red

Active Member
View Badges
Joined
Sep 15, 2020
Messages
159
Reaction score
65
Location
Denmark
Rating - 0%
0   0   0
I’ll definitely follow the updates...and probably steal the rock design as well as soon as I get my tank.

have you already thought about what fish would you like to have in the tank?
 
OP
OP
Jdubyo

Jdubyo

Active Member
View Badges
Joined
Aug 23, 2018
Messages
196
Reaction score
248
Rating - 0%
0   0   0
I’ll definitely follow the updates...and probably steal the rock design as well as soon as I get my tank.

have you already thought about what fish would you like to have in the tank?

My two clowns are definitely being transferred to this tank. I am pretty attached to them. I am thinking of a goby and pistol shrimp but don’t have anything set in stone yet. I am pretty indecisive. :oops:
 
OP
OP
Jdubyo

Jdubyo

Active Member
View Badges
Joined
Aug 23, 2018
Messages
196
Reaction score
248
Rating - 0%
0   0   0
I have gone a little crazy with trying to make this aquascape look organic. I keep adding and adding to try to make it look right but I’m thinking however it turns out this time is how it’s staying. Hopefully it’s going to be covered in corals soon enough anyway... :rolleyes:

618081D9-3AF8-44D7-AA81-45363E7CC884.jpeg


The CaribSea live sand I used for the underside of the aquascape was off color from the rock so you could really tell the difference. I realized I had a bunch of “sand” that came from the rock itself in the bottom of the bin I used to break it up. So I gathered that up in a bucket and started using it for the top.

4078546C-084A-4E29-A6F0-EC6FCD8C652E.jpeg


I kept the top cement consistency like warm maple syrup. Haha that’s the best I can think of. Basically just on the wetter side. It seams to stick a lot better this way. On the sides I had to use a consistency more like toothpaste mostly just due to gravity.

5467ADFD-133F-44B1-AA27-F07A46C05F03.jpeg


This is where I left it. I really hope it stays similar to this once I rinse it off and get it in water but I am really not sure if it will. The sand on top was super small particle size so I am not sure how well it will stay. Either way, I am so done with working with mortar. I am just gonna take it how it is. ;Dead

I am letting it cure for a couple hours. After, I will give it a good rinse to remove any loose sand. Then getting it into a tub to cure and check for phosphates.
 

revhtree

Owner Administrator
View Badges
Joined
May 8, 2006
Messages
49,226
Reaction score
98,070
Rating - 100%
1   0   0
I have gone a little crazy with trying to make this aquascape look organic. I keep adding and adding to try to make it look right but I’m thinking however it turns out this time is how it’s staying. Hopefully it’s going to be covered in corals soon enough anyway... :rolleyes:

618081D9-3AF8-44D7-AA81-45363E7CC884.jpeg


The CaribSea live sand I used for the underside of the aquascape was off color from the rock so you could really tell the difference. I realized I had a bunch of “sand” that came from the rock itself in the bottom of the bin I used to break it up. So I gathered that up in a bucket and started using it for the top.

4078546C-084A-4E29-A6F0-EC6FCD8C652E.jpeg


I kept the top cement consistency like warm maple syrup. Haha that’s the best I can think of. Basically just on the wetter side. It seams to stick a lot better this way. On the sides I had to use a consistency more like toothpaste mostly just due to gravity.

5467ADFD-133F-44B1-AA27-F07A46C05F03.jpeg


This is where I left it. I really hope it stays similar to this once I rinse it off and get it in water but I am really not sure if it will. The sand on top was super small particle size so I am not sure how well it will stay. Either way, I am so done with working with mortar. I am just gonna take it how it is. ;Dead

I am letting it cure for a couple hours. After, I will give it a good rinse to remove any loose sand. Then getting it into a tub to cure and check for phosphates.

It looks great and you won't even notice!
 
OP
OP
Jdubyo

Jdubyo

Active Member
View Badges
Joined
Aug 23, 2018
Messages
196
Reaction score
248
Rating - 0%
0   0   0
A7C8D4D5-1729-4C79-804B-04A306116BC1.jpeg


And we are finally curing! As you can see the sand didn’t stick very well. There is some coverage but quite a bit of the gray mortar is showing. Oh well. I’m ready to get this going.

E5A18E7B-9EB7-44C1-BF91-2DDB456FD7E8.jpeg
 
OP
OP
Jdubyo

Jdubyo

Active Member
View Badges
Joined
Aug 23, 2018
Messages
196
Reaction score
248
Rating - 0%
0   0   0
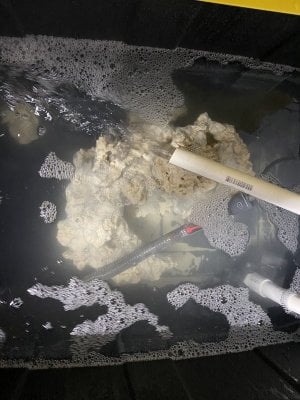
Added a little IM nano skimmer to the curing tub and the water cleared up a lot. Going to give it a couple days and then test for phosphates. I also cleaned out my pump to make sure it’s working well for the new tank! Getting excited. :D
 

JenK

Active Member
View Badges
Joined
Oct 3, 2020
Messages
172
Reaction score
279
Location
Orlando
Rating - 0%
0   0   0
Looks great! I can't wait to see it stocked!! Bet you can't either, LOL! NICE JOB! :cool:
 
OP
OP
Jdubyo

Jdubyo

Active Member
View Badges
Joined
Aug 23, 2018
Messages
196
Reaction score
248
Rating - 0%
0   0   0
Tested for phosphate today.

F51DC04C-8F5A-4D71-B4CF-69B2AA0A63DC.jpeg


This was the second test because I wanted to be sure. I am still a little skeptical. I’m gonna give it a few more days and test again. Maybe get a different phosphate test to go against as well.
 
OP
OP
Jdubyo

Jdubyo

Active Member
View Badges
Joined
Aug 23, 2018
Messages
196
Reaction score
248
Rating - 0%
0   0   0
I have been doing a lot of reading on the DSR method today. I honestly have never come across it until I saw a post about it this morning and the pictures of the 13 month old tank That had used this method were beautiful. I am strongly considering trying this. I would appreciate any input on the DSR method! I am by no means an expert but I would not consider myself a beginner either.
 
OP
OP
Jdubyo

Jdubyo

Active Member
View Badges
Joined
Aug 23, 2018
Messages
196
Reaction score
248
Rating - 0%
0   0   0
Today’s update:

Water is still reading 0 ppm phosphate without changing the original water. I hope it’s true but I don’t want to believe it. I noticed that my reagents expire this month so I ordered some more and also a standard for my hanna checker. Better safe than sorry. :rolleyes:
 
OP
OP
Jdubyo

Jdubyo

Active Member
View Badges
Joined
Aug 23, 2018
Messages
196
Reaction score
248
Rating - 0%
0   0   0
The standard for my Hanna checker arrived and proved my checker to be working accurately.

15AAA47C-63B9-4EA2-B918-7CEF0F20C662.jpeg


The instructions show a +/- 0.08 variance from 1.00 so I’d say it’s pretty spot on even with the added 0.01.

checked the water in the curing tub with fresh reagents.

5D7EDA53-E6F2-47BE-890E-5214778AC362.jpeg


I guess I should have trusted it the first time.

With all the debate over whether or not dry rock leaches phosphates, I couldn’t take the risk. But it does appear that in my case, no phosphates were leached at all. Not a single water change was done in the 1.5 weeks that I had the rock soaking. All I did was manually top off the container with RO water twice.

While it would have been nice to save a few dollars and not bought the standard and new reagents, I don’t regret the decision. Ease of mind is worth the few dollars.
 
Back
Top