Love the start to the aquascape!
Navigation
Install the app
How to install the app on iOS
Follow along with the video below to see how to install our site as a web app on your home screen.
Note: This feature may not be available in some browsers.
More options
You are using an out of date browser. It may not display this or other websites correctly.
You should upgrade or use an alternative browser.
You should upgrade or use an alternative browser.
Vandy's Budget Nuvo 100 EXT Build Thread
- Build Thread
- Thread starter vandy
- Start date
- Tagged users None
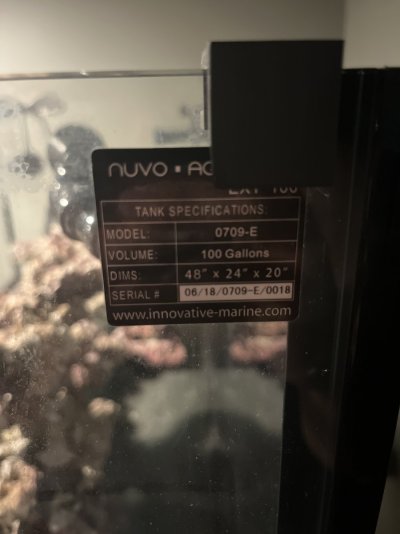
Looking great. I can appreciate all the work you are doing. We have built our cabin and garage. Addition and my husband welds. Great job. What is the outside length of the tank? I thought read 48", but thought their site said less than that.
Shelley
Shelley
You’re right! It’s a tad shorter than 48” at about 47 1/2”, leaving me a small overhang on both sides, which I will be using to overlap the boards I’m skinning with. Won’t be able to notice! I wanted it to sit flush but the sticker on the tank lied to me.. should have measured.Looking great. I can appreciate all the work you are doing. We have built our cabin and garage. Addition and my husband welds. Great job. What is the outside length of the tank? I thought read 48", but thought their site said less than that.
Shelley

Finished the manifold giving me two auxiliary lines (thinking media reactors).
The T to the right will go to one return, and the left one will go through the UV sterilizer, then to the return. I don’t have any flow meters, so I will have to calculate the flow through the UV the old fashion way
Also added a ball valve at the end of the line. Right after, I added a threaded fitting that will allow me to connect 3/4” tubing to the jebao pump
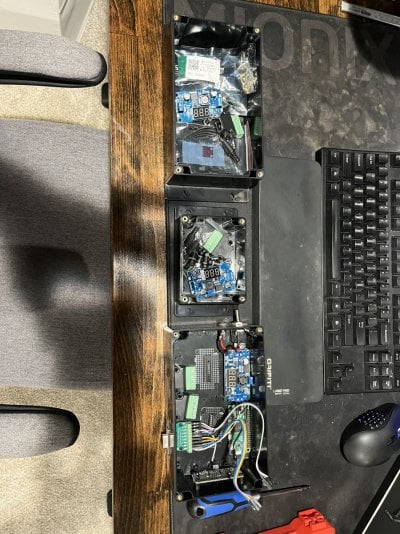
Have fun with the Reefpi! I have been curious about doing one before but have never taken the plunge.Also started on the reefpi controller. I plan on having 4 float switches controlling my skimmer, ato, and some other auxiliary containers, temperature controller, 1 ph and 1 salinity probe and a power strip controller.
I’m looking forward to it too. I left plenty of room for expansion and I’ve always hated buying off the shelf, so the DIY aspect was very appealingHave fun with the Reefpi! I have been curious about doing one before but have never taken the plunge.
More progress on the plumbing.. didn’t realize how painstaking this was (all my tanks in the past were soft tubing, or small 1/2” pvc with no manifolds etc).
One set back I had was I ordered a gate valve off of China that said it would fit 1” PVC.. well it turned out to be a metric fitting and was barely too small. So I had to bite the bullet and get the more expensive ones off BRS.


finished up the UV plumbing as well. After some failed gluings. Tough to see in the pic but there is an extra 90 where there shouldn’t have been.

One set back I had was I ordered a gate valve off of China that said it would fit 1” PVC.. well it turned out to be a metric fitting and was barely too small. So I had to bite the bullet and get the more expensive ones off BRS.
finished up the UV plumbing as well. After some failed gluings. Tough to see in the pic but there is an extra 90 where there shouldn’t have been.
Happy Father’s Day everyone!! Thought I would give some updates.
With the plumbing finished, I set my eyes on the equipment cabinet. I needed to get everything situated so I could hang the lights and get this baby filled!!

The insides

I still need to zip tie everything and clean it up. What’s not shown is the reefpi that is still a work in progress.

And the final shot next to the tank!!
With the plumbing finished, I set my eyes on the equipment cabinet. I needed to get everything situated so I could hang the lights and get this baby filled!!
The insides
I still need to zip tie everything and clean it up. What’s not shown is the reefpi that is still a work in progress.
And the final shot next to the tank!!
I also made some brackets that are going to be acrylic welded into the sump.
First one is a John guest bulkhead baffle for all dosing lines


And then I made a float valve bracket that will eventually send signals back to my reefpi to control my ATO

First one is a John guest bulkhead baffle for all dosing lines
And then I made a float valve bracket that will eventually send signals back to my reefpi to control my ATO
Next step was hanging the lights.. turns out my light hanging kit was much longer than I anticipated because of my low ceilings. Anyone think this will be okay? It’s about 8” from the lid.

The lights look fine! Maybe someone else can chime in as wellNext step was hanging the lights.. turns out my light hanging kit was much longer than I anticipated because of my low ceilings. Anyone think this will be okay? It’s about 8” from the lid.

We have sand!!! I found a good deal on 400lbs of reef rock locally, and it came with 60lbs of Ocean Direct sand. Sold the rock on marketplace and it paid for the sand 3x over.

And finally the moment I’ve been waiting for over a year since I found the tank. Filling it up!!

With it fully filled, found some fitting that were leaking going to try to fix them with pvc glue, but if I can’t, gonna have to cut them out and replace them with new fittings. Peep the box fan that was needed after I forgot to fully secure my UV bulkheads

With it fully filled, found some fitting that were leaking going to try to fix them with pvc glue, but if I can’t, gonna have to cut them out and replace them with new fittings. Peep the box fan that was needed after I forgot to fully secure my UV bulkheads
Similar threads
- Replies
- 8
- Views
- 653
- Replies
- 2
- Views
- 161


