Navigation
Install the app
How to install the app on iOS
Follow along with the video below to see how to install our site as a web app on your home screen.
Note: This feature may not be available in some browsers.
More options
You are using an out of date browser. It may not display this or other websites correctly.
You should upgrade or use an alternative browser.
You should upgrade or use an alternative browser.
Tips and Tricks on Creating Amazing Aquascapes.
- Thread starter Veganbrian
- Start date
-
- Tags
- aquascape
- Tagged users None
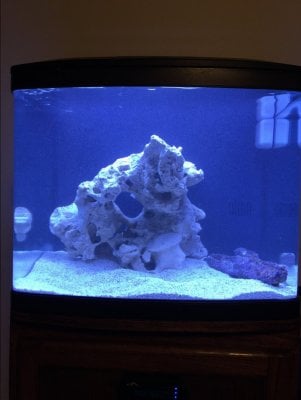
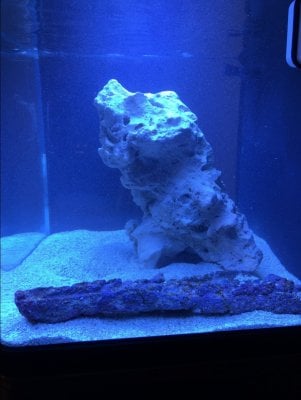
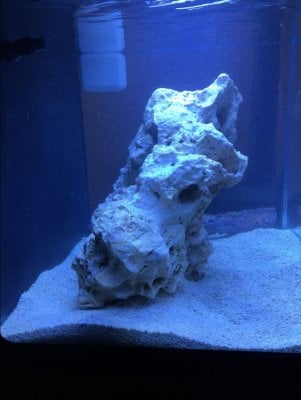
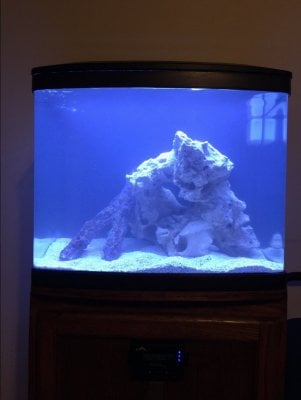
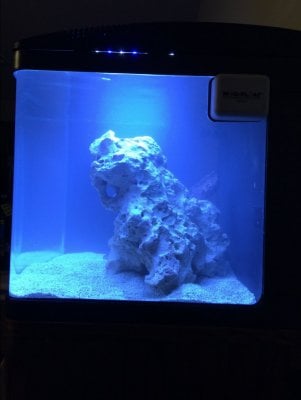
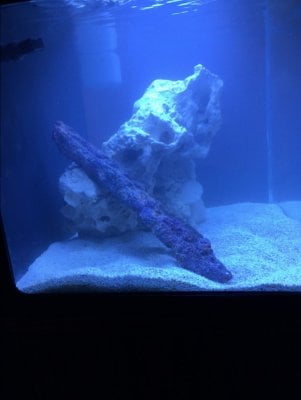
That rock is beautiful, I love the backside of it. It will make it difficult for placing corals though if you were to use the backside of it.This might be my new favorite position. A bit off center. Some negative space to the top right. I might run with this. Thoughts?


I didn't realize the branch had a fork in it. What if you turn the branch so the fork is sticking out instead of the single end? Might also give a little more coral real estate as well.
- Joined
- Sep 10, 2018
- Messages
- 38
- Reaction score
- 153
That rock is beautiful, I love the backside of it. It will make it difficult for placing corals though if you were to use the backside of it.
I didn't realize the branch had a fork in it. What if you turn the branch so the fork is sticking out instead of the single end? Might also give a little more coral real estate as well.
I will have to look into that. I just started to get my first brown algae bloom and got some Cheato in the back. So I still have a couple of weeks till it’s ready for any livestock. Plenty of time to think about it.
Thoughts on this new aquascape?
I'm going to glue it today so I stop fiddling a few pieces are attached with pvc as well. Since it's not fully attached you can be harsh if you want. Constructive criticism is welcome.


I am happy with the footprint, concerns are not enough height variation or height period. I can cancel some of this out by selecting corals that grow to different heights. I do have more both dry and live rock but I think this is a good amount. The plan is for this to be an sps reef. The par 38 will be replaced by a 250w mh. Hopefully the heaters are not a distraction as I have not yet added water to sump. May do a sprinkle of sugar sized sand but probably not.
One final thing is this is unlikely to become a tank with 100s of frags. It will have a few pieces that will hopefully grow into colonies within a year or 2.
I'm going to glue it today so I stop fiddling a few pieces are attached with pvc as well. Since it's not fully attached you can be harsh if you want. Constructive criticism is welcome.
I am happy with the footprint, concerns are not enough height variation or height period. I can cancel some of this out by selecting corals that grow to different heights. I do have more both dry and live rock but I think this is a good amount. The plan is for this to be an sps reef. The par 38 will be replaced by a 250w mh. Hopefully the heaters are not a distraction as I have not yet added water to sump. May do a sprinkle of sugar sized sand but probably not.
One final thing is this is unlikely to become a tank with 100s of frags. It will have a few pieces that will hopefully grow into colonies within a year or 2.
I've downsized from a 2 tank system (120g & 50g cube) to just the 50g cube. I fragged all the good fluorescing corals in the 120g and keep them while selling the colonies and the 120g DT. The game then became making the 50g cube as full of corals and anemones as possible. The floor of the tank is 22"x22", but if I tip the floor up with a 40 degree rock wall I end up with a 22"x 28". That's 130 square inches more space for corals. So that's what I built.
I've done egg crate platforms for my live rock in previous tanks and it's always worked well for me. The egg crate is about 2" above the sand on PVC pipe legs. Now the bottom of the live rock is more available for good bacteria as well as filter feeders that like the dark (sponges, feather dusters and more). The entire bottom of the tank is now 2" deep in sand for all the critters that want sand to play in (sea cucumbers, sea stars, more feather dusters, wrasses, crabs and more). The water in the tank also gets to move around under the rocks and there is far less chance of 'dead spots' in the flow due to rocks sitting in the sand. That means far less chance of issues with cyanobacteria since it doesn't do well with better flow. When I tock down the 120g tank the egg crate that was under the rocks was just over 2 years old and it was well covered with sponges and small white feather dusters.
So this time I've decided to use less rock, and slope the egg crate up from the sand near the front of the tank and up close to the water surface at the back of the tank. That creates a huge void under the egg crate. For now I can see in under the rocks and egg crate and many of the critters seem to enjoy the space. Even all the fish spend some time in the 'cave'. I'm sure that in time the side glass will get covered with coraline algae and other 'stuff' which will reduce and eventually eliminate my ability to see under the egg crate. But I do have a good size cave entrance at the sand toward the front of the tank. And with a flashlight I can still see in pretty well. I also have an Olympus Tough camera that we use when we go snorkeling in the Florida Keys and when I put it in the tank and take flash pictures through the cave entrance, I get to see almost everything.
I also drilled holes in the live rock so frag plugs could fit in with easy. With my original rockscape I had about 50 frags in the rocks. With the new rockscape and drilled holes I have over 100 frags in the rocks. So I effectively have an almost new tank that is full of zoas, rock flower anemones, maxi-mini anemones, and a few lps and sps. The primary driving force behind the tank is to have as much coral that fluoresces well under blue leds as I could get. And so far it looks like it's going to be an outrageous success. In the evening, when it's dark outside and the lights are off in the room, the blue tank looks like Pandora at night (think the movie Avatar). I only wish I could share that look with you, but photos of very blue tanks usually look awful, even when they look incredible to the human eye.
This is the original rockscape in the tank and the start of the egg crate & PVC pipe rockscape platform. You can see how much space is going to be created under the egg crate toward the back of the tank.
 20180904_133514_resized by Ron Lindensmith, on Flickr
I sprayed the egg crate and PVC black with special plastic epoxy paint. I've used it before and it holds up very well underwater.
 20180906_091605 by Ron Lindensmith, on Flickr
This is the FTS after 80% of the rock is in and some of the corals and anemones are in. You can see the cave entrance in the middle of the wall at the sand.

Here you can see what it looks like from the side after most of the rocks are laid out on the egg crate.

In this side view you can see even the clowns enjoy spending some time in the cave.

This was all done a few weeks ago and I've only moved a few corals around. I'll do my best to try and get a good photo of the full tank and get it posted.
I've done egg crate platforms for my live rock in previous tanks and it's always worked well for me. The egg crate is about 2" above the sand on PVC pipe legs. Now the bottom of the live rock is more available for good bacteria as well as filter feeders that like the dark (sponges, feather dusters and more). The entire bottom of the tank is now 2" deep in sand for all the critters that want sand to play in (sea cucumbers, sea stars, more feather dusters, wrasses, crabs and more). The water in the tank also gets to move around under the rocks and there is far less chance of 'dead spots' in the flow due to rocks sitting in the sand. That means far less chance of issues with cyanobacteria since it doesn't do well with better flow. When I tock down the 120g tank the egg crate that was under the rocks was just over 2 years old and it was well covered with sponges and small white feather dusters.
So this time I've decided to use less rock, and slope the egg crate up from the sand near the front of the tank and up close to the water surface at the back of the tank. That creates a huge void under the egg crate. For now I can see in under the rocks and egg crate and many of the critters seem to enjoy the space. Even all the fish spend some time in the 'cave'. I'm sure that in time the side glass will get covered with coraline algae and other 'stuff' which will reduce and eventually eliminate my ability to see under the egg crate. But I do have a good size cave entrance at the sand toward the front of the tank. And with a flashlight I can still see in pretty well. I also have an Olympus Tough camera that we use when we go snorkeling in the Florida Keys and when I put it in the tank and take flash pictures through the cave entrance, I get to see almost everything.
I also drilled holes in the live rock so frag plugs could fit in with easy. With my original rockscape I had about 50 frags in the rocks. With the new rockscape and drilled holes I have over 100 frags in the rocks. So I effectively have an almost new tank that is full of zoas, rock flower anemones, maxi-mini anemones, and a few lps and sps. The primary driving force behind the tank is to have as much coral that fluoresces well under blue leds as I could get. And so far it looks like it's going to be an outrageous success. In the evening, when it's dark outside and the lights are off in the room, the blue tank looks like Pandora at night (think the movie Avatar). I only wish I could share that look with you, but photos of very blue tanks usually look awful, even when they look incredible to the human eye.
This is the original rockscape in the tank and the start of the egg crate & PVC pipe rockscape platform. You can see how much space is going to be created under the egg crate toward the back of the tank.
 20180904_133514_resized by Ron Lindensmith, on Flickr
I sprayed the egg crate and PVC black with special plastic epoxy paint. I've used it before and it holds up very well underwater.
 20180906_091605 by Ron Lindensmith, on Flickr
This is the FTS after 80% of the rock is in and some of the corals and anemones are in. You can see the cave entrance in the middle of the wall at the sand.
Here you can see what it looks like from the side after most of the rocks are laid out on the egg crate.
In this side view you can see even the clowns enjoy spending some time in the cave.
This was all done a few weeks ago and I've only moved a few corals around. I'll do my best to try and get a good photo of the full tank and get it posted.
Wow..this is like level 99 for me. Thanks for sharingI've downsized from a 2 tank system (120g & 50g cube) to just the 50g cube. I fragged all the good fluorescing corals in the 120g and keep them while selling the colonies and the 120g DT. The game then became making the 50g cube as full of corals and anemones as possible. The floor of the tank is 22"x22", but if I tip the floor up with a 40 degree rock wall I end up with a 22"x 28". That's 130 square inches more space for corals. So that's what I built.
I've done egg crate platforms for my live rock in previous tanks and it's always worked well for me. The egg crate is about 2" above the sand on PVC pipe legs. Now the bottom of the live rock is more available for good bacteria as well as filter feeders that like the dark (sponges, feather dusters and more). The entire bottom of the tank is now 2" deep in sand for all the critters that want sand to play in (sea cucumbers, sea stars, more feather dusters, wrasses, crabs and more). The water in the tank also gets to move around under the rocks and there is far less chance of 'dead spots' in the flow due to rocks sitting in the sand. That means far less chance of issues with cyanobacteria since it doesn't do well with better flow. When I tock down the 120g tank the egg crate that was under the rocks was just over 2 years old and it was well covered with sponges and small white feather dusters.
So this time I've decided to use less rock, and slope the egg crate up from the sand near the front of the tank and up close to the water surface at the back of the tank. That creates a huge void under the egg crate. For now I can see in under the rocks and egg crate and many of the critters seem to enjoy the space. Even all the fish spend some time in the 'cave'. I'm sure that in time the side glass will get covered with coraline algae and other 'stuff' which will reduce and eventually eliminate my ability to see under the egg crate. But I do have a good size cave entrance at the sand toward the front of the tank. And with a flashlight I can still see in pretty well. I also have an Olympus Tough camera that we use when we go snorkeling in the Florida Keys and when I put it in the tank and take flash pictures through the cave entrance, I get to see almost everything.
I also drilled holes in the live rock so frag plugs could fit in with easy. With my original rockscape I had about 50 frags in the rocks. With the new rockscape and drilled holes I have over 100 frags in the rocks. So I effectively have an almost new tank that is full of zoas, rock flower anemones, maxi-mini anemones, and a few lps and sps. The primary driving force behind the tank is to have as much coral that fluoresces well under blue leds as I could get. And so far it looks like it's going to be an outrageous success. In the evening, when it's dark outside and the lights are off in the room, the blue tank looks like Pandora at night (think the movie Avatar). I only wish I could share that look with you, but photos of very blue tanks usually look awful, even when they look incredible to the human eye.
This is the original rockscape in the tank and the start of the egg crate & PVC pipe rockscape platform. You can see how much space is going to be created under the egg crate toward the back of the tank.
20180904_133514_resized by Ron Lindensmith, on Flickr
I sprayed the egg crate and PVC black with special plastic epoxy paint. I've used it before and it holds up very well underwater.
20180906_091605 by Ron Lindensmith, on Flickr
This is the FTS after 80% of the rock is in and some of the corals and anemones are in. You can see the cave entrance in the middle of the wall at the sand.

Here you can see what it looks like from the side after most of the rocks are laid out on the egg crate.

In this side view you can see even the clowns enjoy spending some time in the cave.

This was all done a few weeks ago and I've only moved a few corals around. I'll do my best to try and get a good photo of the full tank and get it posted.
- Joined
- Jan 7, 2018
- Messages
- 114
- Reaction score
- 84
Wow so cool. Great work!I've downsized from a 2 tank system (120g & 50g cube) to just the 50g cube. I fragged all the good fluorescing corals in the 120g and keep them while selling the colonies and the 120g DT. The game then became making the 50g cube as full of corals and anemones as possible. The floor of the tank is 22"x22", but if I tip the floor up with a 40 degree rock wall I end up with a 22"x 28". That's 130 square inches more space for corals. So that's what I built.
I've done egg crate platforms for my live rock in previous tanks and it's always worked well for me. The egg crate is about 2" above the sand on PVC pipe legs. Now the bottom of the live rock is more available for good bacteria as well as filter feeders that like the dark (sponges, feather dusters and more). The entire bottom of the tank is now 2" deep in sand for all the critters that want sand to play in (sea cucumbers, sea stars, more feather dusters, wrasses, crabs and more). The water in the tank also gets to move around under the rocks and there is far less chance of 'dead spots' in the flow due to rocks sitting in the sand. That means far less chance of issues with cyanobacteria since it doesn't do well with better flow. When I tock down the 120g tank the egg crate that was under the rocks was just over 2 years old and it was well covered with sponges and small white feather dusters.
So this time I've decided to use less rock, and slope the egg crate up from the sand near the front of the tank and up close to the water surface at the back of the tank. That creates a huge void under the egg crate. For now I can see in under the rocks and egg crate and many of the critters seem to enjoy the space. Even all the fish spend some time in the 'cave'. I'm sure that in time the side glass will get covered with coraline algae and other 'stuff' which will reduce and eventually eliminate my ability to see under the egg crate. But I do have a good size cave entrance at the sand toward the front of the tank. And with a flashlight I can still see in pretty well. I also have an Olympus Tough camera that we use when we go snorkeling in the Florida Keys and when I put it in the tank and take flash pictures through the cave entrance, I get to see almost everything.
I also drilled holes in the live rock so frag plugs could fit in with easy. With my original rockscape I had about 50 frags in the rocks. With the new rockscape and drilled holes I have over 100 frags in the rocks. So I effectively have an almost new tank that is full of zoas, rock flower anemones, maxi-mini anemones, and a few lps and sps. The primary driving force behind the tank is to have as much coral that fluoresces well under blue leds as I could get. And so far it looks like it's going to be an outrageous success. In the evening, when it's dark outside and the lights are off in the room, the blue tank looks like Pandora at night (think the movie Avatar). I only wish I could share that look with you, but photos of very blue tanks usually look awful, even when they look incredible to the human eye.
This is the original rockscape in the tank and the start of the egg crate & PVC pipe rockscape platform. You can see how much space is going to be created under the egg crate toward the back of the tank.
20180904_133514_resized by Ron Lindensmith, on Flickr
I sprayed the egg crate and PVC black with special plastic epoxy paint. I've used it before and it holds up very well underwater.
20180906_091605 by Ron Lindensmith, on Flickr
This is the FTS after 80% of the rock is in and some of the corals and anemones are in. You can see the cave entrance in the middle of the wall at the sand.

Here you can see what it looks like from the side after most of the rocks are laid out on the egg crate.

In this side view you can see even the clowns enjoy spending some time in the cave.

This was all done a few weeks ago and I've only moved a few corals around. I'll do my best to try and get a good photo of the full tank and get it posted.
Ok, my situation.
I'm setting up a in wall 125g mixed reef. I have a 55g already set up for about 3 years, with great older bioloaded rock that is around 15 years old. The rock has no larger pieces, most are hand sized. I have apx 100 lbs or the Bulk Reef Supply's dead white rock that is very popular and around 100 lbs of the established rock. I do want to use some of the rock for a 29g anenome clown tank, a 29g transition tank. (no rock in the 14g new arrival/hospital tank)
Questions -
I hear that the white rock is full of phosphates (I think,.that's it) and other chemicals thst are hard to clean out of the rock. People soak them in water and acid ( again, I think it acid) for weeks or even months. I don't want to start this new build with big issues !
So what do I do there ?
How do I mix the old coraline and established rock with the white, that won't look,....icky ? (my nephew says) or out of place ?
Someday,....the white will mesh together in color and coral's will also cover them, but that can take many months or even years.
So, what's your idea's ?
I just took this FTS of the 50g cube.

- Joined
- Jan 7, 2018
- Messages
- 114
- Reaction score
- 84
I have just rinsed it off with a hose in a bucket for awhile (well water) to get dust off and not had any real issue with BRS white rock stuff. Its pretty clean. Id probably still run it in a tote with a pump for awhile to establish bacterial populations if you are adding it to something existing. If its going into a new tank id just cycle it in tank after a rinse. If you are splitting it up id cycle all your new rock in the new tank and then add what you want to existing setups after its capable of removing ammonia nitrite.Ok, my situation.
I'm setting up a in wall 125g mixed reef. I have a 55g already set up for about 3 years, with great older bioloaded rock that is around 15 years old. The rock has no larger pieces, most are hand sized. I have apx 100 lbs or the Bulk Reef Supply's dead white rock that is very popular and around 100 lbs of the established rock. I do want to use some of the rock for a 29g anenome clown tank, a 29g transition tank. (no rock in the 14g new arrival/hospital tank)
Questions -
I hear that the white rock is full of phosphates (I think,.that's it) and other chemicals thst are hard to clean out of the rock. People soak them in water and acid ( again, I think it acid) for weeks or even months. I don't want to start this new build with big issues !
So what do I do there ?
How do I mix the old coraline and established rock with the white, that won't look,....icky ? (my nephew says) or out of place ?
Someday,....the white will mesh together in color and coral's will also cover them, but that can take many months or even years.
So, what's your idea's ?
Dry Fiji rock was a different outcome due to all the dead stuff on it. Definitely cycle used or dry live rock from the ocean for awhile. When using dry Fiji i had a ton of Phosphates and nitrates for like 3 months but it cleared up with plenty of large water changes.
When setting my aquarium up again after a move and a few yrars out of the hobby i did "cook" my rock. I soaked it in about 10% bleach and water for a week or so and then soaked for another week in RODI with a whole bottle of dechlorinator. I qas super happy with the outcome. Cleanest cycle ive ever done. I will probably do this anytime i set up a new tank now as i have a probably about 300 lbs of dry rock from when i had multiple aquariums.
This is just in my experience though. Different people have different methods.
- Joined
- Oct 2, 2018
- Messages
- 39
- Reaction score
- 59
Lol my wife would agree with you ! Here’s some less blue photos , have some cleaning to do in there just a little lazy today . What’s the red algae called that’s growing in my sandbed?OMG,....START OVER !!!,.....GET OUT OF THE HOBBY !!! lol...
Looking good, but take some pics with less blue in the lighting, so we can see the tank better.
- Joined
- Oct 2, 2018
- Messages
- 39
- Reaction score
- 59
Lol my wife would agree with you ! Here’s some less blue photos , have some cleaning to do in there just a little lazy today . What’s the red algae called that’s growing in my sandbed?
- Joined
- Oct 2, 2018
- Messages
- 39
- Reaction score
- 59
Similar threads
- Replies
- 10
- Views
- 253
- Replies
- 5
- Views
- 233


