Navigation
Install the app
How to install the app on iOS
Follow along with the video below to see how to install our site as a web app on your home screen.
Note: This feature may not be available in some browsers.
More options
You are using an out of date browser. It may not display this or other websites correctly.
You should upgrade or use an alternative browser.
You should upgrade or use an alternative browser.
RODI shut off valve question...
- Thread starter Ruben's Reef
- Start date
- Tagged users None
I have the same unit but don't have an ASO, so I will be following along.
Same here. I want to know how to use this before I buy it. I have the RO buddy and the buddy booster that I am about to hook up.
Crabs McJones
I'm so shi-nay
View Badges

Excellence Award
Reef Tank 365
Article Contributor
Moderator Emeritus
Hospitality Award
Reef Tank 365 Boss
Wisco Reefers
My Tank Thread
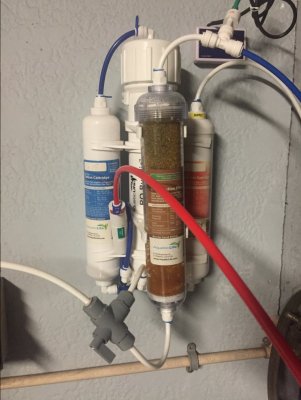
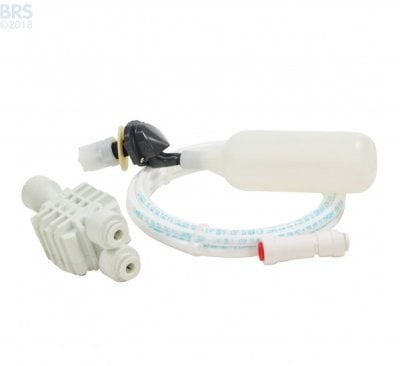
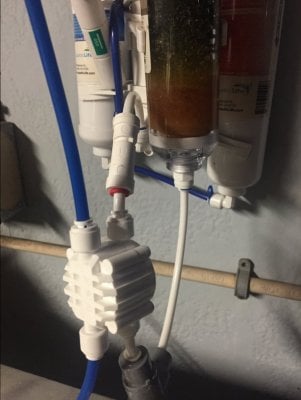
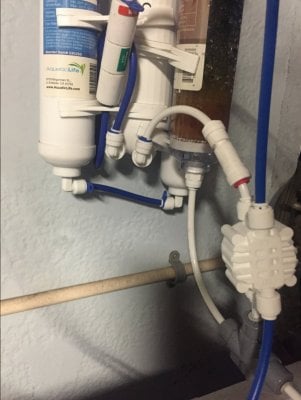
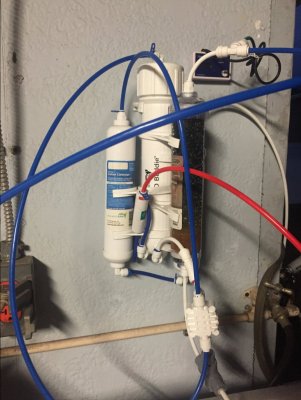
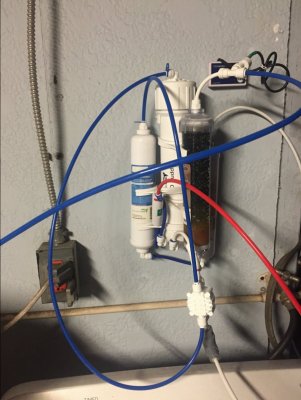
So there are four connections on your shut off valve. One side has screws that you can take out to split the unit in half. The two connections on rhe side where you can see the head of the screw is your product side, the other two on the larger half are your feed side. So basically what you want to do is have the line coming out of your ro membrane that goes to your di cartridge spliced in on that side of the shut off valve, and then the line that goes from your pre filter to your ro membrane gets spliced into the other side of the valve. Double check that you dont already have a check valve installed on this unit, if you dont you'll want to put it between the output on your ro membrane and the shutoff valve to prevent water from backing up into the ro membrane and also creating the pressure in the switch to close off the supply water line. This video from brs probably explains it much better than I can. They're using a different rodi unit but the concept is the same.
So there are four connections on your shut off valve. One side has screws that you can take out to split the unit in half. The two connections on rhe side where you can see the head of the screw is your product side, the other two on the larger half are your feed side. So basically what you want to do is have the line coming out of your ro membrane that goes to your di cartridge spliced in on that side of the shut off valve, and then the line that goes from your pre filter to your ro membrane gets spliced into the other side of the valve. Double check that you dont already have a check valve installed on this unit, if you dont you'll want to put it between the output on your ro membrane and the shutoff valve to prevent water from backing up into the ro membrane and also creating the pressure in the switch to close off the supply water line. This video from brs probably explains it much better than I can. They're using a different rodi unit but the concept is the same.
Thanks Crabs. So the connection has to be made before the DI cartridge? The unit doesn't come with a check valve but the kit came with one. I watched that video before but I will watch it again when I get home cuz on my work computer the YouTube is blocked.
Crabs McJones
I'm so shi-nay
View Badges

Excellence Award
Reef Tank 365
Article Contributor
Moderator Emeritus
Hospitality Award
Reef Tank 365 Boss
Wisco Reefers
My Tank Thread
All the ones I've seen have been before the di cartridge. Whether or not you can put it after the di I am unsureThanks Crabs. So the connection has to be made before the DI cartridge? The unit doesn't come with a check valve but the kit came with one. I watched that video before but I will watch it again when I get home cuz on my work computer the YouTube is blocked.
I will try with the BRS instructions and the @Crabs Mcjones suggestions. Thanks
Crabs McJones
I'm so shi-nay
View Badges

Excellence Award
Reef Tank 365
Article Contributor
Moderator Emeritus
Hospitality Award
Reef Tank 365 Boss
Wisco Reefers
My Tank Thread
awesomeyes it does take a few seconds, but not too long. that’s normal.
Similar threads
- Replies
- 2
- Views
- 109
- Replies
- 8
- Views
- 395
TOP 10 Trending Threads
- Replies
- 24
- Views
- 139
New Posts
-
-
SBB - AFTERPARTY SALE- 3 day event 1750 corals. Our Largest sale ever!
- Latest: SBB Corals


