Yes, I do not think coverage will be an issue!! I am slowly building up a supply of lamps just in case the ban thing comes to fruition any time soon!!!think that will be perfect. The issue with led is coverage and t5 hybrid fixtures fix all of that!

Navigation
Install the app
How to install the app on iOS
Follow along with the video below to see how to install our site as a web app on your home screen.

Note: This feature currently requires accessing the site using the built-in Safari browser.
More options
You are using an out of date browser. It may not display this or other websites correctly.
You should upgrade or use an alternative browser.
You should upgrade or use an alternative browser.
Rectangular Fiji Cube
- Build Thread
- Thread starter REEFRIED!
- Start date


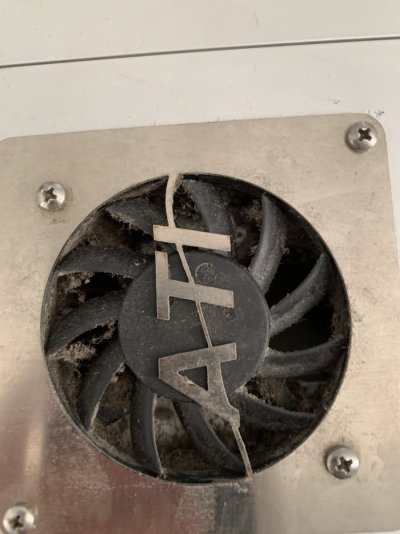
Like I mentioned, I wanted to go T5 for this set up. With some type of blue LED bar for color pop. Fully knowing that a possible ban may come into effect at some point. (I guess then I will switch to LEDs). I knew I wanted an ATI 8 bulb fixture. Worst case I would purchase a new Sunpower or new Powermodule with the LEDs. However I found on here someone selling a used Powermodule for a decent price. I bought it. I also purchased a broken (one ballast) and in rough shape 8 bulb Sunpower from my local reef club, to use as parts. 54w non dimmable ballasts are no longer available from ATI as they seem to develop some sort of “buzzing noise”.
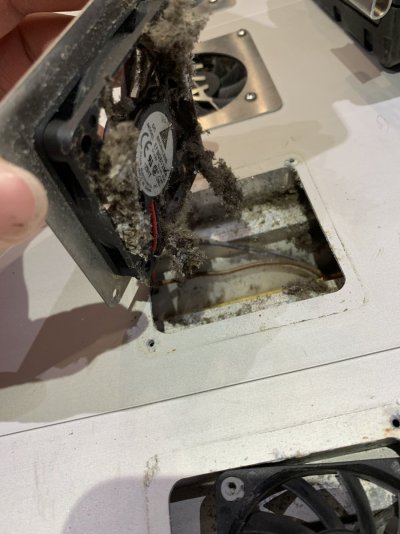
At this point in the build I was not sure if I was going to go with a canopy or not, and was not even sure how I would mount/hang the lights. Either way I definitely wanted to paint the light black. So I started taking the light apart, inspecting and getting it ready to paint. I ordered 8 new reflectors, 4 new fans, and a new fan power supply.
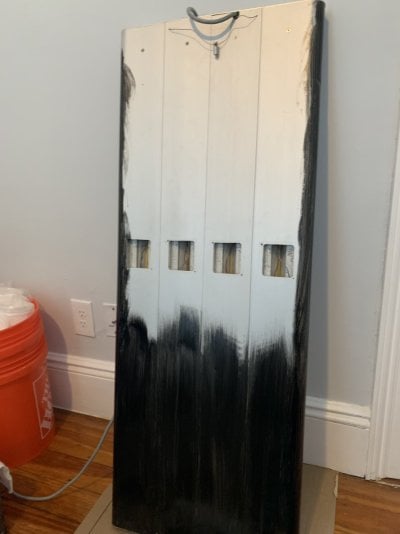
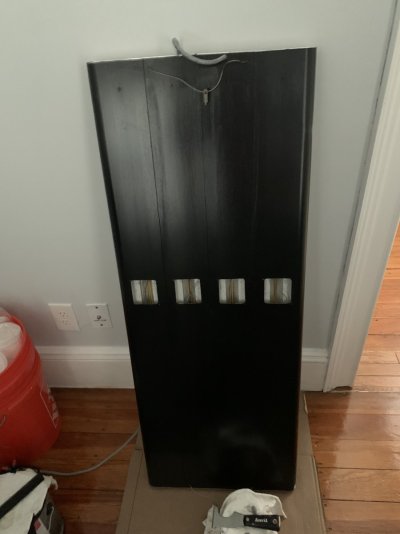
I sanded the frame of the light with 300 grit sandpaper, and applied 3 coats of direct to metal heat resistant paint. It came out great.
At this point in the build I was not sure if I was going to go with a canopy or not, and was not even sure how I would mount/hang the lights. Either way I definitely wanted to paint the light black. So I started taking the light apart, inspecting and getting it ready to paint. I ordered 8 new reflectors, 4 new fans, and a new fan power supply.
I sanded the frame of the light with 300 grit sandpaper, and applied 3 coats of direct to metal heat resistant paint. It came out great.
Attachments
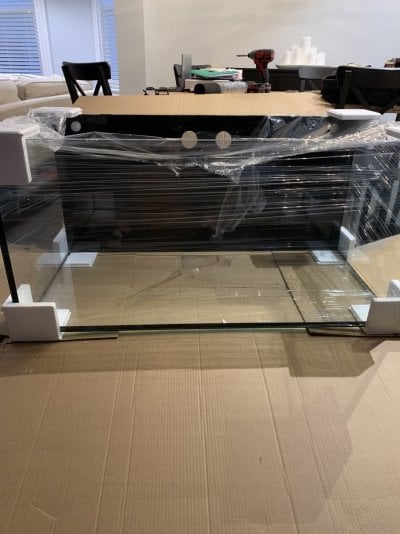
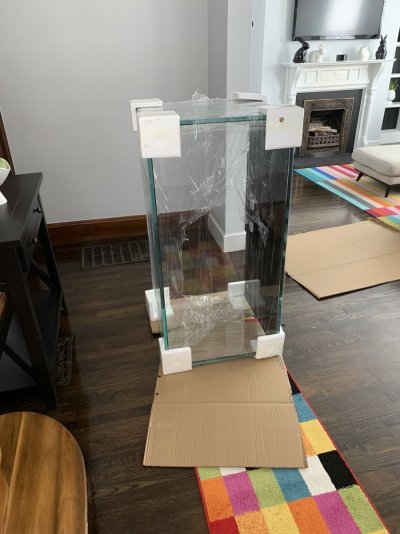
My tank arrived. (The second one!). Shipment went smooth. Waiting for a buddy to come help me lug it to the second floor! Quality is great, low iron glass is perfectly clear, silicone is great.
Attachments
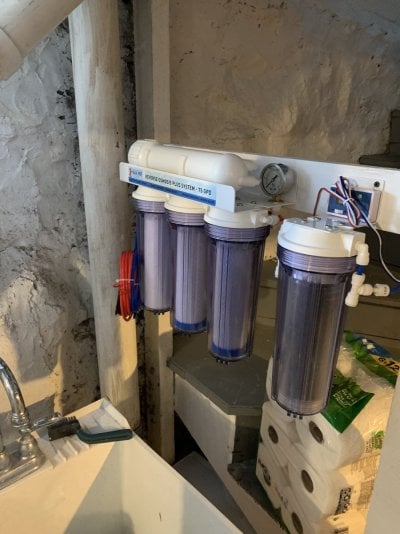
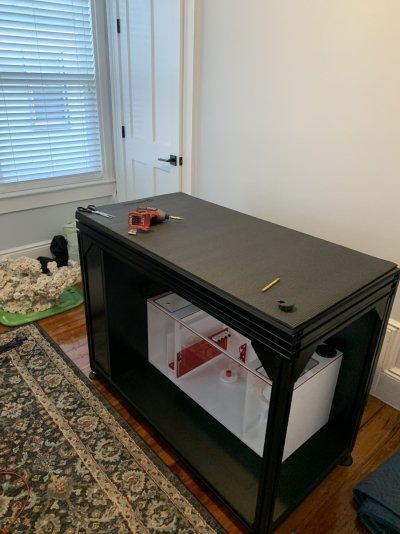
Got the tank upstairs and into place. I believe the tank was about 300-350 pounds but two of us managed it. RO is installed and ready to make water. Plumbing next. Tank came with a small cheesy mat for underneath, I decided to use a 1/4” yoga mat that I bought on Amazon. I will put the small one under the sump.
Attachments
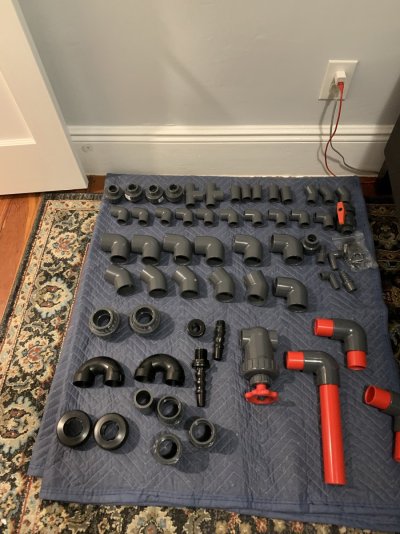
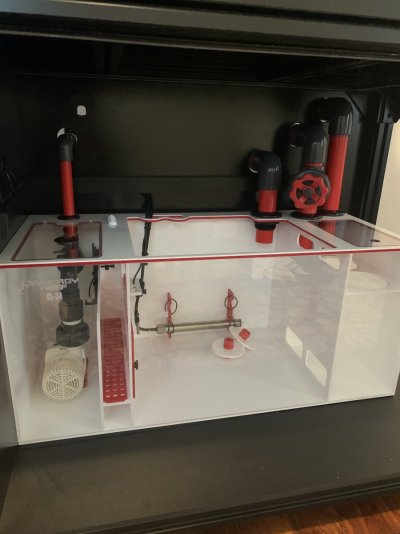
It is time for plumbing! I am taking a chance and not using two unions on each of the 1 1/2” drains. I went over a few different options and the cleanest look is to come up from the sump and 90 right out the back of the stand. This will not allow a union to be placed and will require cutting the pipe to remove the sump. If I get to the point where I change the sump out, I will likely be cutting the pipe anyways. I am really just hoping nothing leaks as I am putting myself in a vulnerable position by doing it this way!
Attachments


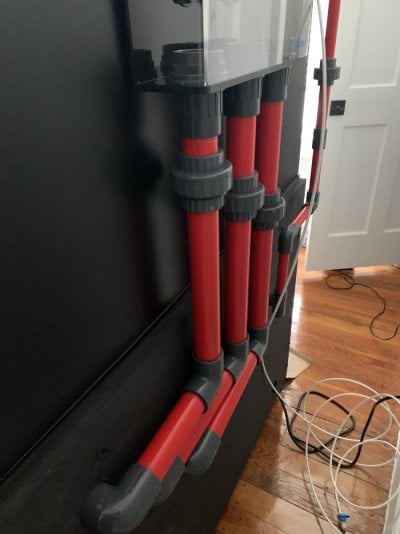
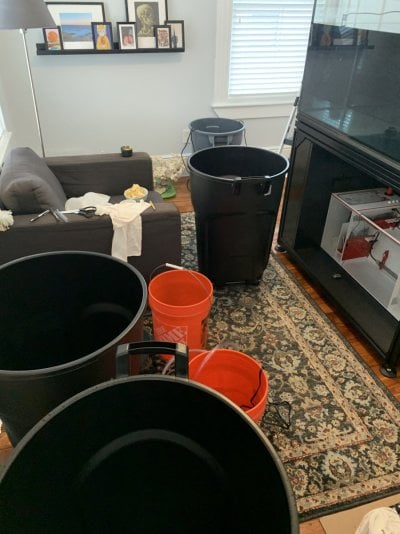
I got the tank plumbed on a Saturday in about 5 hours. Felt good about everything. I used a portable band saw, and a file on every cut. Took time to measure accounting for the extra 1/4” the pipe slides into fittings once glued. Everything came out nice. Now it’s time to leak test. I have decided to fill with rodi, use that to leak test and pump it out to trash barrels to mix. I don’t want to run tap water through the system for leak test and I also don’t want to mix salt in tank
Attachments
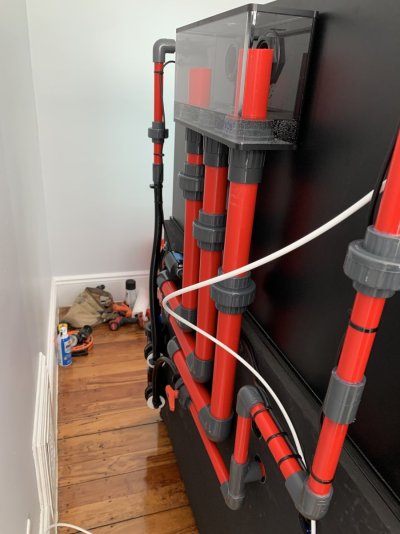

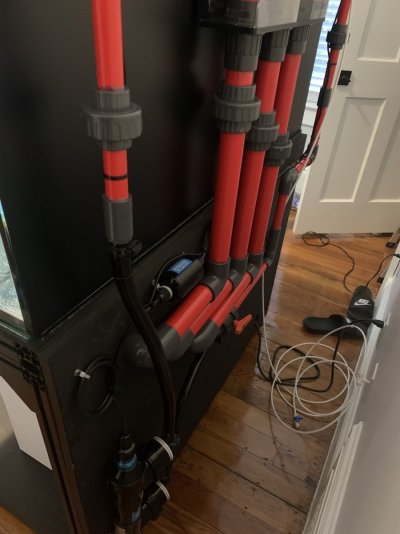
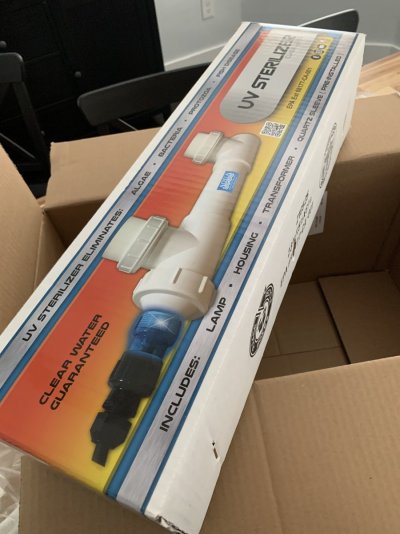
I installed a UV sterilizer. I did not want to do a manifold, and I also did not want to mount it under the tank. It is plumbed directly into my return line and mounted on the back of the stand. I can easily remove the lamp when needed. It has a ball valve which I know is not perfect for dialing in flow rates, but I can attach tubing to that loc line return and time the filling of a bucket for precise flow rates if needed. I also did not buy those overpriced UV mounts. It came out nice.
Attachments
The plumbing leak test was successful. I ran the tank for 3 days with just RODI. I ran a couple bags of carbon to hopefully remove any residual manufacturing oils or anything like that in the pumps or plumbing. Then I pumped the water out into 3 trash barrels to mix salt.
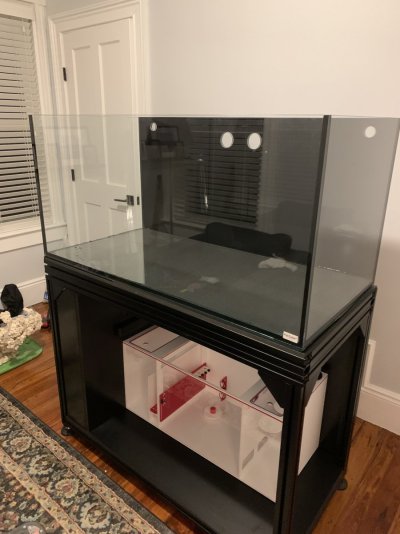
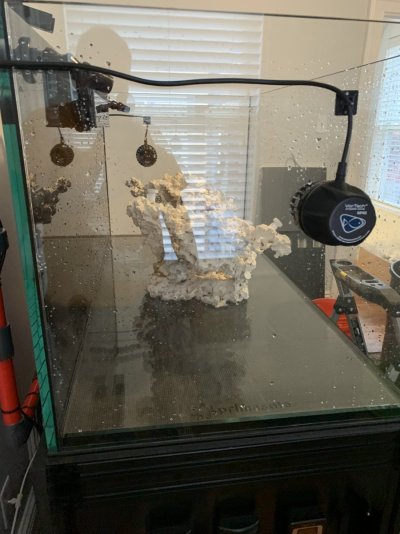
I pushed the tank back against the wall. Not all the way as my ATO reservoir will be behind the tank. I put the rock in and set up the MP40’s. Started to route and organize wires into the controller cabinet portion of the stand. I am using 40 pounds of dry sand that I rinsed in RO, and two bags of Carib Sea live sand.
I pushed the tank back against the wall. Not all the way as my ATO reservoir will be behind the tank. I put the rock in and set up the MP40’s. Started to route and organize wires into the controller cabinet portion of the stand. I am using 40 pounds of dry sand that I rinsed in RO, and two bags of Carib Sea live sand.
Attachments
Similar threads
- Replies
- 26
- Views
- 215

- Replies
- 17
- Views
- 648