$pikes 25 Gallon Goon

SpikesReef

Active Member
View Badges
Joined
Apr 4, 2015
Messages
186
Reaction score
62
Location
Connecticut
Rating - 0%
0   0   0
The Plan- Full Tank Zoa Garden

Innovative Marine NUVO 25 gallon Lagoon AIO
Custom Stand
10g Aqeon Petco special w/ plexi lid ATO reservoir

2x Ai Prime HD16
2x Ai Axis 40 Return Pumps
Jebao SLW-5 Wave Maker
Tunes Osmolator OG - 3155 ATO
2x VCA Random Flow Generators
2x Cobalt Neo-Therm 75w heaters
Inkbird controller

Marco Rock- Reef Save/Foundation/Hybrid
Australian Live Rock Rubble
CaribSea Special Grade Sand (Dry)
MarinePure Bio Balls
*Brightwell Microbacter Dry Rock bacteria starter kit**

HW Marine Mix Reefer Salt (temp)
BRS 6 stage 75 GPD RODI w/ dual carbon and DI
Milwaukee PH Monitor
Red Sea Test kits - Ammonia, Nitrate/trite, Alk, Cal, Mag
Hannah Tester - ULR Phosphate

Started 9/1/2024
 
OP
OP
SpikesReef

SpikesReef

Active Member
View Badges
Joined
Apr 4, 2015
Messages
186
Reaction score
62
Location
Connecticut
Rating - 0%
0   0   0
After a 5 year hiatus it's time to try again.

PAST- I spent 2-3 years building my last system meticulously while trying to save money by doing DIY as much as possible. Working as a commercial glass apprentice came with obvious benefits. I was inpatient after such a long tedious build and went nuts on stocking fish and coral before the ugly stage even started.

I had to go out of town for a week and instructed my Ex Fiancé's father on feeding and pre portioned all food in little sauce cups. I left and there were barely diatoms. I came home to a completely green tank complete with hair algae, bubble algae, Dino's and cyano. Plus most of my fish died and 80% of the frags I bought were toast. I became super discouraged and never made it through the bounce back- selling the tank cheap and kicking my Fiancé to the curb.

I have been semi-keeping up and educating myself on the hobby during these past 5 years and realized most of my mistakes.
***1.Not being patient with the cycle and adding initial live stock***
2. Aiming for Zero nutrients as that was more common
3. Overbuilding my overflow and filtration to accomplish zero nutrients ( insert Dino's etc)
***4. Zero perserverance in the face of challenges.***

Onward- I am older, wiser, married and much MUCH better off financially

I purchased an Innovative Marine 25g Lagoon and most of the stuff needed to get started on September 1st, 2024.

IMG_8215.jpeg
 
OP
OP
SpikesReef

SpikesReef

Active Member
View Badges
Joined
Apr 4, 2015
Messages
186
Reaction score
62
Location
Connecticut
Rating - 0%
0   0   0
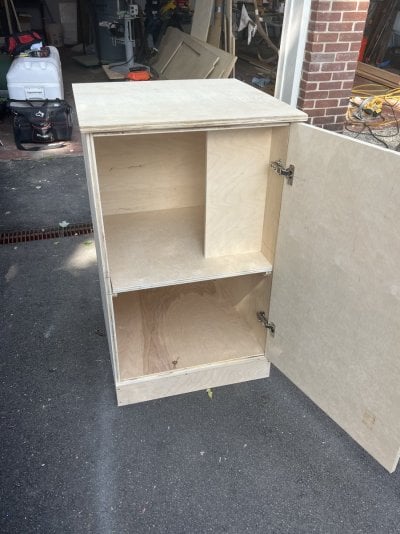
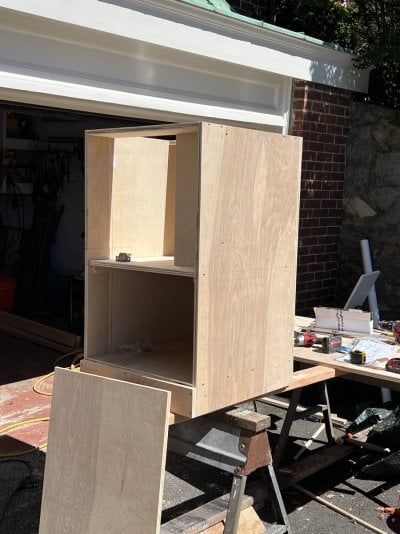
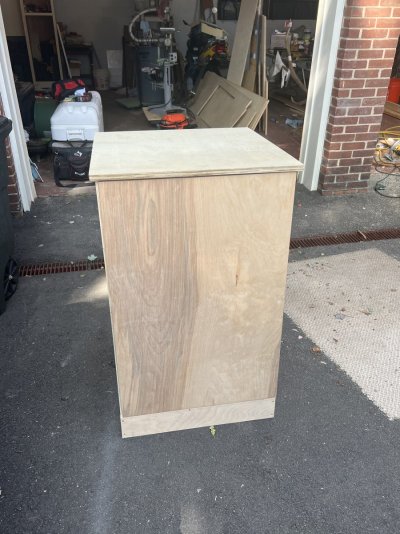
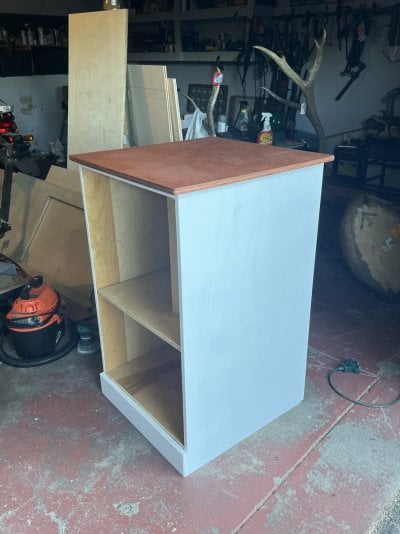
I spent 4-5 months on my last build's stand. Essentially redoing it 4x until it was perfect. I'm going more for function this time around and I want to get water in the tank as soon as possible.

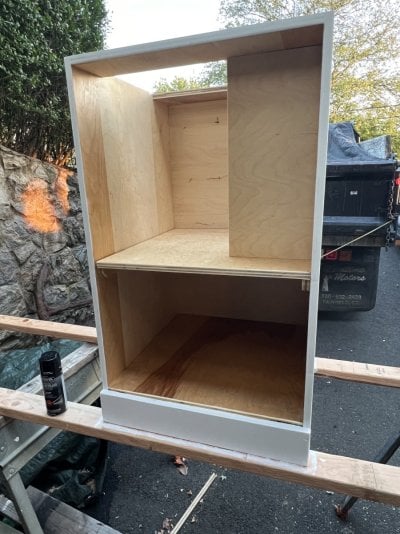
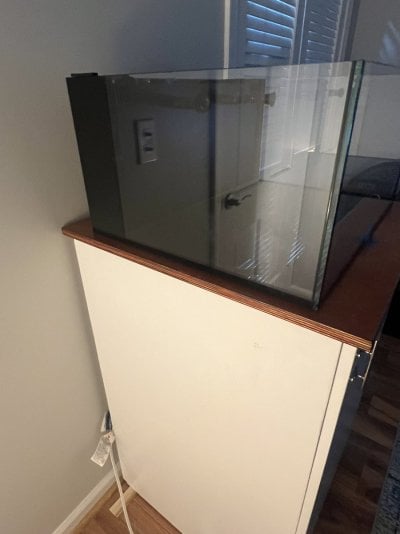
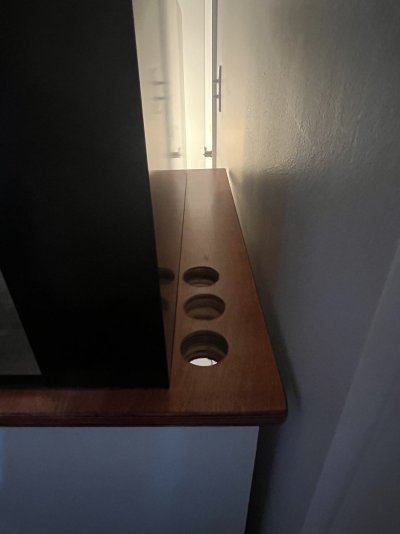
I used 3/4" ply glued and screwed with added bracing at the top and bottom. Opted for a vertical control panel to make it easier to access chords as needed. I will eventually build a removable 2 shelf system for the left side.

I sealed the inside with exterior grade poly and painted the outside with kilz primer + 3 coats of Benjamin Moore Aura semi gloss in Super White to match the trim in the room. Top is stained gun stock and coated several times marine spar varnish. Are I could have added edge banding or a nose trim, but I'm trying to get this thang cycled GOOD before Reefapalooza NY next summer.

Looking back, I think it would have looked cooler if I left the natural wood and just sealed it.

I found a small chrome boat cleat that I'm using as a handle. Thought that s'cute.

I always opt for a stand that's bigger than the footprint of the tank 1. For added working surfaces around the tank and 2. I like to run plumbing, or wires since this is AIO, straight down rather than along the back of the stand. This lets me bring the stand flush to the wall.

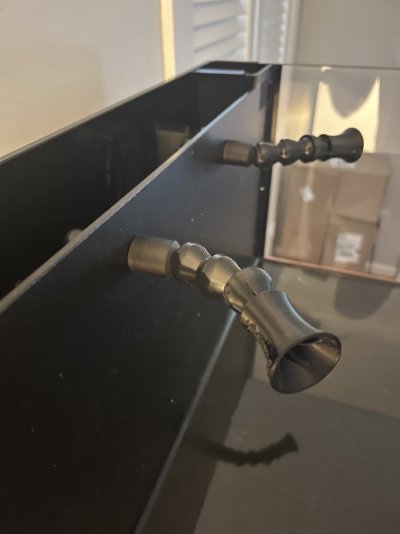
Got the tank on and installed the VCA random flow generators to the locline. They stick out mad far, I'll eventually shorten them a few sections.

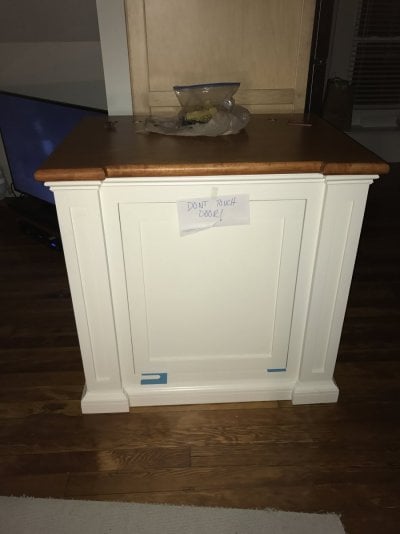
I spent around 6 hours building and painting this stand and I'm happy with the final product, BUT I'd be lying if I said the modern basic look doesn't bother me. Feels like it's missing something.

Photo of my previous stand for reference.

Onward!
IMG_8261.jpeg
IMG_8151.jpeg IMG_8148.jpeg IMG_8150.jpeg IMG_8157.jpeg IMG_8159.jpeg IMG_8263.jpeg IMG_8264.jpeg

IMG_3704.jpeg


IMG_8265.jpeg
 

Gumbies R Us

Certified Noob
View Badges
Joined
Nov 10, 2022
Messages
14,188
Reaction score
24,058
Location
North Georgia
Rating - 0%
0   0   0
I spent 4-5 months on my last build's stand. Essentially redoing it 4x until it was perfect. I'm going more for function this time around and I want to get water in the tank as soon as possible.

I used 3/4" ply glued and screwed with added bracing at the top and bottom. Opted for a vertical control panel to make it easier to access chords as needed. I will eventually build a removable 2 shelf system for the left side.

I sealed the inside with exterior grade poly and painted the outside with kilz primer + 3 coats of Benjamin Moore Aura semi gloss in Super White to match the trim in the room. Top is stained gun stock and coated several times marine spar varnish. Are I could have added edge banding or a nose trim, but I'm trying to get this thang cycled GOOD before Reefapalooza NY next summer.

Looking back, I think it would have looked cooler if I left the natural wood and just sealed it.

I found a small chrome boat cleat that I'm using as a handle. Thought that s'cute.

I always opt for a stand that's bigger than the footprint of the tank 1. For added working surfaces around the tank and 2. I like to run plumbing, or wires since this is AIO, straight down rather than along the back of the stand. This lets me bring the stand flush to the wall.

Got the tank on and installed the VCA random flow generators to the locline. They stick out mad far, I'll eventually shorten them a few sections.

I spent around 6 hours building and painting this stand and I'm happy with the final product, BUT I'd be lying if I said the modern basic look doesn't bother me. Feels like it's missing something.

Photo of my previous stand for reference.

Onward!
IMG_8261.jpeg
IMG_8151.jpeg IMG_8148.jpeg IMG_8150.jpeg IMG_8157.jpeg IMG_8159.jpeg IMG_8263.jpeg IMG_8264.jpeg

IMG_3704.jpeg


IMG_8265.jpeg
I like the color of the stand! I especially love the brown top to it
 
OP
OP
SpikesReef

SpikesReef

Active Member
View Badges
Joined
Apr 4, 2015
Messages
186
Reaction score
62
Location
Connecticut
Rating - 0%
0   0   0
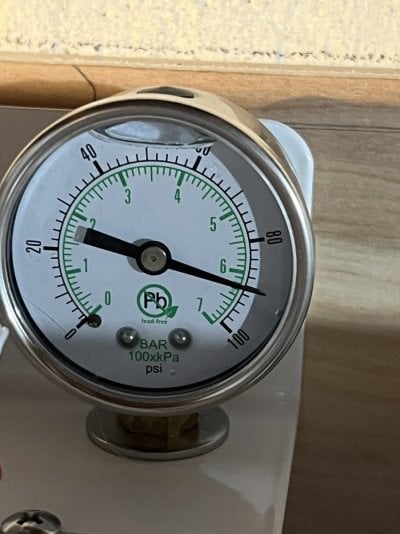
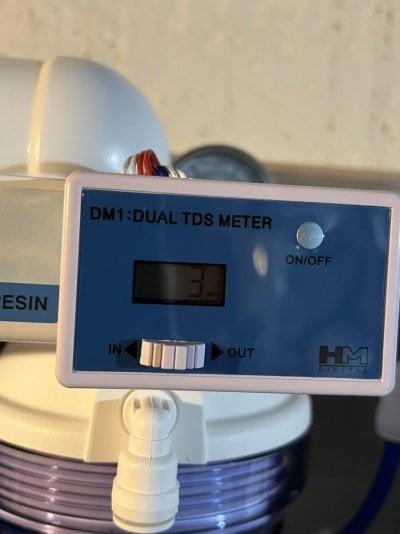
Got the RODI all hooked up via the Landry hook up. This is in my basement right where the main comes in and I'm getting 100 psi if opened all the way. I throttled it to 85 to slow it down a bit. Dual carbon and do canisters should help blast whatever in the city water. Post Membrane I was getting 3 TDS, but that's gone down to around 1 now that I've run 10-20 gallons through it.

I added a split before DI for drinking water which I've yet to use but fully intend to.

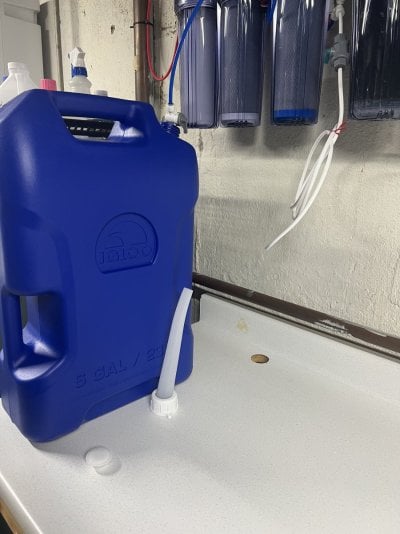
Found this blue Igloo 6g water jug to transport top off water since the tank is on the second floor. Not ideal but this was the best place in my townhome to mount the unit.
IMG_8254.jpeg
IMG_8255.jpeg IMG_8256.jpeg IMG_8274.jpeg
 

Buckeye Hydro

Valuable Member
View Badges
Joined
Dec 17, 2013
Messages
1,524
Reaction score
1,036
Location
Ohio
Rating - 0%
0   0   0
Your pressure is too high - I'd back that down to no more than about 75 psi
 

Buckeye Hydro

Valuable Member
View Badges
Joined
Dec 17, 2013
Messages
1,524
Reaction score
1,036
Location
Ohio
Rating - 0%
0   0   0
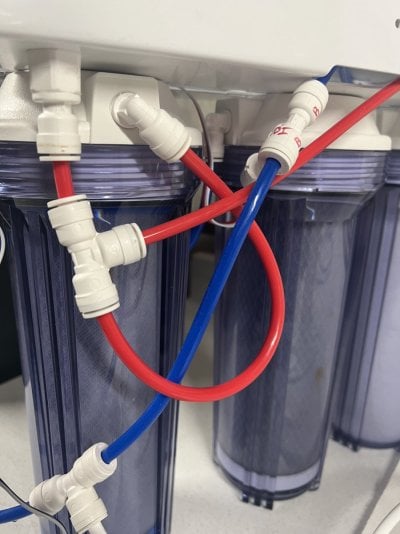
Are those two mixed bed DI cartridges? If so, I'd change the orientation of those two DI housings so the ports are at the front and the back. Link housing 1 to housing 2 with a loop of tubing, and install a TDS meter probe between the two.
 

Buckeye Hydro

Valuable Member
View Badges
Joined
Dec 17, 2013
Messages
1,524
Reaction score
1,036
Location
Ohio
Rating - 0%
0   0   0
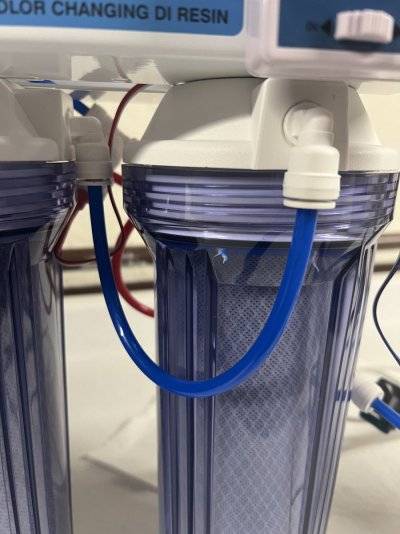
Are you certain that the port on the front of the housing with your blue carbon block in it is the IN port and not the OUT port? Feel free to call us when you are in front of the system if you need help figuring that out.
 
OP
OP
SpikesReef

SpikesReef

Active Member
View Badges
Joined
Apr 4, 2015
Messages
186
Reaction score
62
Location
Connecticut
Rating - 0%
0   0   0
Are those two mixed bed DI cartridges? If so, I'd change the orientation of those two DI housings so the ports are at the front and the back. Link housing 1 to housing 2 with a loop of tubing, and install a TDS meter probe between the two.
What's the reasoning for doing this? I want to know the tds post membrane so I can see when it starts to go and then post dual-doctor know my source water before using it.
 
OP
OP
SpikesReef

SpikesReef

Active Member
View Badges
Joined
Apr 4, 2015
Messages
186
Reaction score
62
Location
Connecticut
Rating - 0%
0   0   0
Are you certain that the port on the front of the housing with your blue carbon block in it is the IN port and not the OUT port? Feel free to call us when you are in front of the system if you need help figuring that out.
I spent a long time weighing this myself as I was converting the 4 stage system to a 6 stage.

How can I know which port is in vs out?

I am getting 1 tdi out of the membrane before di so I figured it was correct.
 

Buckeye Hydro

Valuable Member
View Badges
Joined
Dec 17, 2013
Messages
1,524
Reaction score
1,036
Location
Ohio
Rating - 0%
0   0   0
What's the reasoning for doing this? I want to know the tds post membrane so I can see when it starts to go and then post dual-doctor know my source water before using it.
Your first DI cartridge, in order of water flow, does 99% of the work relative to your second cartridge. Your fist cartridge will wear out first. In order to know when this is happening, you'll need a TDS probe between the housings. When DI1 is shot, move DI2 to position 1, and put a new DI cart in position 2.

Your vendor should have done a better job of configuring that double DI for you.
 
OP
OP
SpikesReef

SpikesReef

Active Member
View Badges
Joined
Apr 4, 2015
Messages
186
Reaction score
62
Location
Connecticut
Rating - 0%
0   0   0
Your first DI cartridge, in order of water flow, does 99% of the work relative to your second cartridge. Your fist cartridge will wear out first. In order to know when this is happening, you'll need a TDS probe between the housings. When DI1 is shot, move DI2 to position 1, and put a new DI cart in position 2.

Your vendor should have done a better job of configuring that double DI for you.
Makes sense, otherwise I'd be guessing or doing a visual on the color change.

Here are some closer pics of how I configured the lines when converting the 4 stage. Does this look like I have the in/out of the third stage reversed?

IMG_8381.jpeg
IMG_8382.jpeg
 

Buckeye Hydro

Valuable Member
View Badges
Joined
Dec 17, 2013
Messages
1,524
Reaction score
1,036
Location
Ohio
Rating - 0%
0   0   0
I spent a long time weighing this myself as I was converting the 4 stage system to a 6 stage.

How can I know which port is in vs out?

I am getting 1 tdi out of the membrane before di so I figured it was correct.
The easiest way to tell is to remove the clear housing sump so you can see the underside of the lid.
Under side of housing lid.png
 

Johnd651

Getting back in after 10+ years
View Badges
Joined
Oct 29, 2019
Messages
2,053
Reaction score
2,653
Location
Utica, NY
Rating - 100%
1   0   0
I spent 4-5 months on my last build's stand. Essentially redoing it 4x until it was perfect. I'm going more for function this time around and I want to get water in the tank as soon as possible.

I used 3/4" ply glued and screwed with added bracing at the top and bottom. Opted for a vertical control panel to make it easier to access chords as needed. I will eventually build a removable 2 shelf system for the left side.

I sealed the inside with exterior grade poly and painted the outside with kilz primer + 3 coats of Benjamin Moore Aura semi gloss in Super White to match the trim in the room. Top is stained gun stock and coated several times marine spar varnish. Are I could have added edge banding or a nose trim, but I'm trying to get this thang cycled GOOD before Reefapalooza NY next summer.

Looking back, I think it would have looked cooler if I left the natural wood and just sealed it.

I found a small chrome boat cleat that I'm using as a handle. Thought that s'cute.

I always opt for a stand that's bigger than the footprint of the tank 1. For added working surfaces around the tank and 2. I like to run plumbing, or wires since this is AIO, straight down rather than along the back of the stand. This lets me bring the stand flush to the wall.

Got the tank on and installed the VCA random flow generators to the locline. They stick out mad far, I'll eventually shorten them a few sections.

I spent around 6 hours building and painting this stand and I'm happy with the final product, BUT I'd be lying if I said the modern basic look doesn't bother me. Feels like it's missing something.

Photo of my previous stand for reference.

Onward!
IMG_8261.jpeg
IMG_8151.jpeg IMG_8148.jpeg IMG_8150.jpeg IMG_8157.jpeg IMG_8159.jpeg IMG_8263.jpeg IMG_8264.jpeg

IMG_3704.jpeg


IMG_8265.jpeg
I've never built with plywood, will screws hold? It doesn't split the ply?
 
OP
OP
SpikesReef

SpikesReef

Active Member
View Badges
Joined
Apr 4, 2015
Messages
186
Reaction score
62
Location
Connecticut
Rating - 0%
0   0   0
I've never built with plywood, will screws hold? It doesn't split the ply?
It can, but if you pre drill you will have zero issues. The screws will hold everything in place as the glue does the bulk of the work. Then, later the screws keep the individual ply's together. For a tank of this size this is more than enough. A bigger 1000+lb tank I'd probably double, or even triple layer the verticals so they are extra thick. Either way it's much cleaner than using 2x luber.
 
Last edited:
OP
OP
SpikesReef

SpikesReef

Active Member
View Badges
Joined
Apr 4, 2015
Messages
186
Reaction score
62
Location
Connecticut
Rating - 0%
0   0   0
Can confirm- per the advice from Buckeye Hydro - I had the third stage of my rodi canister reversed between In-Out. It's big to offer advice to someone who is using a competitors system, I'll be purchasing any future fittings or components from Buckeye.
 

Johnd651

Getting back in after 10+ years
View Badges
Joined
Oct 29, 2019
Messages
2,053
Reaction score
2,653
Location
Utica, NY
Rating - 100%
1   0   0
It can, but if you pre drill you will have zero issues. The screws will hold everything in place as the glue does the bulk of the work. Then, later the screws keep the individual ply's together. For a tank of this size this is more than enough. A bigger 1000+lb tank I'd probably double, or even triple layer the verticals so they are extra thick. Either way it's much cleaner than using 2x luber.
Ahh.. the glue makes sense.

Whats wrong with 2x, I can park a tractor trailer on my 15g AIO stand now. :beaming-face-with-smiling-eyes:

Pic here prior to wrapping and finishing.

 
OP
OP
SpikesReef

SpikesReef

Active Member
View Badges
Joined
Apr 4, 2015
Messages
186
Reaction score
62
Location
Connecticut
Rating - 0%
0   0   0
Ahh.. the glue makes sense.

Whats wrong with 2x, I can park a tractor trailer on my 15g AIO stand now. :beaming-face-with-smiling-eyes:

Pic here prior to wrapping and finishing.

Nothing wrong with 2x4 at all, especially from a strength point. I think you'd be able to park a whole truck stop worth of tractor trailers on top of your stand lol. I have a small house and having that extra room to store all the reef keeping gear is essential. Same reason I made the stand bigger from to back by like 7" and side to side by another 2"ish. Plus the added benefit of a working space when testing water, etc.

Think of it like this - where you have 2x8's - thedoubled up 3/4" on mine is only 1-1/2". Thats 6"+ of lost real estate. Plus the sides that's another 3"+ in both directions vertically from the 2x4.

Another way to look at it is standard kitchen cabinets are basic 3/4" boxes at their core, with huge cut outs for doors and drawer, usually with no back. These can hold up fat chonks of thick granite no problem.

My design has a full back and a shelf that is screwed to all sides with extra supports underneath. Plus the base which has double up framing and cross braces underneath.

I did a bad job taking pics of the cabinet build because I was rushing to get it don't in a weekend using my old man's wood shop.

How do you feel about the back chamber on the 15g? I feel like the IM AIO have smaller compartments thank competitors. but I like that this maximizes display real estate.
 
Back
Top