IM 100 EXT Setup Question

Cody000125

Active Member
View Badges
Joined
Mar 13, 2023
Messages
116
Reaction score
114
Location
Murrieta
Rating - 100%
1   0   0
Hi All!

I recently got an IM 100 EXT and was curious how people are setting these up. I want to have it against a wall, but after setting up the plumbing is it safe to push it a couple feet into place? I was curious how others set theirs up or if they used any tools that make it easier to push/roll it into place. Any input would be appreciated, thanks!
 

BubblesandSqueak

Valuable Member
View Badges
Joined
May 8, 2023
Messages
1,739
Reaction score
3,120
Location
Maine
Rating - 0%
0   0   0
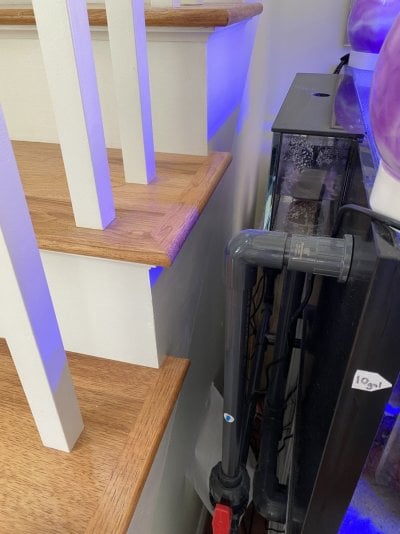
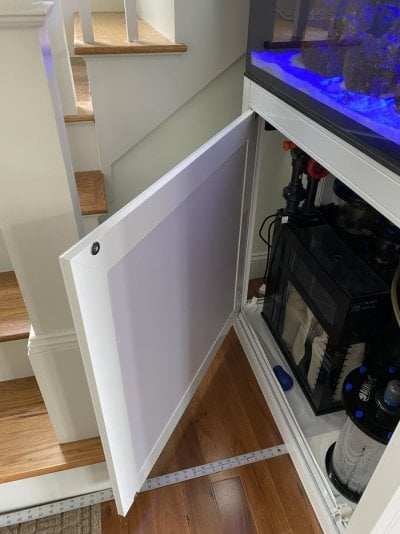
Is there enough room to route and screw in the plumbing with it against the wall?
There was for me.

IMG_2549.jpeg
 

BubblesandSqueak

Valuable Member
View Badges
Joined
May 8, 2023
Messages
1,739
Reaction score
3,120
Location
Maine
Rating - 0%
0   0   0
I’ll also add that if there wasn’t enough room that you needed to plumb then push it against the wall, what would you do if you had a leaking fitting? I don’t think I’d ever trust ANY stand sliding it with a few hundred pounds on top. Much easier to shim the stand for level, then place the tank on top and re-check. I think I slid my fittings up from inside the stand.
 
OP
OP
C

Cody000125

Active Member
View Badges
Joined
Mar 13, 2023
Messages
116
Reaction score
114
Location
Murrieta
Rating - 100%
1   0   0
I’ll also add that if there wasn’t enough room that you needed to plumb then push it against the wall, what would you do if you had a leaking fitting? I don’t think I’d ever trust ANY stand sliding it with a few hundred pounds on top. Much easier to shim the stand for level, then place the tank on top and re-check. I think I slid my fittings up from inside the stand.
That's a good point. Appreciate the pictures! I'll remove the tank, get it setup against the wall and then do the plumbing.
 

nickng

Active Member
View Badges
Joined
Apr 20, 2023
Messages
460
Reaction score
339
Location
Boston
Rating - 0%
0   0   0
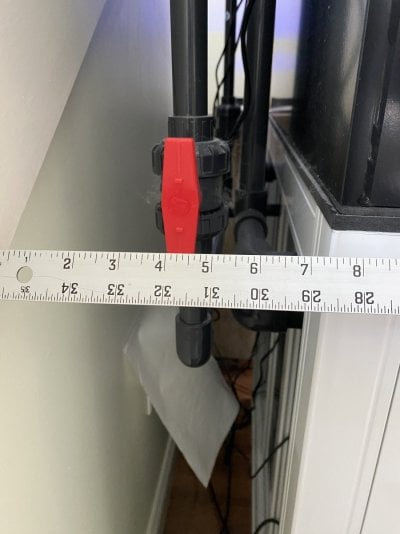
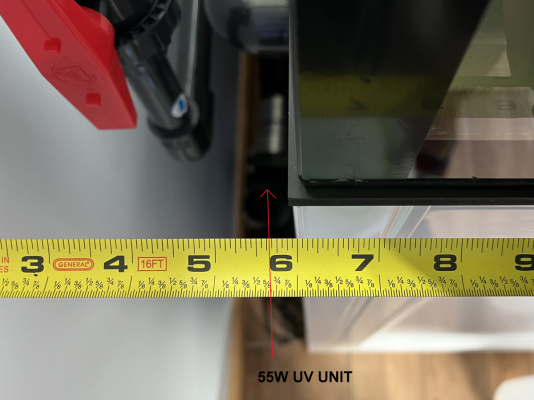
Hi, I have the IM100 EXT as well. I placed the stand at exactly 6 inches from the wall and afterwards placed the tank on top and finally shimmed the stand to get everything level. Once all that's done there's just about enough space to attach all the plumbing. Also 6 inches of space from the wall allows me to put a 50W UV steriliser on the floor space behind the stand.

If the plumbing was already assembled and attached to the tank, it's possible to move the tank and stand closer to the wall by another 0.5 inch. The distance of the stand from the wall will be just under 5.5inches. However that will make it hard or impossible to remove the return plumbing that is screwed onto the back wall of the tank.
 

Attachments

  • Untitled.png
    Untitled.png
    1.1 MB · Views: 47
  • Untitled1.png
    Untitled1.png
    686.4 KB · Views: 39

SumpinFishy

Community Member
View Badges
Joined
May 18, 2024
Messages
40
Reaction score
48
Location
Troy, Mi
Rating - 0%
0   0   0
So glad I found this, I was about to ask as I am getting the IM 100 EXT. I have to water test etc.. but I was thinking more along 10" from wall. Concerned that if I need to adjust anything it would be good to have space to reach behind. I think I might still add a little extra. 6" just seems tight.
 

code4

Valuable Member
View Badges
Joined
May 3, 2015
Messages
1,634
Reaction score
2,528
Location
wyoming
Rating - 0%
0   0   0
How did everyone get it to be quiet. Driving me nuts.
 

nickng

Active Member
View Badges
Joined
Apr 20, 2023
Messages
460
Reaction score
339
Location
Boston
Rating - 0%
0   0   0
So glad I found this, I was about to ask as I am getting the IM 100 EXT. I have to water test etc.. but I was thinking more along 10" from wall. Concerned that if I need to adjust anything it would be good to have space to reach behind. I think I might still add a little extra. 6" just seems tight.
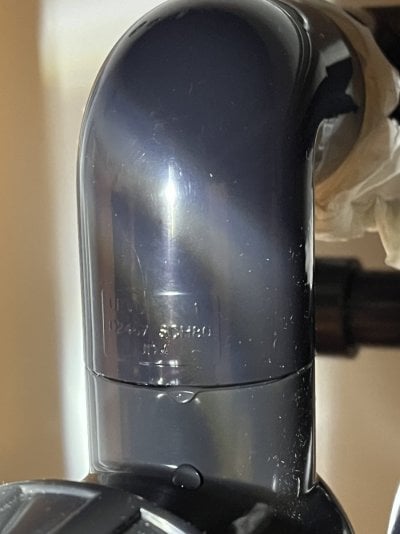
FYI, I had to take apart the plumbing to fix a defective drain pipe. 6 inches of space is just enough to take the entire plumbing out, any less it will be impossible.
 

BubblesandSqueak

Valuable Member
View Badges
Joined
May 8, 2023
Messages
1,739
Reaction score
3,120
Location
Maine
Rating - 0%
0   0   0
FYI, I had to take apart the plumbing to fix a defective drain pipe. 6 inches of space is just enough to take the entire plumbing out, any less it will be impossible.
that bad and great news for everyone that wants to place a tank closer to the wall and for your re-work. My molding to tank is 7.5" but 8.5" to wall. did you take the door off to help getting inside?
 

SPS2020

2500 Club Member
View Badges
Joined
Jun 24, 2020
Messages
2,511
Reaction score
6,125
Location
NC
Rating - 100%
5   0   0
I did all my plumbing prior to putting in place. I have unions and ball valves everywhere. Once plumbed, set your tank on a couple of sawhorses (or the floor) put the stand in place, then set the tank on top and connect your unions. Fill with water and salt. :) You can see my efforts in my build thread.
 

nickng

Active Member
View Badges
Joined
Apr 20, 2023
Messages
460
Reaction score
339
Location
Boston
Rating - 0%
0   0   0
that bad and great news for everyone that wants to place a tank closer to the wall and for your re-work. My molding to tank is 7.5" but 8.5" to wall. did you take the door off to help getting inside?
Nope I didn't need to take my door out. In fact, the side door was 3/4 open only. I did find that I had to take it out through the side door. I have a fleece roller filter in the filter area of the RFS sump blocking the font portion of the stand.
 

Tuffyyyyy

2500 Club Member
View Badges
Joined
Aug 16, 2016
Messages
2,611
Reaction score
3,141
Location
BHM
Rating - 0%
0   0   0
Btw anyone with quick fix ideas for a small leak at a PVC joint of the drain section. Will dabbing some Oatley hot blue PVC glue work? or JB water weld? or use a self fusing silicone tape or weldon epoxy https://weldon.com/products/810-a-b-kit/
How small is it? If it's a single drip every few minutes I've always just let salt creep fill the gap over time (happens pretty quickly).
 

BubblesandSqueak

Valuable Member
View Badges
Joined
May 8, 2023
Messages
1,739
Reaction score
3,120
Location
Maine
Rating - 0%
0   0   0
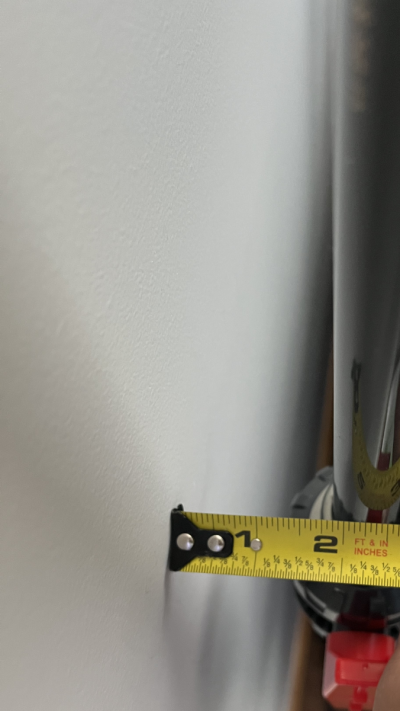
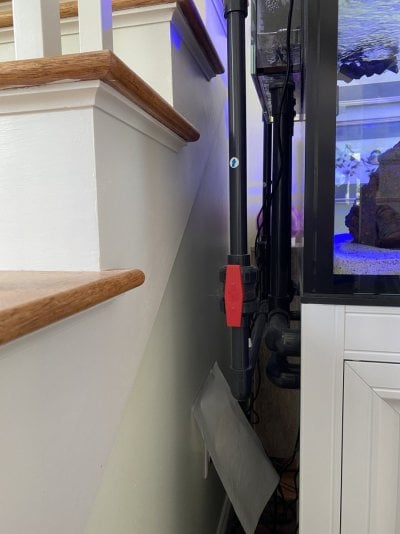
This is an old pic right? I swear I looked at this 100x when I was trying to figure out the placement for my EXT100
so that pic is measuring from my stair molding to the tank. the actual wall is another inch away. these pics might show it better. My floor molding to stand is 8", wall is 8.5", then the stair riser molding is 7.5"The over flow box is 4" from the stair. the valve sits right at the diagonal nook. And 18" from the stairs on the side. so I can get inside OK. The other side is 18" from a full wall.

IMG_2969.jpeg IMG_2970.jpeg IMG_2972.jpeg
 

nickng

Active Member
View Badges
Joined
Apr 20, 2023
Messages
460
Reaction score
339
Location
Boston
Rating - 0%
0   0   0
How small is it? If it's a single drip every few minutes I've always just let salt creep fill the gap over time (happens pretty quickly).
About one drop every 2 minutes. I want to avoid salt creep as much as possible. For now I’ll try the self-sealing silicone tape. If that fails I’ll fabricate a pvc ring to go around the leaking joint and glue that in permanently. Got the idea from this product… “leak b gone”

I am going to message Innovative Marine and suggest they include a couple of these with the complete tank set!!
 
Back
Top