I’ve been doing this how long? Let’s try this again. My IM SR-120 Build.

icedgxe

Well-Known Member
View Badges
Joined
Jun 22, 2008
Messages
581
Reaction score
350
Rating - 0%
0   0   0
If you’re here, strap yourself in for a boring ride haha. May the odds be ever in your favor if you choose to continue reading.

I’ve found myself setting up a new tank yet again. It seems like I’ve been doing this a lifetime now. A little background on my previous tanks first. I warned you…can’t say otherwise. It all started with a 60g freshwater tank that changed several times over its life. Then shortly after setting that up, my first saltwater tank was born. A 90g with compact fluorescent lighting and many learning curves lol. I ran both at the same time, but within a year or so, we moved to a new house and my 125g was born. I moved the freshwater (Mbuna Cichlids) to the new house as well. Even with several issues through its life, it was by far my most successful reef. Life happened and I broke that tank down after about 5 or so years. The cichlid tank stayed running for a few years after that and it too was dismantled.

Fast forward a few years and my wife gave me a IM Nuvo 10 for my birthday. I set it up when we moved to a new city and were in our apartment waiting for our house to be built. It was my first nano and was pretty successful. I still have that tank running as an observation tank to this day. It’s about 7 1/2 years old now. I knew that I was going upgrade once the new house was done so I started gathering some equipment such as a skimmer etc. in preparation for a new tank. About 8 months after moving into the new house, I set up a Cadlights Versa 42g. I was pretty impressed with the system and it did pretty well. I kept it pretty simple and had good results. After 3 years, our first child, and then COVID, we made the decision to move back home closer to family. I sold the 42g, kept a few corals I wanted, and transferred them into the Nuvo 10 with a single piece of rock.

Once settled in the new house, the search began for the next tank. With a child and a busy life, I wanted to get back to basics and keep things simpler. The KISS method fits my lifestyle well. With this in mind, I decided to go with an AIO and landed on the IM SR-80. This is the tank I have running currently and I love it for the most part. It’s been pretty successful for the level of attention I’ve given it. Back in November, my wife and I started discussing rearranging the house as we don’t really ever use the formal dining room. We had originally thought about putting the SR-80 there, but ultimately decided against it and we actually finished decorating the dining room in November of ‘22. Well, back to the original idea of putting a tank in the dining room, removing the table, and making it a sort of reading, aquarium, relax with a beer room. We should have listened to our original instincts. Lesson: go with your gut. Now, the 80’s only been running for a couple of years and the thought of breaking it down, moving it, and setting it all up in the same day was not appealing to me. I spoke to my wife and we ultimately decided a new tank would make it much easier. Usually I would be really excited at the notion, but the work involved along with disturbing the stability of the inhabitants had me nervous/unsure.

Que the shopping for a new tank. There were tons of Black Friday sales going on and I had a few tanks in mind, but I finally decided on an IM SR-120. I thought about going back to a sumped system, but have really been enjoying the simplicity that an AIO gives me. Back to basics is the aim for me. Enough talking, here are a few pictures of previous setups and I’ll start updating the thread with the new build soon.

125g

IMG_8737.jpeg


NUVO 10

IMG_1206.jpeg


Versa 42g

IMG_0418.jpeg


SR-80

IMG_7801.jpeg
 
Last edited:

Gumbies R Us

Certified Noob
View Badges
Joined
Nov 10, 2022
Messages
14,188
Reaction score
24,058
Location
North Georgia
Rating - 0%
0   0   0
If you’re here, strap yourself in for a boring ride haha. May the odds be ever in your favor if you choose to continue reading.

I’ve found myself setting up a new tank yet again. It seems like I’ve been doing this a lifetime now. A little background on my previous tanks first. I warned you…can’t say otherwise. It all started with a 60g freshwater tank that itself changed several time. Then shortly after setting that up, my first saltwater tank was born. A 90g with compact fluorescent lighting and many learning curves lol. I ran both at the same time. Within a year or so, we moved to a new house and my 125g was born. I moved the freshwater (albums Cichlids) to the new house as well. Even with several issues through its life, it was by far my most successful reef. Life happened and I broke that tank down after about 5 or so years. The cichlid tank stayed running for a few years after that and it too was dismantled.

Fast forward a few years and my wife gave me a IM Nuvo 10 for my birthday. I set it up when we moved to a new city and were in our apartment waiting for our house to be built. It was my first nano and was pretty successful. I still have that tank running as an observation tank to this day. It’s about 7 1/2 years old now. I knew that was going upgrade once the new house was done so I started gathering some equipment such as a skimmer etc. in preparation for a new tank. About 8 months after moving into the new house, I set up a Cadlights Versa 42g. I was pretty impressed with the system and it did pretty well. I kept it pretty simple and had good results. After 3 years, our first child, and then COVID, we made the decision to move back home closer to family. I sold the 42g, kept a few corals I wanted, and transferred them into the Nuvo 10 with a single piece of rock.

Once settled in the new house, the search began for the next tank. With a child and a busy life, I wanted to get back to basics and keep things simpler. The KISS method fits my lifestyle well. With this in mind, I decided to go with an AIO and landed on the IM SR-80. This is the tank I have running currently and I love it for the most part. It’s been pretty successful for the level of attention I’ve given it. Back in November, my wife and I started discussing rearranging the house as we don’t really ever use the formal dining room. We had originally thought about putting the SR-80 there, but ultimately decided against it and we actually finished decorating the dining room in November of ‘22. Well, back to the original idea of putting a tank in the dining room, removing the table, and making it a sort of reading, aquarium, relax with a beer room. We should have listened to our original instincts. Lesson: go with your gut. Now, the 80’s only been running for a couple of years and the thought of breaking it down, moving it, and setting it all up in the same day was not appealing to me. I spoke to my wife and we ultimately decided a new tank would make it much easier. Usually I would be really excited at the notion, but the work involved along with disturbing the stability of the inhabitants had me nervous/unsure.

Que the shopping for a new tank. There were tons of Black Friday sales going on and I had a few tanks in mind, but I finally decided on an IM SR-120. I thought about going back to a sumped system, but have really been enjoying the simplicity that AIO gives me. Back to basics is the aim for me. Enough talking, here are a few pictures of previous setups and I’ll start updating the thread with the new build soon.

125g

IMG_8737.jpeg


NUVO 10

IMG_1206.jpeg


Versa 42g

IMG_0418.jpeg


SR-80

IMG_7801.jpeg
Great looking tanks!
 
OP
OP
icedgxe

icedgxe

Well-Known Member
View Badges
Joined
Jun 22, 2008
Messages
581
Reaction score
350
Rating - 0%
0   0   0
Thanks! Hopefully this one turns out how I envision.

Once the decision was made on the new tank, it was time to pull the trigger and spend the money (not always an easy task haha). Up until the day I ordered, I was still a bit unsure between the 120 and the Waterbox Frag 155. One of the main reasons was due to the wait time. The IM was MTO and the WB would only be roughly a 2-3 week wait. Well, on November 17th I got an email from IM advertising their Black Friday sales and at the top of the email it said select models in stock, ships within 72hrs. I looked at the list and lo and behold, the SR-120 was on the list. While on our way to pick up dinner, I called IM to verify and they confirmed that they did in fact have them in stock and ready to go. That was all I needed to hear and that night, I placed the order for the 120 with a white stand. The (hopefully) short wait began. With the larger tank on the herizon, I knew I would need a few more items, so why not take advantage of more Black Friday sales. Queue more shopping!

First stop, Premium aquatics for some sand and rock. They were running 40% off Tropic Eden Morroca rock so I picked up an irregular piece, an arch, 2 minis, and a shelf. I like a shallow sand bed and wanted to try something different this time. I used meso flakes in the 80, but was looking for something with a bit smaller grain. I decided on TE Tonga pink and ordered a 30lb bag. Also added an Eheim 100w heater. I’ll be bringing the current 150w over from the 80 as well.

Next stop, BRS which was running their preferred refer event. Spoiler alert, I didn’t win anything, but that’s ok, thanks anyways! I picked up a box of Red Sea blue and MicroBacter Start XLM. My wallet and I were both quite tired at this point. Lighting and shipping stories to come!
 
Last edited:
OP
OP
icedgxe

icedgxe

Well-Known Member
View Badges
Joined
Jun 22, 2008
Messages
581
Reaction score
350
Rating - 0%
0   0   0
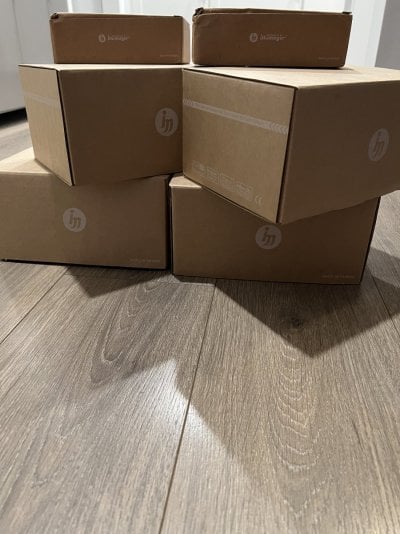
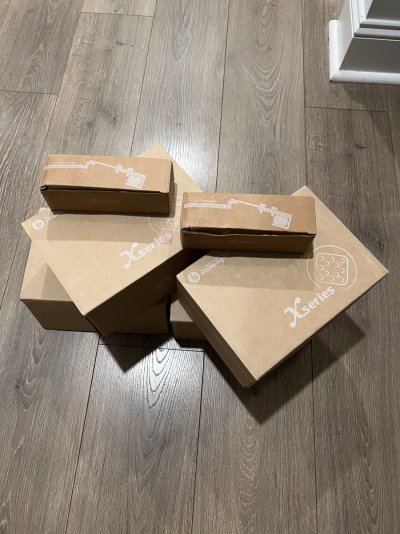
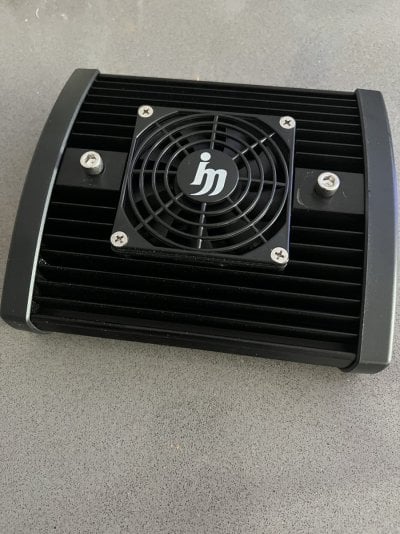
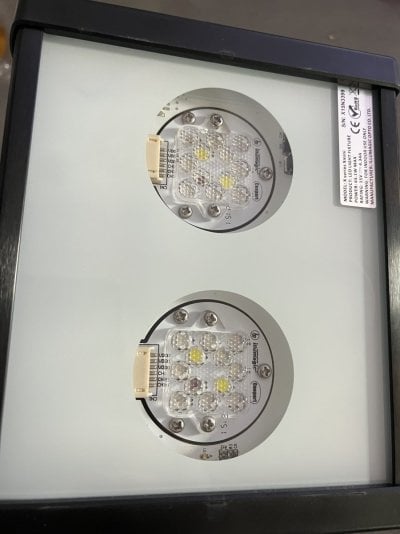
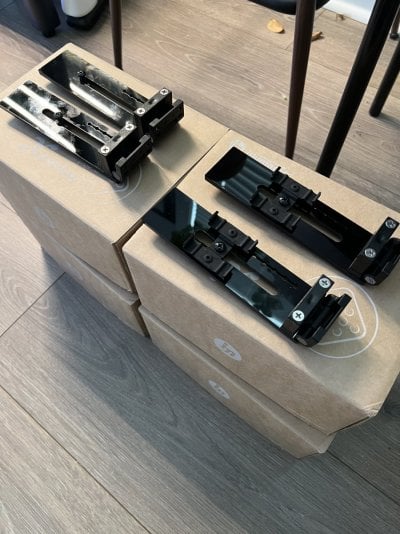
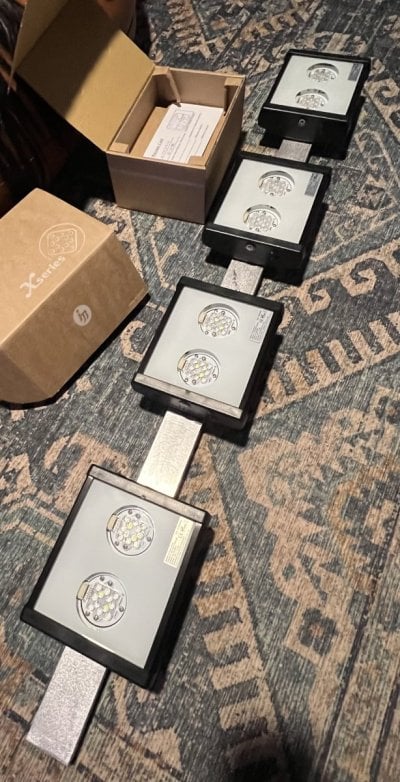
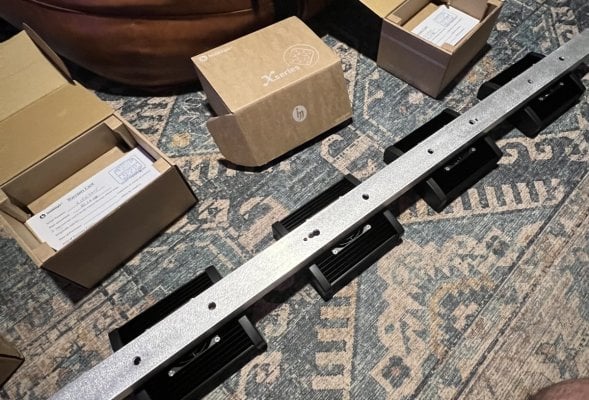
Taking a step back to August, I noticed the center 360 on my 80 was flickering for about 30 seconds to a minute at the exact same time everyday. It happened during ramp down. I bought the Kessils in 2021 for a really good deal. The person I bought them from claimed they were a few years old, but I knew that couldn’t be true for the price. I knew I would eventually upgrade, so when the flickering started, I emailed Kessil to see just how old they were. To my surprise, they were even older than I imagined. The two outer lights were manufactured in January of 2017 and the center light was manufactured in September 2014. At this point, the light search began. I am a budget reefer at heart and knew I didn’t want to break the bank, so Straton’s (I wish) were out of the picture. I had been seeing some more talk of Illumagic/Dalua lights and started researching a bit more. After tons of research and comparing different setup choices, I noticed the Blaze X minis were on sale at Dalua. I decided that’s the route I was going to go. I order 4 X minis and knew I could always expand if I decided to upgrade tanks. I also wanted to address any shading on the front side of corals as well. I already had a 36” Quanta Meso blue, so I decided to order another and some Vitamini mounts that I was hoping to make work with the Quanta’s. Everything arrived quickly and in great shape. Then I turned my attention to mounting. To be continued…

IMG_8035.jpeg IMG_8036.jpeg IMG_8025.jpeg IMG_8026.jpeg
 
OP
OP
icedgxe

icedgxe

Well-Known Member
View Badges
Joined
Jun 22, 2008
Messages
581
Reaction score
350
Rating - 0%
0   0   0
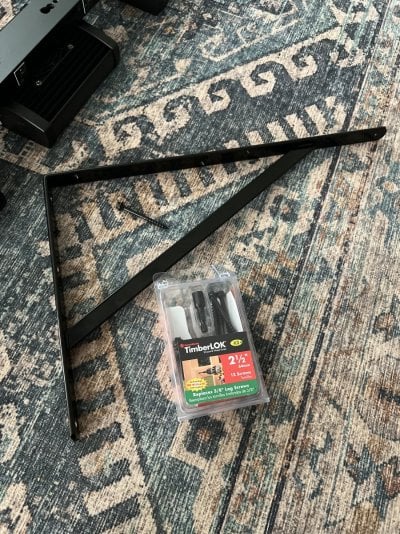
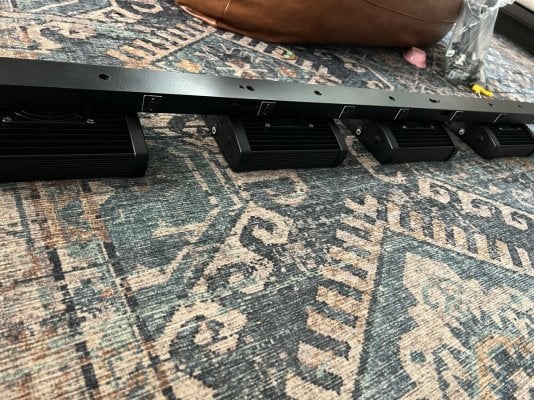
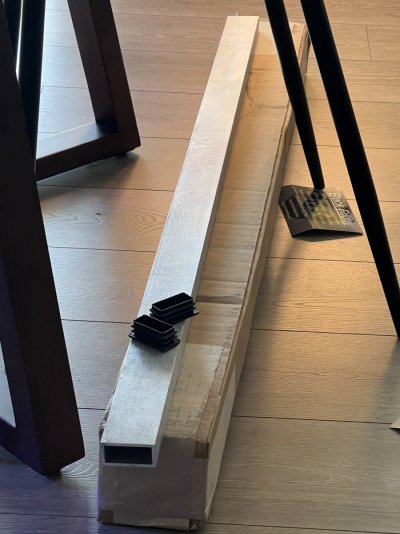
Now that I got the lights in, it was time to make a mount. I wanted to make one similar to what I already had for my Kessils which was an Orphek tank mount with a custom aluminum rectangle tube rail. This time I needed a 4 ft rail (since I thought it was going on the 80 at the time) and I could only find one that was a thicker aluminum. After mounting everything on the rail, I didn’t feel comfortable with the weight being supported by the Orphek mounts attached to the glass. I purchased have duty l brackets that would perfectly center the light above the display. Luckily enough, there are studs right where I needed them. I bought large cabinet screws, finished drilling mounting holes in the rail, and painted it. I also bought plastic end caps for the rail. It was ready to mount…and then we decided on buying a new tank. I didn’t want to mount the lights, get everything acclimated, and then have to remove the lights only to remount and stress everything out, again. I decided to hold off and use the rail as designed for the new tank, even though it would be 6ft. More on that decision later.
 

Attachments

  • 72141005121__EC68C302-0ED9-4495-8F13-B0DF9B0E7A0D.jpeg
    72141005121__EC68C302-0ED9-4495-8F13-B0DF9B0E7A0D.jpeg
    432.3 KB · Views: 24
  • IMG_8106.jpeg
    IMG_8106.jpeg
    363.2 KB · Views: 26
  • IMG_8068.jpeg
    IMG_8068.jpeg
    218 KB · Views: 24
  • IMG_8063.jpeg
    IMG_8063.jpeg
    204 KB · Views: 25
  • IMG_8062.jpeg
    IMG_8062.jpeg
    272.1 KB · Views: 26
  • IMG_8005.jpeg
    IMG_8005.jpeg
    170.7 KB · Views: 24
OP
OP
icedgxe

icedgxe

Well-Known Member
View Badges
Joined
Jun 22, 2008
Messages
581
Reaction score
350
Rating - 0%
0   0   0
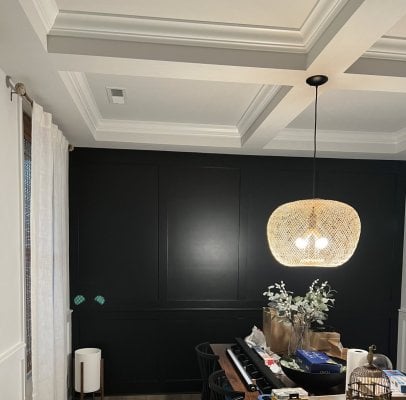
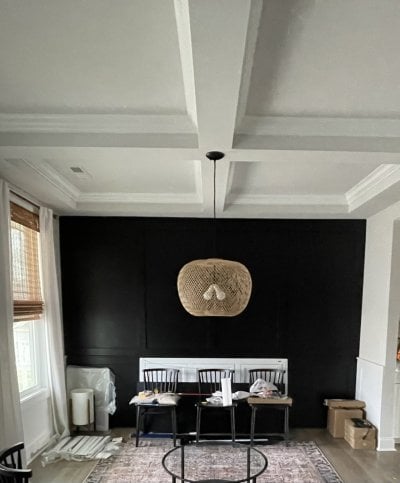
Been pretty busy, but figure d I would keep this going in case anyone is interested. After getting the lights together, it was time to get ready for the tank delivery. Sand, rocks, heater, water change pump, and more parts came in. Tank was set delivery about a week out from this point. The room the new setup is in used to be our dining room. We rarely used it so we need to move the table chairs out, as well as raise the light up so it wouldn’t impede viewing. After getting everything cleared out I would turn my attention over to reinforcing the floor.

IMG_8217.jpeg IMG_0232.jpeg
 
OP
OP
icedgxe

icedgxe

Well-Known Member
View Badges
Joined
Jun 22, 2008
Messages
581
Reaction score
350
Rating - 0%
0   0   0
Skipping a bit ahead of tank delivery and stand build. Tank Location was set and now I turned my attention towards reinforcing the floor. The tank goes perpendicular across the floor joists (which are engineered I Joists) and backs up to an exterior wall, but the span is pretty long so there was more deflection than I’d like. I hired a structural engineer to come out and give me their professional opinion. He said he didn’t think there would be an issue such as the tank falling through the floor, but thought it would be beneficial to add support. I planned on doing this myself, but ultimately hired a contractor to add a 5.5” steel I-beam supported by two jack posts sitting on concrete footers. I also had him add crush blocking where the floor joists rest on the exterior wall and above the steel beam. I feel much better about the amount of deflection and support.

IMG_8132.jpeg


IMG_8696.jpeg
IMG_8697.jpeg
IMG_8698.jpeg
 
OP
OP
icedgxe

icedgxe

Well-Known Member
View Badges
Joined
Jun 22, 2008
Messages
581
Reaction score
350
Rating - 0%
0   0   0
Around this time I also decided to go ahead and get the lights mounted. I was a little nervous mounting the lights before having the tank and stand in place, but I measured, re-measured and measured again, taking into account the overall dimensions listed on IM’s website. The goal was to have the lights 12” from the waters surface. The lights were covered to protect the glass. In the picture there is only one Quanta meso blue strip mounted as the other was till on the 80.

72141005121__EC68C302-0ED9-4495-8F13-B0DF9B0E7A0D.jpeg
IMG_8331.jpeg
IMG_8332.jpeg
 
OP
OP
icedgxe

icedgxe

Well-Known Member
View Badges
Joined
Jun 22, 2008
Messages
581
Reaction score
350
Rating - 0%
0   0   0
Let’s rewind a bit to tank delivery day. I was pleasantly surprised how fast the tank arrived. I ordered it Nov. 17th and it was delivered on Dec. 4th. Overall the experience went smoothly and even better than when my 80 was delivered. I received a call to schedule the date, and when the 4th arrived, the driver let me know he was on his way. He did end up going to the wrong address, but it was only 10 minutes away, so no big deal. I sent him a picture of the driveway area so he knew if he had to back the trailer in and he arrived shortly after. He unloaded the pallet by himself and pulled it up my long inclined driveway. I was surprised he did this alone. I asked him to wait while I opened the crate and inspected everything. He had no problem waiting. When the 80 was delivered, the driver didn’t want to wait for me to open the box. There was a small tear in stand box on top, so I tore open some of the box and didn’t see any damage to the foam underneath, so I figured it was fine. I did take pictures of the box beforehand. More on this later. I opened the wooden crate and inspected the tank, which was luckily in perfect shape. I signed for everything and the driver went on his way.

Once the driver was gone, I had a bit more time to open everything. I started by opening the stand box completely. Remember that tear? You guessed it. The stand was damaged. It must have been from an impact or a heavy weight, because the foam directly on top of the damage was not affected. Where the hole was had no damage. I took all the pieces out and inspected them. All in all, a vertical support, top and bottom rear rails, and a side bottom rail were damaged. I took pictures of everything and immediately called IM. I sent them all required pictures via email and a little over a week later, I had all the replacement pieces I needed. Next, it was time to build and level the stand.
IMG_8246.jpeg
IMG_8247.jpeg
IMG_8248.jpeg
IMG_8249.jpeg
IMG_8250.jpeg
IMG_8251.jpeg
IMG_8252.jpeg
IMG_8255.jpeg
 

TheWB

2500 Club Member
View Badges
Joined
Sep 22, 2017
Messages
2,529
Reaction score
3,997
Location
Puyallup,WA
Rating - 0%
0   0   0
This is going to be really cool. I don't think the SR120's get enough love. Really like what you did with the SR80. Had I not gone custom with my latest build I would have ended up with an SR80. Went custom to get a larger AIO section so I could get away from the nano sized equipment that you usually have to settle for with most AIO's. Following along.
 
OP
OP
icedgxe

icedgxe

Well-Known Member
View Badges
Joined
Jun 22, 2008
Messages
581
Reaction score
350
Rating - 0%
0   0   0
This is going to be really cool. I don't think the SR120's get enough love. Really like what you did with the SR80. Had I not gone custom with my latest build I would have ended up with an SR80. Went custom to get a larger AIO section so I could get away from the nano sized equipment that you usually have to settle for with most AIO's. Following along.
Thanks! I agree and really don’t think larger AIO’s do in general. I enjoy AIO’s for the simplicity and cleanliness of it all. Gives me tons of storage space underneath. The larger sump section in yours is a definite bonus, but I’m making do with the space I have. It fits my KISS method.
 

TheWB

2500 Club Member
View Badges
Joined
Sep 22, 2017
Messages
2,529
Reaction score
3,997
Location
Puyallup,WA
Rating - 0%
0   0   0
Thanks! I agree and really don’t think larger AIO’s do in general. I enjoy AIO’s for the simplicity and cleanliness of it all. Gives me tons of storage space underneath. The larger sump section in yours is a definite bonus, but I’m making do with the space I have. It fits my KISS method.
I'm a fan of the simplicity and cleanliness as well. My biggest problem with the Lagoon 50 AIO I had before is that the AIO section is so narrow I can't get my hands in there. Makes it very difficult to do anything. Even pulling equipment for cleaning was tough because it was just too crowded. Having an 8" wide AIO section has already paid off a couple of times when I've dropped something (skimmer cup plug) back there that would have been difficult/impossible to retrieve without a ton of effort. Now it's easy and I can use a full sized skimmer and a fleece roller and there is still room.
 
OP
OP
icedgxe

icedgxe

Well-Known Member
View Badges
Joined
Jun 22, 2008
Messages
581
Reaction score
350
Rating - 0%
0   0   0
I'm a fan of the simplicity and cleanliness as well. My biggest problem with the Lagoon 50 AIO I had before is that the AIO section is so narrow I can't get my hands in there. Makes it very difficult to do anything. Even pulling equipment for cleaning was tough because it was just too crowded. Having an 8" wide AIO section has already paid off a couple of times when I've dropped something (skimmer cup plug) back there that would have been difficult/impossible to retrieve without a ton of effort. Now it's easy and I can use a full sized skimmer and a fleece roller and there is still room.
That’s definitely an issue. I have to use my long grabbers if something does fall down in there. I bet that extra space is great.
 
OP
OP
icedgxe

icedgxe

Well-Known Member
View Badges
Joined
Jun 22, 2008
Messages
581
Reaction score
350
Rating - 0%
0   0   0
Now that I had the replacement pieces in, it was time to focus on building the stand, leveling it, and getting the tank inside. Normally I would first do this in the garage to water test, but with the weight of the tank it was going to be hard to get the help needed to set it up in the garage and then again to move it into the house.

Building the stand was pretty straightforward/easy. Where I began to run into issues was during the leveling process. I find squaring APS stands to be a bit challenging, but not completely terrible. But combined with a floor that is not level (that great new construction quality) it makes for a fun time. On the first attempt there was an almost 3/4” gap under the right side of the stand and the left side was sitting flat on the floor. I wanted to try and reduce the gap if I could, so I took the stand to another part of house that was more level, loosened the locks on the stand, and squared the stand again in each direction. I slowly started added shims again and was able to reduce the gap significantly. It’s not ideal, but much better. I am finished adding shims around the base to better distribute the weight/pressure and now it was ready for the tank.

IMG_8335.jpeg
IMG_8336.jpeg
IMG_8337.jpeg
IMG_8338.jpeg
IMG_8339.jpeg
IMG_8340.jpeg
IMG_8341.jpeg
IMG_8360.jpeg
 
OP
OP
icedgxe

icedgxe

Well-Known Member
View Badges
Joined
Jun 22, 2008
Messages
581
Reaction score
350
Rating - 0%
0   0   0
Now that the stand was in place and leveled, it was time to bring the tank in. I contemplated hiring someone to move it in as I was nervous with how heavy IM was telling me it was and the potential of damaging something. I ended up deciding to move it in with the help of family members. I order a heavy duty moving strap, a couple more suction cups, and some gloves. I cut the crate down to a little wider than the tank so it would fit through the door. Keeping it on the crate ensured that it was protected in the sides from bumps, supported underneath, and it significantly reduced the chances of damaging the tank. Full crated weight is listed at 430lbs, but just what was cut off reduced this down it around 300lbs or so. We were able to get the tank in with 4 people, even though it was not very easy. Once we got it inside, we set it right in front of the stand, removed the side panels and packaging, attached the suction cups, and lifted the tank in place. Luckily, it all went well and the tank was fine.
IMG_8523.jpeg
IMG_8522.jpeg
IMG_8627.jpeg
IMG_8636.jpeg
IMG_8635.jpeg
 

TheWB

2500 Club Member
View Badges
Joined
Sep 22, 2017
Messages
2,529
Reaction score
3,997
Location
Puyallup,WA
Rating - 0%
0   0   0
Now that the stand was in place and leveled, it was time to bring the tank in. I contemplated hiring someone to move it in as I was nervous with how heavy IM was telling me it was and the potential of damaging something. I ended up deciding to move it in with the help of family members. I order a heavy duty moving strap, a couple more suction cups, and some gloves. I cut the crate down to a little wider than the tank so it would fit through the door. Keeping it on the crate ensured that it was protected in the sides from bumps, supported underneath, and it significantly reduced the chances of damaging the tank. Full crated weight is listed at 430lbs, but just what was cut off reduced this down it around 300lbs or so. We were able to get the tank in with 4 people, even though it was not very easy. Once we got it inside, we set it right in front of the stand, removed the side panels and packaging, attached the suction cups, and lifted the tank in place. Luckily, it all went well and the tank was fine.
IMG_8523.jpeg
IMG_8522.jpeg
IMG_8627.jpeg
IMG_8636.jpeg
IMG_8635.jpeg
Looks awesome!!!
 

braaap

Valuable Member
View Badges
Joined
Jul 16, 2015
Messages
1,432
Reaction score
1,306
Location
Montana
Rating - 100%
3   0   0
Gorgeous tank. I really like those dimensions. The ONLY things I don't like about my IM50 is the top that comes with it not covering the overflows and no ability to use a shelf on the INT version.
 
OP
OP
icedgxe

icedgxe

Well-Known Member
View Badges
Joined
Jun 22, 2008
Messages
581
Reaction score
350
Rating - 0%
0   0   0
Thanks!

I didn’t realize that about the 50. I’ve only ever had the Innovative AIOs, so didn’t pay attention to the tops on the others. I did know you could really use the shelf with the int. which is unfortunate.
 
Back
Top