Cost without skimmer: $122.50 (skimmer can substituted with a regular pump)
Using this on a 20 gal high with 2 clownfish, 2 fire shrimp
This thing absolutely destroys nitrates. I am new to the hobby (2 months) and didn't want to pay for a HOB refugium, since they would be much smaller than this anyway. I plan to change this setup when I get a sump.
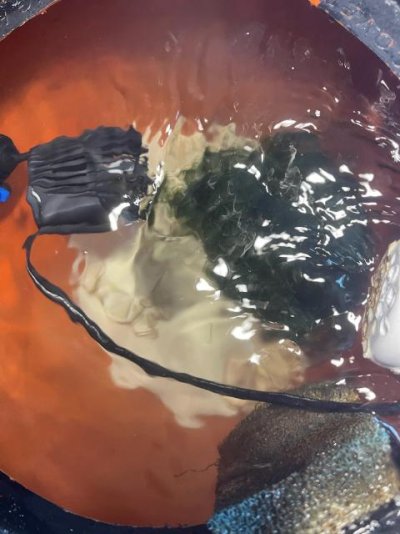
Sometimes it works too well, my chaeto doubled in size in 2 weeks and eliminated nitrates down to zero. To remedy this, I reduced the hours of light each night.
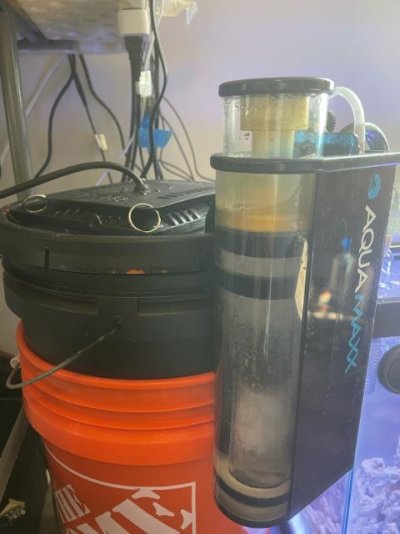
The paint looks ugly because I didn't sand the buckets before painting. If you do this, just get black buckets and save yourself the trouble... but if you paint it, do not paint the inside.
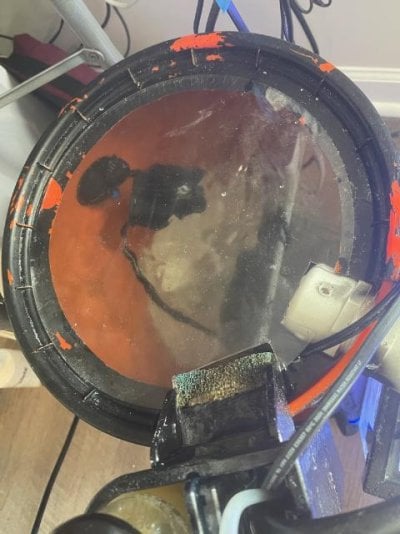
5 gal. DIY refugium using parts from Home Depot and Amazon:
- Waterproof 100W LED Grow Light Full Spectrum, New Technology COB LED Grow Light, Natural Heat Dissipation Without Noise, Suitable for Plants All Growing Stage Indoor or Outdoor. ($32.38)
- 2x 5 Gallon Orange Homer Bucket ($4.48 each)
- 5 gal. Orange Paint Bucket Lid ($2.28)
- 1-1/4 in. PVC Schedule 40 MPT x S Male Adapter ($1.76)
- 1-1/4 in. PVC Schedule 40 Cap ($2.95)
- 2 ft 1 1/4" PVC ($2.36)
- 1/2 in. x 260 in. Thread Sealing PTFE Plumber's Tape ($0.98)
- Bullet-1 Hang-On-Back Protein Skimmer ($114.99), a simple pump will also work, though (I just already had a protein skimmer)
- Chaetomorpha, softball size ($20)
- CaribSea Aragonite Aquarium Sand, 10 lbs. (10.69)
- 2 Pieces 1/8" Round Plexiglass Sheet, 10 Inch Diameter Clear Acrylic Circle, Round Cake Disk Acrylic Sheet, Plexiglass Table Top, Round Acrylic Backdrop ($9.99)
- Clear Silicone 2.7 fl. oz. Waterproof Sealant ($6.28)
- AQUANEAT Circulation Pump, Aquarium Wave Maker, Fish Tank Powerhead Submersible Water Pump with Suction Cup (Small 480 GPH) ($9.88)
- Fosmon C-10707US Outdoor 15A 24-Hour Mechanical Light Timer, 3-Prong ETL Listed Water Resistance and Heavy Duty Grounded Outlet with 7inch Power Cord - Black, 1 Plug ($13.99)
Tools needed:
- Drill with 3/8" bit
- Dremel or something similar to cut acrylic
Process:
1. Cut a hole in one 5 gal. bucket near the top to fit the threads of the PVC adapter
2. Screw the adapter in, facing out; seal the edges on inside and outside; don't bother using Teflon tape, unless you were able to get the hole absolutely perfect (I wasn't)
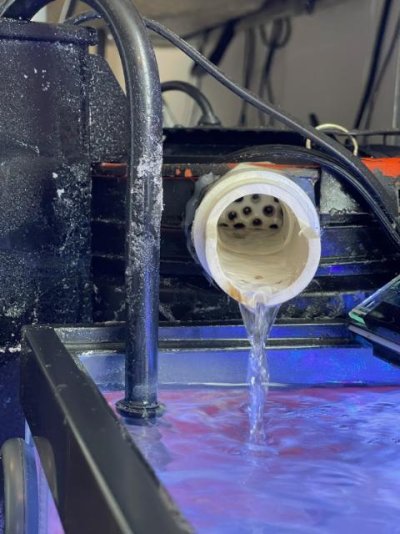
3. Drill 3/8" holes in the end cap to enable flow (see image), then screw it onto the adapter (use Teflon tape)
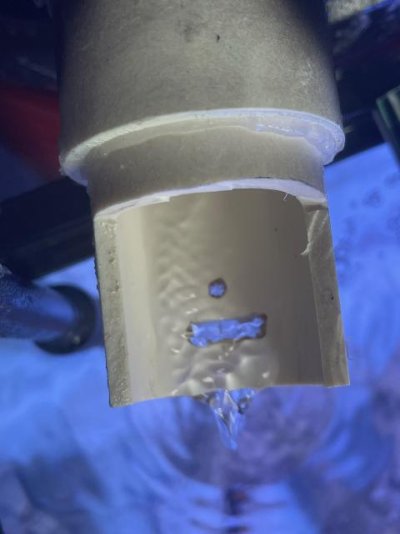
3. Cut 1 1/4" PVC pipe to desired length to reach tank; you'll probably want to drill a small hole before the edge of the pipe, so that water doesn't drip back toward your bucket (see image)
4. Insert PVC pipe into adapter and seal with silicone
5. Cut the lid on the inside edge, leaving about 1 1/2" of lip, and cut out a section for the pipe (see image)
6. Cut one of the acrylic circles (one is extra) so that it fits over the PVC cap and skimmer entry (or whatever you use to get water into the bucket)
7. I used the second bucket to get the first up to the right height (to flow into a 20 gal high; your situation is probably different from mine, so plan accordingly if you want to reproduce this
8. Paint the bucket so that light doesn't leak out (or just use a black bucket in the first place, lol)
9. After configuring placement of the refugium, put in your sand and saltwater, your powerhead, the chaeto, the skimmer or pump inflow
10. Place the acrylic over top and put the light on top (it fits nicely in the lid)
11. I used the timer on the powerhead so that it ran opposite to my normal light cycle, for about 6 hours each night
12. Prime your skimmer or pump and enjoy!
Optional:
- Keep pods in there
- Put live rock in there
What I would change:
- Black buckets to begin with
- A better way to get the bucket to height
- Maybe some kind of spigot for water changes


