HaubFather's First Reef (build + fails STORY)

Haubfather07

Active Member
View Badges
Joined
Dec 30, 2017
Messages
122
Reaction score
105
Location
Wilder, KY
Rating - 0%
0   0   0
Well, I'm going to do what I understand it to be popular to do these days and document the steps of my first reef build.. While writing this, I have my first 2 Spot Tail Bennies, 4 snails (2X Trochus and 2X Nassarius), a Peppermint shrimp and 2 Blue Leg Hermit Crabs in the tank.

In an effort to do what I find most threads I've read tend not to (or maybe most people are just perfect ;-) I'm going to focus on issues and mistakes I've made vs the successes. I think this type of thread will be more helpful to beginners like myself. At the very least it can help to serve as somewhat of a "what not to do" along with documenting my reef. Having said all of that, I am very happy with where my reef is now and excited about future additions as I continue to build and add! This will truly be a story, and most can be skipped if you're really looking for just info.. I'll mark a paragraph with a "∑" if it contains info that may be useful instead of just entertaining :). Enjoy!


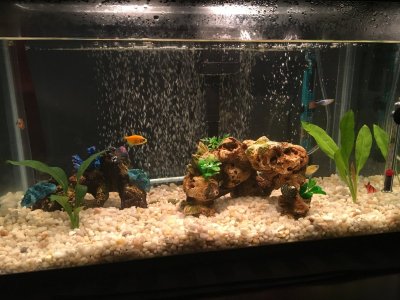
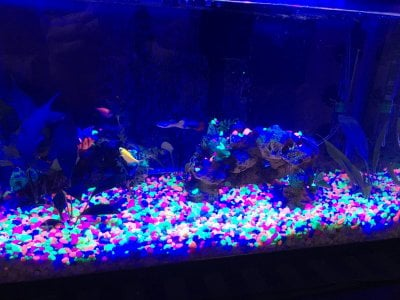
My journey begins summer of 2017 at the zoo with my pregnant wife and my 2y/o. She is in love with Hippos and so of course we stopped to see Fiona (baby hippo at the Cincinnati zoo, google her, she's a big deal). The entire time my daughter Malina was more focused on the fish that they allow in the hippo's pool.... And so begins a journey.... The wife and I discussed on our way out of the zoo about getting a fish tank for her. Neither of us knew much of anything, although my wife had owned one years ago and we happened to have a 10gal in our garage with some gravel and such. We called my buddy who I knew had a fish tank (I now understand that he had a freshwater tropical tank). He explained that salt is more fun, but MUCH more expensive, freshwater is great and what he has, it's less expensive etc. This was the extent that we knew when we walked into our first LFS. This is where the knowledgable 16 yo explained to me that we really should get the tank setup, let it run for a month before putting fish in it. Understand that by that time, we had already excitedly told our daughter about the new fish we were getting and that would have been bad... So we buy 2 Glo Fish, 2 Guppies a Pleco along with heater, HOB filter, air pump and some ATI Quick Start. Long story short the setup was nice... We did lose one fish during the cycle, but thanks to a decent beginners water change schedule we kept the rest healthy! We even had Guppy hatchling, which also didn't make it despite our efforts. (photos of first tank, and that fateful day at the zoo)
IMG_4375.jpg
IMG_4983.jpg IMG_5023.jpg IMG_5396.jpg
 
OP
OP
Haubfather07

Haubfather07

Active Member
View Badges
Joined
Dec 30, 2017
Messages
122
Reaction score
105
Location
Wilder, KY
Rating - 0%
0   0   0
The freshwater tank did lovely all summer, except it was located in my daughter's room. Which allowed limited enjoyment to the rest of the family. Meanwhile we had a new baby Meara (I was really outnumbered then).
IMG_5145.jpg

Lots of long nights ahead, which I spent watching BRS160 videos. I watched them all the way through maybe 3 times. My wife even made the comment " I can't believe you don't know EVERYTHING about this yet!?"... Little did she know I was scratching the surface..

My first mistake comes as a really dumb one.. I started shopping LetGo, OfferUp, Craigslist for tanks/stands. I decided on going with a 75 gal for my first... I purchased my first 75gal tank! It was 3X2X1.. That's right.. I got it home, set it in place, loved it, measured it, found it to be a 45gal tall... I continued shopping, found another 75 gal for sale. Went to purchase that one. It had VERY think glass... was long, not tall, I wasn't sure what gal it was and of course the person didn't have a tape measure for me to check... Ended up being only a 55gal. He was selling it too cheap, so I purchased it anyway.. After all of that, I decided I'd just stick with the 45 tall and get to work.. My LFS gave me credit for the 55 and I ended up on top of that deal. Advise: If you're buying from people who know less than yourself on tank size, bring a tape measure and print off a list of standard tank sizes and volumes. Pic below, the 55 is on the ground, ignore all the work white boards, those hadn't come down yet...
53439337784__D9A327CD-C905-400F-898B-526500A87EF4.jpg
 
OP
OP
Haubfather07

Haubfather07

Active Member
View Badges
Joined
Dec 30, 2017
Messages
122
Reaction score
105
Location
Wilder, KY
Rating - 0%
0   0   0
Inspired by the BRS160 videos, my plan began to take shape... I had no idea what I was doing, I made about 500 trips to the LFS, Home Depot and I made it happen... It was about this time that I decided to use the space under my stairs for my "fish room" for the sump etc.. It was tight in there but I THOUGHT I had tons of space... I started with a board to mount all my electronics/power to. I had some extra shelving in my garage which worked out nicely. I picked up some desk cable managers from HD and drilled holes for them (mostly placed them randomly, I wish I had looked into where I wanted things mounted a bit better here. Then again, I still don't have the equipment today, so I don't know that it would have mattered). The 2" holes my drill made were just a bit too large, so I used some wood glue to secure them, ended up working beautifully. Used deck screws to mount to the studs and that thing isn't going anywhere.

IMG_5509.jpg

IMG_5508.jpg

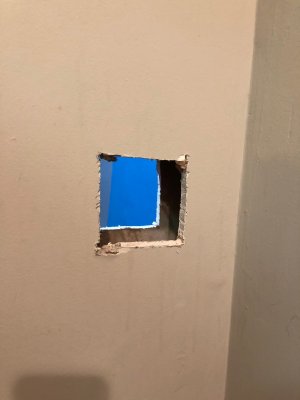
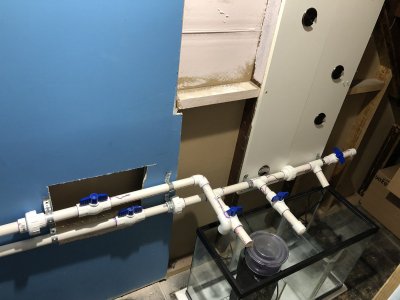
Next I cut my access hole into the space from where my tank was. Simple drywall saw did the trick nicely. See pic below. I'd like a way to clean that up a bit, but its hidden on both sides so not a huge concern. Any suggestions for that would be appreciated.
IMG_5513.jpg
 

revhtree

Owner Administrator
View Badges
Joined
May 8, 2006
Messages
49,225
Reaction score
98,068
Rating - 100%
1   0   0
Welcome and following along! Welcome to the journey!
 
OP
OP
Haubfather07

Haubfather07

Active Member
View Badges
Joined
Dec 30, 2017
Messages
122
Reaction score
105
Location
Wilder, KY
Rating - 0%
0   0   0
The next step (wisely insisted upon by my wife) was to paint the wall. Used a semi-gloss, so it would resist any splashing/salt creep... TBH I almost skipped this step, just because I was so excited to get to work on the tank.. Long story short, my wife is smarter than me... And a chemist, which ended up being a life saver in this hobby, but more on that later...

First REALLY smart thing (maybe the only, so I'm going to soak up all the credit I can here) I did was to use one of those whiteboards. Put it in place of where the sump was to go and map out (in real scale) what I was picturing. This allowed me to make modifications as simple as dry erase, and redraw. This allowed me to make only 3 trips to Home Depot for supplies when I started on the plumbing.. Again, added the manifold based on the BRS160 design. Had my LFS make my 30 gal sump (put the baffles in) so I knew how large that was and where the baffles were to help with the drawing. Laid all the fittings out minus the pipe itself which I took measurements for what to cut etc.

IMG_5515.jpg

IMG_5516.jpg


Learning all the plumbing terms was half the battle here. I ended up with plenty of extra pieces. Someone should really make a YouTube walkthrough of each piece/fitting, its name, use etc.. I DID spend some time looking for such a thing, but unfortunately didn't come up with anything if it does exist. No matter, only ended up with ~$20 worth of extra pieces and I'm sure I'll use them in the future.

I really wish I would have taken the time to drill my tank, or buy one that was drilled, but again, I didn't know better...
 
Last edited:
OP
OP
Haubfather07

Haubfather07

Active Member
View Badges
Joined
Dec 30, 2017
Messages
122
Reaction score
105
Location
Wilder, KY
Rating - 0%
0   0   0
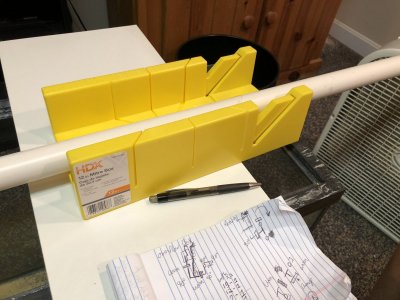
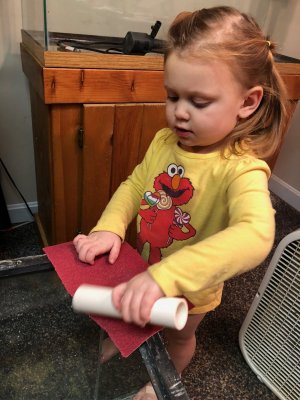
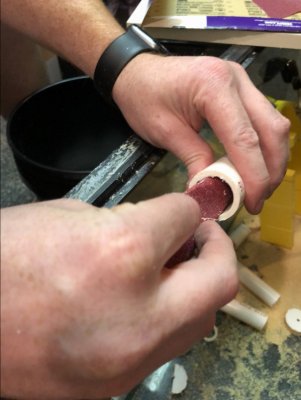
The plumbing process was a bit of a struggle. My daughter helped... Didn't end up buying the nice PVC pipe cutting tool until I was about 3/4 the way done, so here were are sawing and cleaning the edges.. BTW, buy the tool, you will by the end of your project anyway and it makes perfect, clean edges, ready to use, every time.

IMG_5517.jpg IMG_5523.jpg IMG_5526.jpg

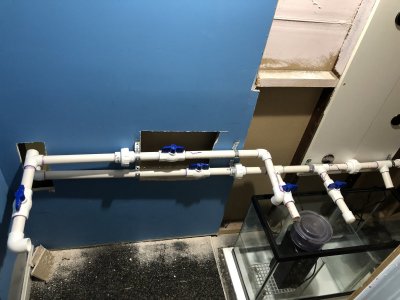
I then proceeded to dry fit and lay everything out to make sure it was matching with my vision... Used some unions per EVERYONE's suggestion.. They haven't come in handy quite yet, but I'm confident they will. Whiteboard went away, and I started gluing everything. As you'll notice in future photos, I wasn't very good with the purple primer... I was good about using it and cement liberally, so believe it or not zero leaks right off the bat. I heard that you can use clear primer to clean off the visible purple primer without risking hurting the connections. That will be a future project I'll work on at some point when I'm more worried about how everything looks. Currently I'm more worried about how everything WORKS.
IMG_5549.jpg
IMG_5551.jpg
 
OP
OP
Haubfather07

Haubfather07

Active Member
View Badges
Joined
Dec 30, 2017
Messages
122
Reaction score
105
Location
Wilder, KY
Rating - 0%
0   0   0
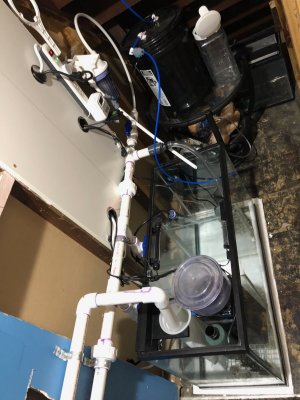
Sump in place, pipes secured to the wall. Notice the water change extension off of the return pipe for easy water changes and to take "dirty" water instead of water from the DT. I found a really inexpensive styrofoam that was almost the perfect shape to pad the sump. The whole setup is in my finished office/basement. So I didn't want it sitting directly on the concrete.

IMG_5556.jpg IMG_5557.jpg

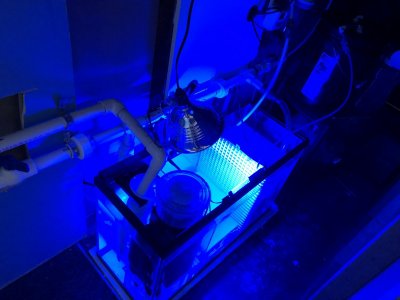
Manifolds were capped and turned down out of the way.. I made them long initially for whenever (if ever) I need to cut the caps off and put them in use. Time to clean up a bit, add some LEDs to make sure it was "cool" looking.

Added a BRS mini reactor and started running it at the rate I wanted to use it right away without media. This allowed me to dial in the overflow and return pump speeds as it would be once I started using media in there. Added a 5gal bucket as a drip ATO.. Impossible to get perfect but does the job with quick small adjustments about 2 times a week. The 5gal bucket seems to be enough to make refilling it a nearly weekly task.

Added a used Tunze skimmer from my LFS as well as a clip on light from HD with a slightly more expensive "Plant" bulb.I haven't added Cheto yet though, so I can't let you know how well that's working quite yet... Also found a great place on the web that suggested the egg crate with some cross stick canvas behind it. Allows water to flow freely but will hold any algae in the refugium.

Purchased some filter socks and holder from BRS (I bought a lot of things from them, even though I am loyal to my LFS as they helped me out a ton as well, mostly due to the time/energy/effort they spent on the BRS160 videos.)

LFS for my return pump purchase. I went with the Syncra Silent 4.0 for a couple reasons. I figured this is rated upto 951 GPH which was WAY more than I needed, but some of that would be used off the manifold for the reactor any anything else I may add later. It also could handle the head pressure that the long(ish) run I had back to the DT. Basically 4X 90°, about 6ft horizontal and 5ft height. Also purchased my heaters, 2X Eheim 100w. This again was overkill but I liked the redundancy of two with one doing the majority of the work. Pictured below they are in the return section, this was a mistake I made, as I quick realized that section wouldn't stay a constant depth. I decided I didn't want them in my refugium so I moved them to where they are now, in my skimmer/sock section.

IMG_5622.jpg IMG_5676.jpg
 

Matthew Frost

Active Member
View Badges
Joined
Jul 13, 2017
Messages
396
Reaction score
472
Rating - 0%
0   0   0
You're off to an awesome start. In regards to your initial hole in the wall, I don't know what size it is but it looks like you might be able to get an "old construction" electrical box at any big box hardware store and insert it in the hole. Then you can get a blank "switch plate" style cover and cut a hole in it for your piping to go through. I have also seen people get acrylic panels and cut holes in them for pipes as well.
 
OP
OP
Haubfather07

Haubfather07

Active Member
View Badges
Joined
Dec 30, 2017
Messages
122
Reaction score
105
Location
Wilder, KY
Rating - 0%
0   0   0
On to the display!!!

I purchased an overflow and hard plumbed it. A simple return kit and that wraps up the plumbing. Learned a ton about that, but overall really happy with my result for it being my first time! After I had it running for a week or so I noticed the gurgling from the single overflow drain pipe and noise of the water moving inside of the pipe and hitting the first 90°. I made my own Stockman which solved the gurgling.. I muted the pipes and the water hitting the first 90° by wrapping it in some foam insulation (the kind designed for the 1" pipe from HD). That wasn't quite enough, so I got more insulation designed for 3" pipe from Granger to wrap around that foam. That has seemed to do the tick. Had some extra of the 1" foam so I put that on a few other locations to help heat loss (those pipes weren't making any noise as they were part of the return and full of water).

I purchased about 35 lbs of dry pukani from my LFS, managed to get my hands on a really solid large piece. I used the bleach method. Put it all in a large brute and soaked it for a week in 20/1 water/bleach mix. I then replaced the water and added a whole bottle of conditioner. I let that soak for 3 days (even though simple test strips were saying no chlorine the first day. I then let the pieces dry out for another week. I didn't take photos (but really wish I had), but I spent a good 4-5 hours aquascaping. The amount of time it took me speaks more to my inexperience than quality of work.... I used the fiberglass driveway markers from HD and a mason bit to drill through the rocks. I also used a chisel to shape some of the rock.. I sawed off the bottom of my base rocks to make them very stable. The overall look I leaned a lot on my wife, as she is much more creative than I am. I pulled a bunch of photos from the web to show her as examples and just did exactly what she said.. I feel like we really ended up with almost exactly what I was looking for! Except that in a couple of places the rods are visible. I was able to hide them well after the fact with some smaller rubble pieces.

Next purchase was the lights. I wish I would have looked into these further before purchasing, so I'd call this another mistake. I ended up purchasing the Marine Current IC LEDs. I just feel after reading online these lights might end up proving to be underpowered. Hopefully I'm wrong, won't really know until I get into corals, which I plan to start on next month. Since those have the ability to control the pumps as wave makers, I went that route as well and purchased their 660 EFlux and a larger 1050 as well. Overall the controls of the pump via remote, the nice display the overall look, I'm very happy with so far. I did purchase the nicer mounting bracket to avoid the arms just resting on the edges of the tank. I drilled a hole in the stand on the front to mount the display. Just wish it displayed more relevant info, temp, PH etc... But if/when I go with a controller I can always mount its display there.

Went with black sand.. Didn't really consider the color until I was in my LFS and saw it. Love the contrast to the brighter corals. Very happy with the look of that so far. Only down side I see so far, I'm sure I'm getting less light reflection in the tank from it. Along with what I believe to be slightly underpowered LEDs, this might prove an issue later.. Again, we'll just have to see.

The last photo was taken more recently, but it does show the 1" insulation on the pipes while the other photos show the bare pipes. With how I have my return plumbed directly next to my overflow (not a huge concern because my flow is so high vs tank size that I've actually dialed it down to closer to 10X when it was original closer to 15X) I would love ideas on how to place and aim my powerheads. The Current wave maker allows me to have them on one of three settings: A: On all the time (0-100%) B: Have them slowly ramp up to max speed and then ramp back down to 0% over a set amount of time. C: Pulse full speed for X time then off for X time. All of these settings can be set to have the two powerbeads on the same schedule or opposite. I want to get that zeroed in before I get corals next month, but perhaps that's best figured out by what corals I end up with and changing the layout as I add more? Would love input on that piece.

I stared my cycle mid December. I was following the Red Sea Reef Mature schedule. My troubles first started about day 5, when I realized that the kit I had purchased from BRS didn't have full bottles like it should of had. I assumed they were the correct amounts in each and started dosing per instructions. Until I ran out of the bacteria way too early. This caused me to run up and buy some other brand cycle supplement. I also figured specific instructions would make it fool proof... I was wrong, or more specifically I didn't follow the specific instructions ... I missed the part where it told me that I was to use LIVE ROCK... Since I started with dead dry, that whole schedule was thrown to hell, but I didn't know that... When I wasn't getting the expected results. I started to panic and do like I'm sure all you out there expect new reefers to do, and I reacted... Started doing water changes to correct the water perimeters, which I thought would get me back on schedule.. It didn't of course, it simply masked the problem of there not being another bacteria in the system. It also most likely delayed my cycle.. But I had the right perimeters the schedule said I should again, so on day 10 I threw my clean-up crew in! 4 snails (2X Trochus and 2X Nassarius), a Peppermint shrimp and 2 Blue Leg Hermit Crabs. I drip acclimated them over an hour or so and added them. Thankfully the shrimp and craps all survived my fiasco.. The snails on the other hand did not... :-( It was at this time that I was retracing my steps and realized my live rock mistake. I should have given the tank plenty of time to cycle properly. In fact, once I replaced the RS bacteria, I should have just considered that day 1 of the cycle and waited a month and scrapped the schedule. Hindsight is 20/20 though.

Once the cycle was complete, we added the two Tail Spotted Blennies. I now also understand that this may not have been the best idea, as they are territorial. One is slightly larger than the other and the smaller basically avoids the larger all the time. They are both good and active for a couple of weeks now. They are eating the crap out of the diatoms that you can see in the last picture (it was taken before the fish were added). They will not however eat any other food offered. Since they are alive for 2 weeks now, I expected them to have eaten something. I've tried pellets, flakes and Nori, they went for none of them.

My question here is two fold. 1. Should I take the little one out and just get another type of fish or will they be ok in a 45 gal tank with this much rock work, etc? 2. Are they not eating due to the amount of diatoms they are happily munching on all day long? Or should I be trying mysis or something else to get them to take that food? Would maybe adding copepods to the tank (which I plan to do anyway) perhaps encourage them to eat? The diatoms are slowing dwindling... so that last one is a bit time sensitive.

IMG_5672.jpg
IMG_5673.jpg
IMG_5809.jpg
 
OP
OP
Haubfather07

Haubfather07

Active Member
View Badges
Joined
Dec 30, 2017
Messages
122
Reaction score
105
Location
Wilder, KY
Rating - 0%
0   0   0
You're off to an awesome start. In regards to your initial hole in the wall, I don't know what size it is but it looks like you might be able to get an "old construction" electrical box at any big box hardware store and insert it in the hole. Then you can get a blank "switch plate" style cover and cut a hole in it for your piping to go through. I have also seen people get acrylic panels and cut holes in them for pipes as well.

The hole is currently about 5" wide and just under a foot tall. I made it larger just to make it easy to work. Thanks for the advice, I'll look into both options!
 
OP
OP
Haubfather07

Haubfather07

Active Member
View Badges
Joined
Dec 30, 2017
Messages
122
Reaction score
105
Location
Wilder, KY
Rating - 0%
0   0   0
Some additional photos from today showing diatoms (which I'm not cleaning off the glass since I'm afraid of starving the TSBs) and a couple of the livestock. Also, ignore the salt on the back of the tank, I'm going to get that cleaned up this weekend... Which brings me to another question.. Leave the back clear glass showing the gray wall behind it, at least until I get it covered in Coraline? Put up one of those poster type things and tape it to the back.. ? What do people recommend/do that looks the best?

IMG_5868.jpg

IMG_5869.jpg

IMG_5870.jpg
 
OP
OP
Haubfather07

Haubfather07

Active Member
View Badges
Joined
Dec 30, 2017
Messages
122
Reaction score
105
Location
Wilder, KY
Rating - 0%
0   0   0
Decided to upgrade... Once I realized I was going to be in this hobby for a long time, I decided to go with an all-in-one setup. The Reefer 450 ended up fitting my wants and needs best. I decided to upgrade early which is helpful. I only had two Tail Spot Blennies to move for fish. 1 shrimp, 2 crabs and 5 snails and a Duncan.

For those interested I can provide a full list of prep work and process doc that I made to plan all of this out. PM me for that and I'll email it over.

I made a little video time-lapse of the process. More to come though! Going to be upgrading the lights (to better match the tank as they are way undersized right now) and adding a Maxspec Gyre to match the flow from what I had to the new tank.

 
OP
OP
Haubfather07

Haubfather07

Active Member
View Badges
Joined
Dec 30, 2017
Messages
122
Reaction score
105
Location
Wilder, KY
Rating - 0%
0   0   0
Started painting PVC to upgrade my water change station today! Lots of upgrades since my last post. Going to work on updating his week/end!

P.S My lawn is also coming along very nicely!!
4B82B69E-22C2-4BB3-BE82-B18C4280B40E.jpeg
 
Back
Top