Hi guys and gals!
It's time to add another section to my skimmer mechanics. We all have faced problems at some point with our skimmers. Sometimes we tend to overlook the reasons as to why. Skimmers are basic functions of mechanics and fluid dynamics.
I covered the first area of inspection here: https://www.reef2reef.com/threads/skimmer-problems-here-is-the-first-area-to-inspect.280457/
Now I will get more into detail of the second part of inspection. The heart of the skimmer.
For this I am explaining one of the most commonly used styles of pumps. The needle wheel. This is a standard 110v mag pump as even the DC pumps still utilize the same concepts of mechanics.
First the pump:
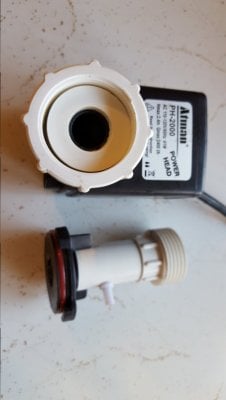
Just the basic venturi needle wheel pump. This particular skimmer uses this pump externally which is important because heat will play a role in cleaning frequency.
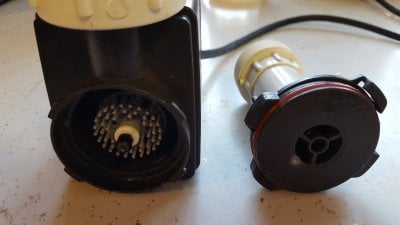
Here is the magnet assembly removed. Make sure no pieces get misplaced.
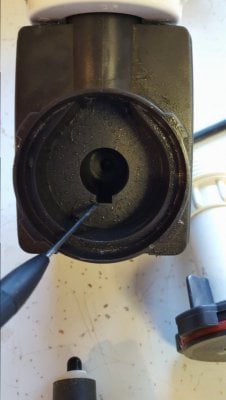
Now we will be looking at magnet cooling. Yup pumps use hydraulic pressures from the rotor to move water. The screwdriver is pointing to the grove that follows the length of the rotor. Make sure this gets cleaned out. If this groove get full of skimmer garbage the magnet assembly will overheat and split. This groove is KEY to keep cleaned out. Even after soaking a pump, garbage will still be left in this.
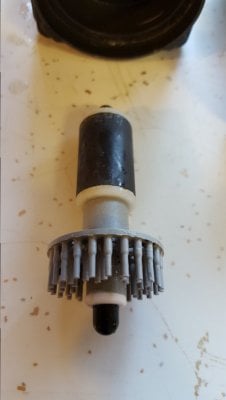
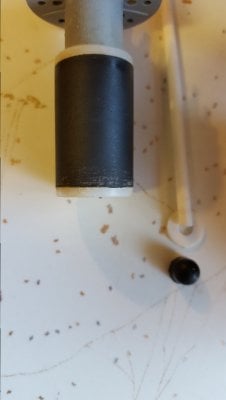
Inspect the rotor assembly for cracks and abnormal wear. As solid deposits build up in the housing it will wear against the magnet and can cause an unbalanced rotor if too much wear has been done. This makes for a noisy pump! You can see here on this magnet that there is slight wear at the bottom.
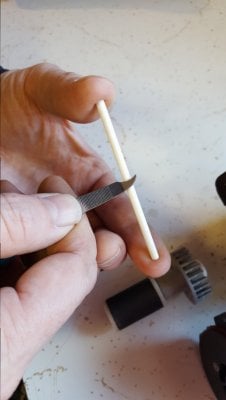
Next we have the ceramic shaft. When the rotor gets hot calcium buildup occurs on the shaft which drastically slows the assembly down. Here you can see me cleaning (scraping) the shaft off.
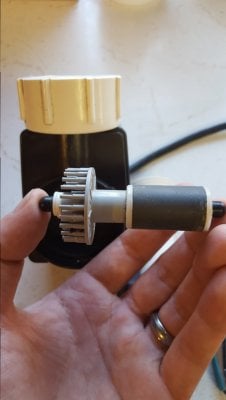
Now take the shaft and slide it in and out of the magnet several times as buildup can even occur within the wall of the magnet. Make sure it slides and spins freely.
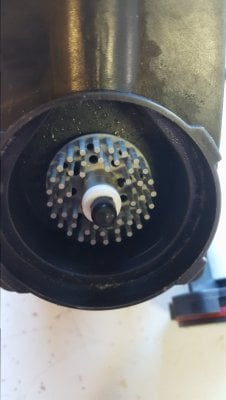
Now where one of the problems that happens with these pumps is installing the pump intake. The rubber shaft mount has a tendency roll out of place causing the shaft to not be centered. I have found it to be simple by putting the rubber mount on the shaft first and not the intake cover.
Now you're ready to rock and roll again!
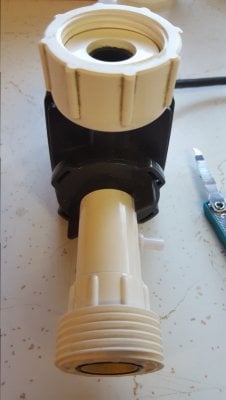
If the shaft is in the correct position with the rubber mount it will run like a champ once again
Thank you R2R!
-Todd
It's time to add another section to my skimmer mechanics. We all have faced problems at some point with our skimmers. Sometimes we tend to overlook the reasons as to why. Skimmers are basic functions of mechanics and fluid dynamics.
I covered the first area of inspection here: https://www.reef2reef.com/threads/skimmer-problems-here-is-the-first-area-to-inspect.280457/
Now I will get more into detail of the second part of inspection. The heart of the skimmer.
For this I am explaining one of the most commonly used styles of pumps. The needle wheel. This is a standard 110v mag pump as even the DC pumps still utilize the same concepts of mechanics.
First the pump:

Just the basic venturi needle wheel pump. This particular skimmer uses this pump externally which is important because heat will play a role in cleaning frequency.

Here is the magnet assembly removed. Make sure no pieces get misplaced.

Now we will be looking at magnet cooling. Yup pumps use hydraulic pressures from the rotor to move water. The screwdriver is pointing to the grove that follows the length of the rotor. Make sure this gets cleaned out. If this groove get full of skimmer garbage the magnet assembly will overheat and split. This groove is KEY to keep cleaned out. Even after soaking a pump, garbage will still be left in this.

Inspect the rotor assembly for cracks and abnormal wear. As solid deposits build up in the housing it will wear against the magnet and can cause an unbalanced rotor if too much wear has been done. This makes for a noisy pump! You can see here on this magnet that there is slight wear at the bottom.

Next we have the ceramic shaft. When the rotor gets hot calcium buildup occurs on the shaft which drastically slows the assembly down. Here you can see me cleaning (scraping) the shaft off.

Now take the shaft and slide it in and out of the magnet several times as buildup can even occur within the wall of the magnet. Make sure it slides and spins freely.

Now where one of the problems that happens with these pumps is installing the pump intake. The rubber shaft mount has a tendency roll out of place causing the shaft to not be centered. I have found it to be simple by putting the rubber mount on the shaft first and not the intake cover.

Now you're ready to rock and roll again!

If the shaft is in the correct position with the rubber mount it will run like a champ once again
Thank you R2R!
-Todd
Last edited by a moderator:


