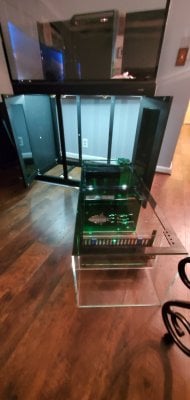
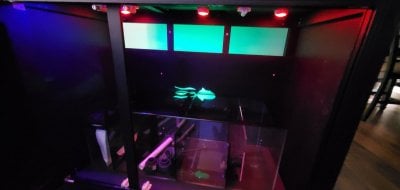
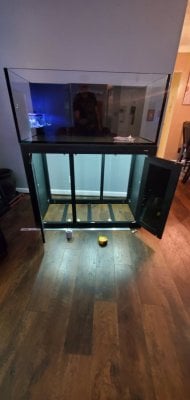
I should of started this thread a couple of months ago as I'm sure the community would of caught some minor (but annoying) mistakes I've made along the way. I've been busy relocating from San Francisco to Chicago while getting our 75 gallon up and running. It has been a fun and interesting journey so far, and hopefully that will continue. I've had small freshwater tanks in my teens/college, and my first foray into saltwater was a 10 gallon AIO this past '18 summer (it is humming along nicely). My partner and I have decided to jump up to something bigger, hence this 75INT Innovative Marine build thread.
Below is my list of components that have so far gone into our build. I'll try and keep this as extensive as possible so fellow refers can have a shopping list resource and not forget some of the important but minor items (like I have).
As of 1/7/2019 the tank has been running for 2 weeks.
=========================================
Components:
Aquarium:
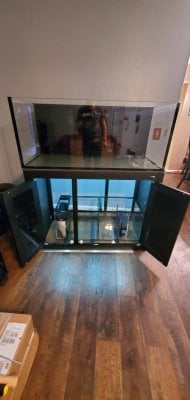
- Innovative Marine IM INT 75
- Innovative Marine IM SR-60
- NB: Provided cut out instructions for top board were incorrect, make it 1" deeper and 1" wider. Top horizontal support beam was mis-located. No instructions provided. Shift it a few inches off center to the left (in between 1st and 2nd bulkheads)
- Shims for leveling
- Tape (to cover those annoying little screws on the top board that prevent the tank from sliding on/off easily)
- Mods:
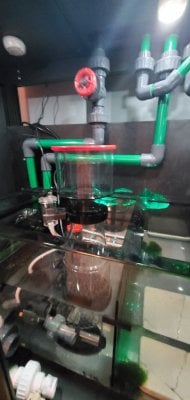
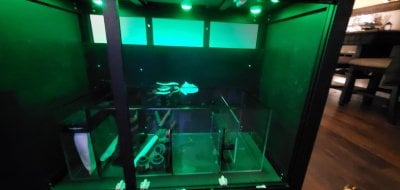
- DIY - Aqueon 20G tall
- 3D model available, PM me
- Chemistry Probes: (Profilux 4 based)
- pH
- Temperature
- Salinity
- ORP
- Profilux Probe holder (terrible design, I don't have confidence it will stay in position. I need to replace it)
- Silicone: GE Silicone 1 Window and Door
- Laser cut 3/8" black acrylic
- 1" PVC Sch 40 pipe from Home Depot
- BRS 1" black vinyl tuning
- BRS 3/4" black vinyl tubing
- 1" unions, Sch 40, PVC, slip slip
- 3/4" unions, Sch 40, PVC, slip slip
- 3/4" Spears True union swing check valve, slip slip
- Various elbows and 90s as needed, slip-slip
- 1” Cepex ball valve, slip slip
- 3/4" Pipe Adapter spigot x barb x2
- Wye fitting, Spears 475 Series PVC Pipe Fitting, Sch. 40, 3/4", slip slip
- Primer and cement
- Foad pad, Aquaneat Reticulated Open Cell Foam Sponge Filter Media (coarse)
- Reservoir (still deciding what my best option is)
- Profilux 4 based
- GHL Float sensor
- GHL Optical Sensor
- Sensor holders (terrible products. Look elsewhere! I'm replacing them):
- ATO pump:
- Pump Sicce Micra (under powered, 2ft head height is very low)
- Replaced with BRS 50mL/min doser
- Pump tubing:
- Sand: Caribsea Aragonite Special Grade, 1 x 40 lbs, 1-2 mm grain size
- ~1 inch depth
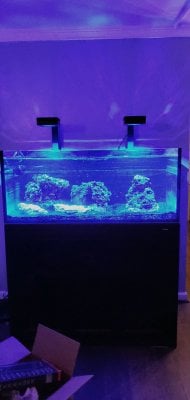
- Rock: MarcoRocks Reef Saver, dry "live", 80 lbs (only ended up using 2/3 of it in the display)
- Glue: BRS Extra Thick Super Glue, 2 x 20G
- Acrylic tubes: 4 x ¼” dia., 16", clear
- Drill bit: Irwin Tools 1813898 Masonry Drill Bit 1/4" Multi Material Xl 16"
- Salt: Instant Ocean Reef Crystals
- BRS Pharma Kalkwasser Bulk Package:
- BRS Kalkwasser
- BRS Magnesium
- BRS Sodium Chloride
- BRS Sodium Bicarbonate
- Purigen, 100 mLs
- Carbon: Using up some old unknown media
- GFO: BRS bulk granular ferric oxide
- Fluval Biomax Filter Media, 500g
- MarinePure 8"x8"x4" block (I wouldn't buy this again, expensive, fragile, sheds)
- Filter media bags:
- API Master Test Kit
- pH
- Ammonia
- Nitrite
- Nitrate
- API Phosphate (very difficult to read, will replace)
- Red Sea Reef Foundation Pro Test Kit
- Calcium
- Alkalinity
- Magnesium
- Lamotte total and free chlorine
- BRS refractometer (use the calibration fluid fortnightly!)
- 1st addition:
- Dry rock matured in basement for 3 months in saltwater
- Cycled with Fritz TurboStart
- Red banded cleaner shrimp (Stinky)
- Red legged hermit crab
- Blue legged hermit crab
- 2nd addition (2nd month):
- Yellow watchman goby (Gilbert)
- Randall's pistol shrimp (Dozer)
- Coralline algae, ARC pink and purple bottles
- 3rd addition (3rd month):
- Da'Vinci clown (Lucy)
- 4th addition (3rd month):
- Da'Vinci clown (Desi 2.0, the only thing not QT'd)
- 5th addition (5th month):
- Bengai Cardinal, mated pair (Morticia and Gomez)
- Firefish x 3
- Royal gramma
- Panamic barnacle blenny x 7 (The Muppets)
- Coralline algae, ARC pink and purple bottles
- 6th addition (6 month):
- Blue mandarin, female, Biota captive bred (only eats live food)
- Future fish I want to add:
- Purple tang
- Controller:
- GHL ProfiLux 4
- Return Pumps
- 2 x Jebao DCP-4000
- Running dual pumps in parallel for redundancy
- Heater:
- 2 x 200 W, Jager TruTemp
- Primary heater is controlled by Profilux temperature probe at 25C, but internal heater thermostat is set to 26C.
- Secondary heater is set to 24C and on permanent power.
- Primary concern is that heater fails on - thermostat within the heater acts as backup (26C). 2nd concern is that heater fails off - 2nd, independent, always on, heater would turn on (24C).
- Wave Maker (display):
- Tunze Nanostream 6055
- Controlled by Profilux with cable
- Refugium lighting:
- 45W grow light
- The best option I could find for my long and narrow refugium chamber.
- Skimmer:
- Wave maker to mix salt:
- Kessil A360X x 2
- Kessil A Series Mounting Arm x 2
- Kessil Spectral Controller X
- BRS 6 stage
- Water reservoir
- Float valve:
- Plumbing:
- Copepods, AlgaGenPods Apocylops
- Hikari Seaweed Extreme small pellet
- Piscine Energetics Mysis shrimp blister pack
- Piscine Energetic Saltwater Pellets
- NB: I bought the smallest packs possible, it's food after all, and will deteriorate at the rate I use it up.
- Misc. towels
- Misc. fish nets
- Large tub for rinsing sand
- Small tub and clamp for acclimating bioware in display
- Plastic Pasteur pipettes for feeding
- Misc. zip ties
- Adhesive zip tie mounts, iExcell 100Pcs Black 20mm x 20mm x 4mm
- Measuring cups and spoons
- Extension cord, Stellar Labs 28-11311 2 outlet
- Velcro, Strenco 2" Adhesive Black Hook and Loop Tape, Heavy Duty, 15 Feet (not sure I would buy this again)
- Saw
- Channellock wrench
Last edited:


