- Joined
- Nov 27, 2017
- Messages
- 26
- Reaction score
- 54
- Review score
- +0 /0 /-0
- Location
- New port Richey/Hudson Fl
Hey everybody...
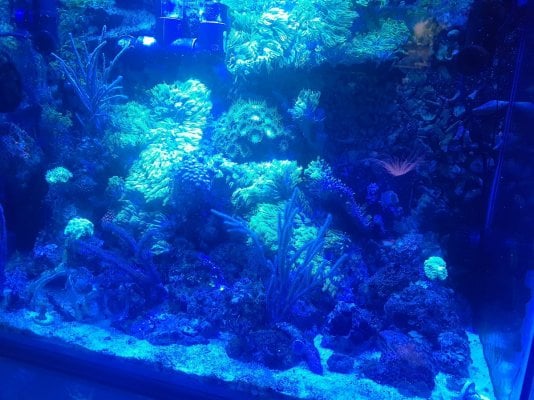
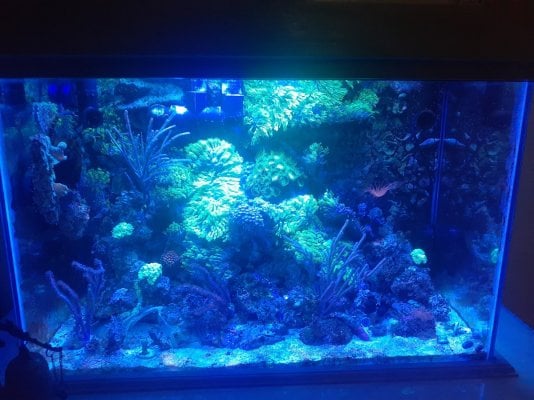
First off, here's my current tank - upgraded from a 10 gallon a week ago. (yes, I started with picos roughly three years ago)

I worked on the stand for about 4 months or so while I was remodeling the house my girlfriend bought. I would have built it faster but I was replacing the matchsticks used to build the house with better lumber.
So the tank...
I built it with only two measurements in mind, the height I wanted the tank to be and the width. These measurements changed eleven times, but that's what I get for measuring with my hammer. All of the lumber was free and it's a combination of pine, oak and poplar.
I like the boxy (boxie?) look and prefer to have a covered tank minimizing light spill. I want the tank lit but not the entire room. I use to document every step thinking someone would read my posts one day and find them helpful but I don't know if that's the case. Last long well documented post I made on another forum the only response I got was 'that looks like too much rock'...
(I tend to ramble so just skim this)
I wanted to build a stand that could double for a pillar for the second story if need be and that I did. For the moment it is only supporting the tank.
I did take a few pictures of of various stages, mostly so I could bounce ideas off of my friend who can't keep goldfish or turn a screw so he was my go-to guy for ideas, I'll post some of them in a bit or a while, whichever happens.
(this will be a bit drawn out so feel free to get a snack - I'll wait)
...
No, really I waited...
So as the stand progressed, so did the tank idea. Originally it was going to be a 10 gallon, then maybe a 15 because I liked that idea. Eventually it became a 20 tall because it was given to me free of charge which of course cost me a lot in the long run - my boss gave it to me and reminds me of that everytime he remembers.
One side of the tank has a tiny chip near the bottom so of course that is the side I made the front because I wasn't paying attention when I drilled it
Back to that in a bit.
I wanted the tank to be self reliant, but that probably isn't the right word. I wanted it to be hands off as much as possible. Things like timers and a ATO make this possible.
I made all of the trim and molding with my router table and all of the boards started out as 2x8 and 2x12 lumber which I cut to whatever size I needed. Everything was pocket screwed and glued. To reiterate I over built this stand, not because I was afraid it couldn't support the tank and not because I was afraid it would just collapse when I leaned on it to view the tank, I over built it because I wanted it to be nearly impossible for me to move it into position by myself. It took me an hour to get it in the back of the truck to move it so again I succeeded.
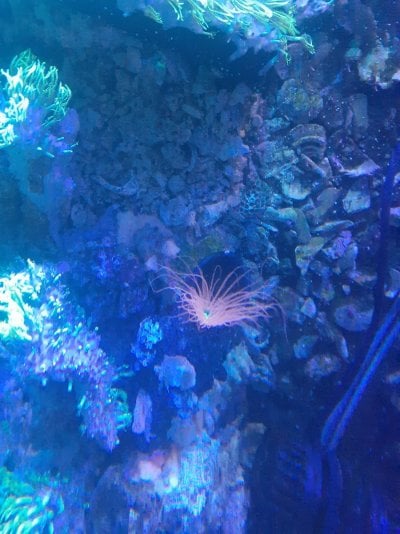
I reused as much as I could from my previous tank-the pumps, Gravel/substrate, leds, rocks, everything that wasn't epoxied to the tank (I like to epoxy rock to the tank...).

(current tank background)
*I'm writing this between breaks at work so it will be a bit scattered...
I built my led fixture, I've done this since I rebuilt the one I bought for my first tank. I like having several channels that can be adjusted individually and come on at different times. I know, I know, I should have built it to be exactly how many leds I needed and in the perfect color but I decided to not do that, and instead go with six different channels that come on 15 minutes apart except for the moon which comes on 5 minutes before lights out and goes off 5 minutes after lights on. I'm sure there is a easier way to do lighting instead of six timers, six dimmers and six power supplies but I had most of the stuff on hand and in the end I felt it was a better idea with more overall control.
*I don't know if there is a limit on post length or if the pictures take up too much room so I will continue in another post... Go take a bathroom break.
First off, here's my current tank - upgraded from a 10 gallon a week ago. (yes, I started with picos roughly three years ago)
I worked on the stand for about 4 months or so while I was remodeling the house my girlfriend bought. I would have built it faster but I was replacing the matchsticks used to build the house with better lumber.
So the tank...
I built it with only two measurements in mind, the height I wanted the tank to be and the width. These measurements changed eleven times, but that's what I get for measuring with my hammer. All of the lumber was free and it's a combination of pine, oak and poplar.
I like the boxy (boxie?) look and prefer to have a covered tank minimizing light spill. I want the tank lit but not the entire room. I use to document every step thinking someone would read my posts one day and find them helpful but I don't know if that's the case. Last long well documented post I made on another forum the only response I got was 'that looks like too much rock'...
(I tend to ramble so just skim this)
I wanted to build a stand that could double for a pillar for the second story if need be and that I did. For the moment it is only supporting the tank.
I did take a few pictures of of various stages, mostly so I could bounce ideas off of my friend who can't keep goldfish or turn a screw so he was my go-to guy for ideas, I'll post some of them in a bit or a while, whichever happens.
(this will be a bit drawn out so feel free to get a snack - I'll wait)
...
No, really I waited...
So as the stand progressed, so did the tank idea. Originally it was going to be a 10 gallon, then maybe a 15 because I liked that idea. Eventually it became a 20 tall because it was given to me free of charge which of course cost me a lot in the long run - my boss gave it to me and reminds me of that everytime he remembers.
One side of the tank has a tiny chip near the bottom so of course that is the side I made the front because I wasn't paying attention when I drilled it
Back to that in a bit.
I wanted the tank to be self reliant, but that probably isn't the right word. I wanted it to be hands off as much as possible. Things like timers and a ATO make this possible.
I made all of the trim and molding with my router table and all of the boards started out as 2x8 and 2x12 lumber which I cut to whatever size I needed. Everything was pocket screwed and glued. To reiterate I over built this stand, not because I was afraid it couldn't support the tank and not because I was afraid it would just collapse when I leaned on it to view the tank, I over built it because I wanted it to be nearly impossible for me to move it into position by myself. It took me an hour to get it in the back of the truck to move it so again I succeeded.
I reused as much as I could from my previous tank-the pumps, Gravel/substrate, leds, rocks, everything that wasn't epoxied to the tank (I like to epoxy rock to the tank...).
(current tank background)
*I'm writing this between breaks at work so it will be a bit scattered...
I built my led fixture, I've done this since I rebuilt the one I bought for my first tank. I like having several channels that can be adjusted individually and come on at different times. I know, I know, I should have built it to be exactly how many leds I needed and in the perfect color but I decided to not do that, and instead go with six different channels that come on 15 minutes apart except for the moon which comes on 5 minutes before lights out and goes off 5 minutes after lights on. I'm sure there is a easier way to do lighting instead of six timers, six dimmers and six power supplies but I had most of the stuff on hand and in the end I felt it was a better idea with more overall control.
*I don't know if there is a limit on post length or if the pictures take up too much room so I will continue in another post... Go take a bathroom break.