Hi all,
After my 32g tank went through a 2000km house move (from Germany to Spain) in a car's trunk with 100F outside and 1 year of minimal maintanance I decided to give it some love and make a brand new setup, and of course, write a Build thread about it!
Some background:
I initially downsized my 32g mixed reef tank to a 18g in order for it to be manageable for the house move, so I sold or gave away most of the finicky inhabitants that could have suffered the stress of the trip. Then the tank was left in my family member's house temporarily where I would only visit it every few days to fill the ATO reservoir and check it was all ok. Water changes? maybe 4 times in a year. Thanks to the macroalgae (I think) the damage was minimal and in the process I lost only few corals and a skunk shrimp.
Now, coming to the new build, I decided I wanted to make the tank nicer than before, but as usual for me, to include a lot of DIY stuff, and go for an "unusual" setup.
I was looking for 200-230l tanks that would fit in my Eheim vivaline 180 stand (100x40cm), and I could not find any rimless tank of that size in my area. While scanning the web I found that Dennerle makes a 50x38cm 18g/70l tank so I thought WHY NOT TWO SMALLER TANKS instead of one? I am intrigued in making something really different from the usual setup so this gives me the chance to keep my livestock and try something slightly different at the same time.
So I went for it.
First thing: I made a 3d digital copy of the project, for better planning. This was created on Thinkercad.

I started by ordering another Dennerle 70l Scaper's Tank. I really like the proportions of this rimless tank, as they enable to give some depth to the scaping. I also decided to hack the Eheim stand and make space for a 60l sump: since the stand was originally designed for freshwater tanks it had 2 sections both too small for a reasonable sump.


So I removed the central brace panel and swapped with a 2x4cm wood frame, large enough to fit the 60l sump. I also painted the inside of the stand with protective acrylic paint and siliconed the corners to avoid moisture damage. The central brace panel was moved a bit to the right as separation between the sump area and the electrical components.


At this point I painted the background (exterior!!!) of the tanks with black acrylic paint.

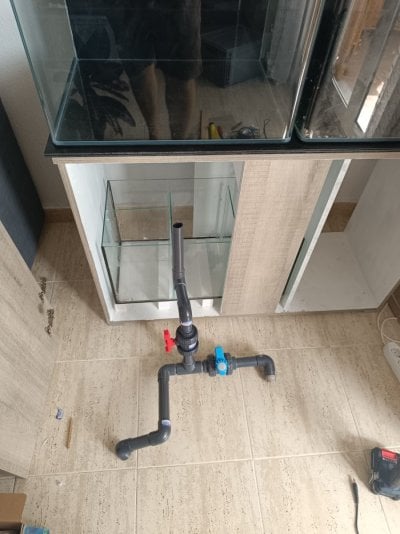
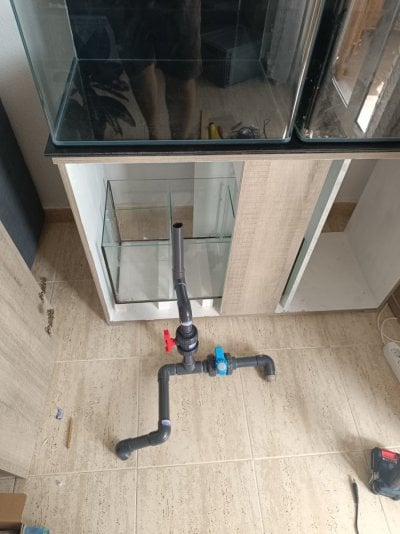
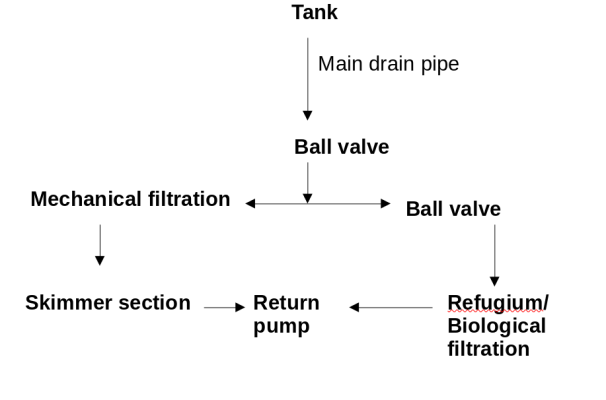
Then installed the sump. It was made starting from a 60x30x30cm tank. I siliconed the sump sections and set up the sump as follow:


Regarding drilling: I decided NOT to drill, mainly because I did not want to risk breaking such a thin glass (only 4mm). I instead decided to build a siphon overflow box starting from the structure of an hob filter (I will add later the details about the build in this thread).
Only the left tank will be connected to the sump for now.
This is the situation as of today: I installed the kessil arms (using cheap amazon tv holders), installed fuge grow light, installed return pump and covered the back of the stand with rugged plastic sheet (for light spill).


I will next:
- Install stand doors
- Make an extractible section where I will install all the monitors and controllers: wavemaker controllers, Inkbird thermostat, and automatic doser
- Install tank controller (Robotank)
- 3D print filter sock holder and sump baffles
- Clean old rocks/corals from some bubble algae/aiptasia
- Get sand and move the livestock with live rocks and water in the left-side tank: this will be a softcorals/lps dominant tank. Livestock: YWG goby, Clownfish pair, bicolor blenny, peppermint shrimps, sexy shrimp, emerald crab.


After my 32g tank went through a 2000km house move (from Germany to Spain) in a car's trunk with 100F outside and 1 year of minimal maintanance I decided to give it some love and make a brand new setup, and of course, write a Build thread about it!
Some background:
I initially downsized my 32g mixed reef tank to a 18g in order for it to be manageable for the house move, so I sold or gave away most of the finicky inhabitants that could have suffered the stress of the trip. Then the tank was left in my family member's house temporarily where I would only visit it every few days to fill the ATO reservoir and check it was all ok. Water changes? maybe 4 times in a year. Thanks to the macroalgae (I think) the damage was minimal and in the process I lost only few corals and a skunk shrimp.
Now, coming to the new build, I decided I wanted to make the tank nicer than before, but as usual for me, to include a lot of DIY stuff, and go for an "unusual" setup.
I was looking for 200-230l tanks that would fit in my Eheim vivaline 180 stand (100x40cm), and I could not find any rimless tank of that size in my area. While scanning the web I found that Dennerle makes a 50x38cm 18g/70l tank so I thought WHY NOT TWO SMALLER TANKS instead of one? I am intrigued in making something really different from the usual setup so this gives me the chance to keep my livestock and try something slightly different at the same time.
So I went for it.
First thing: I made a 3d digital copy of the project, for better planning. This was created on Thinkercad.
I started by ordering another Dennerle 70l Scaper's Tank. I really like the proportions of this rimless tank, as they enable to give some depth to the scaping. I also decided to hack the Eheim stand and make space for a 60l sump: since the stand was originally designed for freshwater tanks it had 2 sections both too small for a reasonable sump.
So I removed the central brace panel and swapped with a 2x4cm wood frame, large enough to fit the 60l sump. I also painted the inside of the stand with protective acrylic paint and siliconed the corners to avoid moisture damage. The central brace panel was moved a bit to the right as separation between the sump area and the electrical components.
At this point I painted the background (exterior!!!) of the tanks with black acrylic paint.
Then installed the sump. It was made starting from a 60x30x30cm tank. I siliconed the sump sections and set up the sump as follow:
Regarding drilling: I decided NOT to drill, mainly because I did not want to risk breaking such a thin glass (only 4mm). I instead decided to build a siphon overflow box starting from the structure of an hob filter (I will add later the details about the build in this thread).
Only the left tank will be connected to the sump for now.
This is the situation as of today: I installed the kessil arms (using cheap amazon tv holders), installed fuge grow light, installed return pump and covered the back of the stand with rugged plastic sheet (for light spill).
I will next:
- Install stand doors
- Make an extractible section where I will install all the monitors and controllers: wavemaker controllers, Inkbird thermostat, and automatic doser
- Install tank controller (Robotank)
- 3D print filter sock holder and sump baffles
- Clean old rocks/corals from some bubble algae/aiptasia
- Get sand and move the livestock with live rocks and water in the left-side tank: this will be a softcorals/lps dominant tank. Livestock: YWG goby, Clownfish pair, bicolor blenny, peppermint shrimps, sexy shrimp, emerald crab.


Last edited:


