- Joined
- Jan 28, 2020
- Messages
- 880
- Reaction score
- 837
Hello all!
I'm a big DIY guy and I figured I'd share a bit about a recent DIY of mine. I used Cellular PVC Trim/Sheets I got from The Home Depot. These sheets come in 1/4", 1/2", and 3/4" thicknesses and are smooth on both sides. They are easy to work with, lightweight, and most importantly, more affordable when compared to acrylic.
Basically its a giant sheet of PVC, yes, PVC as in the plumbing material. So that means its super easy to cut, and even easier to glue, as standard PVC plumbing glue is all that's needed!
I picked up a 24"x48" sheet of 3/4" PVC from my local Home Depot for just over $60 with tax.
My mission here was to replace my temporary and cheap DIY trickle filter.

My main goals were to make something that was easy to clean and maintenance, held a large amount of live rock rubble and bioballs, and looked nice doing so. I'm the type of DIYer that usually just wings the dimensions as I go. I usually base the dimensions around one of two things. I either need the project to be an exact size, or I limit my dimensions to material sizes to ensure most efficient use of materials. In this case I chose the later of the two options. I was hoping to get by with just a single 2ftx4ft sheet of PVC.
Step 1: Layout
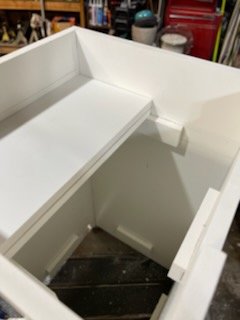
Knowing the size of the material was my limiting factor and knowing I needed to create a box with a trickle plate, I did some quick math and sized 4 pieces to create a tall box and a two piece trickle plate accordingly. Keeping in mind that I would need some extra material to create ledges to rest the trickle plate on as well as some egg crate to hold the rubble off the bottom. I transferred these measurements to my sheet of PVC with a pencil that's incredibly hard to see.

Step 1.5: Layout V2
Make sure you double check your measurements as always before you cut. Then turn the saw on and get ready to cut. STOP. Turn the saw back off and triple check your measurements. Then realize you did in fact measure incorrectly, flip over the sheet and do a new layout. The correct layout this time.
Step 2: Cutting Pieces
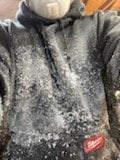
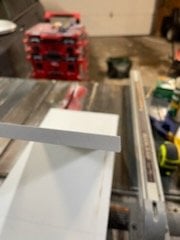
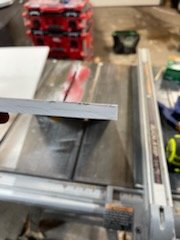
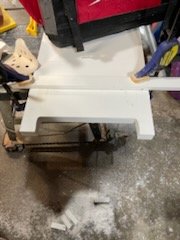
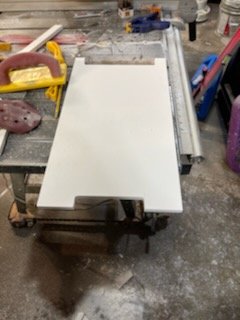
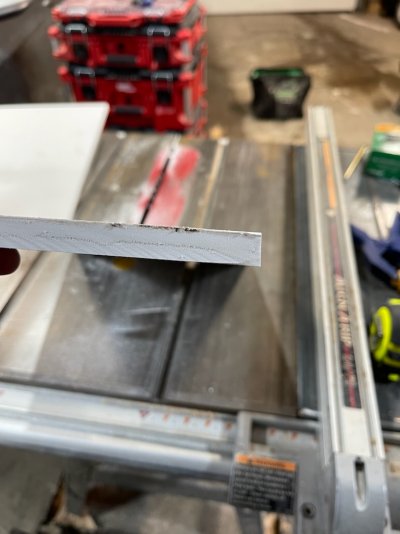
For cutting, I first used a skill saw and clamped a straight edge to the sheet to break it down into manageable sized pieces. With a little sanding you could definitely get by with just a skill saw and a straight edge. I'm sure you could even use a jig saw if you took your time cutting. I personally was after a nice square box which meant that I'd be using a table saw. I should also mention that I just used standard wood blades for all my cutting. Using the table saw allowed me to get nice square cuts while also being able to easily make all the pieces the same width which will give me a nice square box in the end.


This stuff is MESSY to cut, so please use proper PPE when cutting. A dust mask and eye protection is a MUST.

Step 3: Notching
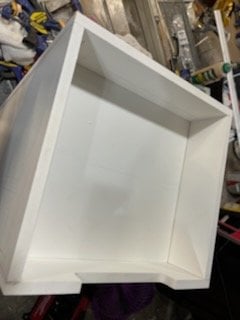
I needed to notch 2 of the 4 sides of the box. Two notches on the bottom for the water to flow out, and one on top to direct water safely into the sump in the event I wait a day too long to change my filter floss out. Don't snicker, we've all done it.
To do this, I used a simple plunge bit on my router. A sharp bit, and a higher speed will cut through this stuff like butter. I actually drew the notch on and free handed the cut. I did use some clamps and a straight edge to just make sure I didn't accidently take out too much material.


Step 4: Starting to glue
As I mentioned before, all that's needed to glue this stuff is your standard PVC plumbing glue and primer. In fact, I didn't even use primer and I ran into no bonding issues. I found that the primer just caused more of a messy finish. All I simply did was mark where the pieces were to be with a pencil, and added some glue in that spot. I was careful not to add too much glue as I didn't want the glue to squeeze out and cause runs. I then added some glue to the other piece and let it sit for 30 seconds or so before putting the two pieces together. This allows the PVC to start "melting" which I found allowed the bond to solidify faster. I didn't use clamps for most of the process and instead just held everything together for a minute or so as it dried. After a minute everything seemed to be tacked well enough to not move until it dried fully.


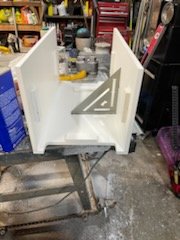
When gluing the box I would hold the pieces together as mentioned for about a minute before the bond would stiffen. To make sure nothing would lean during the next 5 minutes or so until it fully dried I used a speed square to keep everything square. In the end, my box turned out really square and fitting the trickle plate was a breeze. Square box + square trickle plate = easy fitment


I made the trickle plate two pieces to make it easier to take in and out.


Step 5: Drilling Trickle Plate
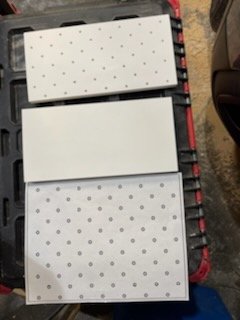
The only thing left to do was to drill the holes in the trickle plate. Rather than measuring out and marking each individual hole, I went inside quick and drew up a quick template on CAD and printed it to scale. Then I simply taped it onto the pieces and drilled right through the template.

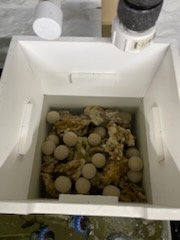
Finally I added egg crate to the bottom, and placed in approximately 40lbs of rubble and biospheres. Put the trickle plate in and added a layer of course aquamesh to space the filter floss off the plate a little bit.


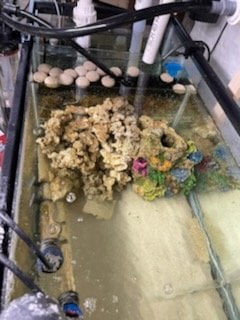
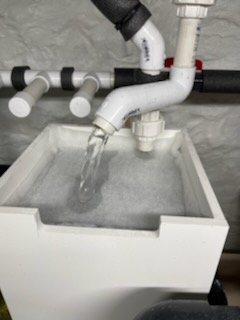
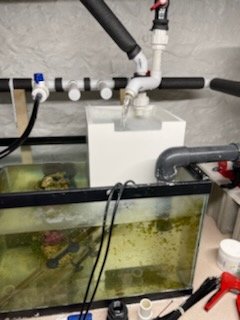
And here is what it looks like in the sump. I have since reworked the plumbing so that it doesn't splash and cause salt creep. Overall I'm very happy with how it turned out. Especially for a project grand total of $60.

It's been running since the first week of February, to which I've made one change since then. The main adjustment was drilling the holes in the trickle plate larger to allow air to freely escape. I had it happen several times where air would get trapped under the trickle plate and not allow water to fall down. Instead the water would just flow out the overflow notch. Since making the holes larger to allow the air to freely escape, I haven't had any issues. Super easy filter floss change every few days and lots of nitrifying bacteria to boot!
A few other things to note, be careful with your glue! If you get glue anywhere its not supposed to be, it will leave a mark even if you wipe it off right away. Also I used pencil to make my marks and found out that for some reason even when using denatured alcohol it refuses to come off. My marks were all either cut off or glued over, so not really a big issue for me, but something to note if you're making marks that wont be covered or cut off. Maybe try a dry erase marker? Not sure what to recommend here. Lastly, I had a heart attack when I initially when to put this into my sump. I quickly realized that PVC likes to float in water. Luckily, I had enough rock to hold it down securely. Again, something to keep in mind when trying to decide if this material would be suitable for your next project.
Whelp, I hope this helped to inspire a few of you with projects of your own. I don't see much being done with this material which is surprising since its reef safe, cheap, and easy to work with. I think if my tank decides it needs one, I very well may try making an ATS out of this material and some glass from an old tank. I think it would be an interesting build. Share your ideas for possible projects made out of PVC!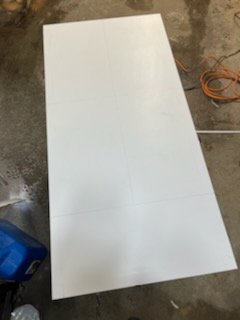
I'm a big DIY guy and I figured I'd share a bit about a recent DIY of mine. I used Cellular PVC Trim/Sheets I got from The Home Depot. These sheets come in 1/4", 1/2", and 3/4" thicknesses and are smooth on both sides. They are easy to work with, lightweight, and most importantly, more affordable when compared to acrylic.
Basically its a giant sheet of PVC, yes, PVC as in the plumbing material. So that means its super easy to cut, and even easier to glue, as standard PVC plumbing glue is all that's needed!
I picked up a 24"x48" sheet of 3/4" PVC from my local Home Depot for just over $60 with tax.
My mission here was to replace my temporary and cheap DIY trickle filter.
My main goals were to make something that was easy to clean and maintenance, held a large amount of live rock rubble and bioballs, and looked nice doing so. I'm the type of DIYer that usually just wings the dimensions as I go. I usually base the dimensions around one of two things. I either need the project to be an exact size, or I limit my dimensions to material sizes to ensure most efficient use of materials. In this case I chose the later of the two options. I was hoping to get by with just a single 2ftx4ft sheet of PVC.
Step 1: Layout
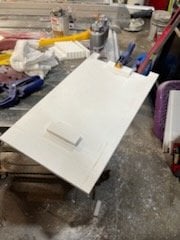
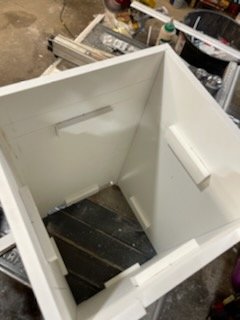
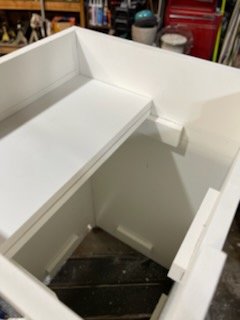
Knowing the size of the material was my limiting factor and knowing I needed to create a box with a trickle plate, I did some quick math and sized 4 pieces to create a tall box and a two piece trickle plate accordingly. Keeping in mind that I would need some extra material to create ledges to rest the trickle plate on as well as some egg crate to hold the rubble off the bottom. I transferred these measurements to my sheet of PVC with a pencil that's incredibly hard to see.
Step 1.5: Layout V2
Make sure you double check your measurements as always before you cut. Then turn the saw on and get ready to cut. STOP. Turn the saw back off and triple check your measurements. Then realize you did in fact measure incorrectly, flip over the sheet and do a new layout. The correct layout this time.
Step 2: Cutting Pieces
For cutting, I first used a skill saw and clamped a straight edge to the sheet to break it down into manageable sized pieces. With a little sanding you could definitely get by with just a skill saw and a straight edge. I'm sure you could even use a jig saw if you took your time cutting. I personally was after a nice square box which meant that I'd be using a table saw. I should also mention that I just used standard wood blades for all my cutting. Using the table saw allowed me to get nice square cuts while also being able to easily make all the pieces the same width which will give me a nice square box in the end.
This stuff is MESSY to cut, so please use proper PPE when cutting. A dust mask and eye protection is a MUST.
Step 3: Notching
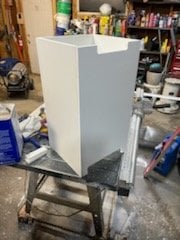
I needed to notch 2 of the 4 sides of the box. Two notches on the bottom for the water to flow out, and one on top to direct water safely into the sump in the event I wait a day too long to change my filter floss out. Don't snicker, we've all done it.
To do this, I used a simple plunge bit on my router. A sharp bit, and a higher speed will cut through this stuff like butter. I actually drew the notch on and free handed the cut. I did use some clamps and a straight edge to just make sure I didn't accidently take out too much material.
Step 4: Starting to glue
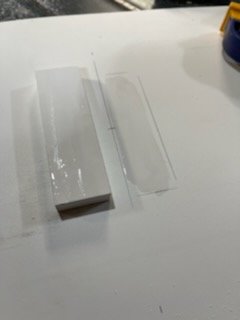
As I mentioned before, all that's needed to glue this stuff is your standard PVC plumbing glue and primer. In fact, I didn't even use primer and I ran into no bonding issues. I found that the primer just caused more of a messy finish. All I simply did was mark where the pieces were to be with a pencil, and added some glue in that spot. I was careful not to add too much glue as I didn't want the glue to squeeze out and cause runs. I then added some glue to the other piece and let it sit for 30 seconds or so before putting the two pieces together. This allows the PVC to start "melting" which I found allowed the bond to solidify faster. I didn't use clamps for most of the process and instead just held everything together for a minute or so as it dried. After a minute everything seemed to be tacked well enough to not move until it dried fully.
When gluing the box I would hold the pieces together as mentioned for about a minute before the bond would stiffen. To make sure nothing would lean during the next 5 minutes or so until it fully dried I used a speed square to keep everything square. In the end, my box turned out really square and fitting the trickle plate was a breeze. Square box + square trickle plate = easy fitment
I made the trickle plate two pieces to make it easier to take in and out.
Step 5: Drilling Trickle Plate
The only thing left to do was to drill the holes in the trickle plate. Rather than measuring out and marking each individual hole, I went inside quick and drew up a quick template on CAD and printed it to scale. Then I simply taped it onto the pieces and drilled right through the template.
Finally I added egg crate to the bottom, and placed in approximately 40lbs of rubble and biospheres. Put the trickle plate in and added a layer of course aquamesh to space the filter floss off the plate a little bit.
And here is what it looks like in the sump. I have since reworked the plumbing so that it doesn't splash and cause salt creep. Overall I'm very happy with how it turned out. Especially for a project grand total of $60.
It's been running since the first week of February, to which I've made one change since then. The main adjustment was drilling the holes in the trickle plate larger to allow air to freely escape. I had it happen several times where air would get trapped under the trickle plate and not allow water to fall down. Instead the water would just flow out the overflow notch. Since making the holes larger to allow the air to freely escape, I haven't had any issues. Super easy filter floss change every few days and lots of nitrifying bacteria to boot!
A few other things to note, be careful with your glue! If you get glue anywhere its not supposed to be, it will leave a mark even if you wipe it off right away. Also I used pencil to make my marks and found out that for some reason even when using denatured alcohol it refuses to come off. My marks were all either cut off or glued over, so not really a big issue for me, but something to note if you're making marks that wont be covered or cut off. Maybe try a dry erase marker? Not sure what to recommend here. Lastly, I had a heart attack when I initially when to put this into my sump. I quickly realized that PVC likes to float in water. Luckily, I had enough rock to hold it down securely. Again, something to keep in mind when trying to decide if this material would be suitable for your next project.
Whelp, I hope this helped to inspire a few of you with projects of your own. I don't see much being done with this material which is surprising since its reef safe, cheap, and easy to work with. I think if my tank decides it needs one, I very well may try making an ATS out of this material and some glass from an old tank. I think it would be an interesting build. Share your ideas for possible projects made out of PVC!


Last edited:


