AquaCave

Tuna Melt

Community Member
Review score
+0 /0 /-0
View Badges
Joined
Feb 22, 2023
Messages
90
Reaction score
83
Review score
+0 /0 /-0
Location
Manhattan
Rating - 0%
0   0   0
Come one come all, welcome to my build thread.

First, a bit about myself. When I was 14 I stumbled into an archaic corner of YouTube where people were keeping reef ecosystems in little glass boxes. I was hooked and immediately wanted to join in the fun. My parents and financial situation on the other hand, disagreed. After much persuading I prevailed and that Christmas I found a 29 galloon BioCube under the tree. Sadly that was the extent of my parent’s generosity. From then on I cut every corner possible to save a few bucks and the result was underwhelming to say the least. Since that first disastrous foray into reefing I’ve always wanted to revisit the hobby but the timing was never right. Fast forward a decade n change’ and the prodigal (hopefully) son has returned, this time equipped with a longer attention span and deeper pockets. The name of the game this time around is attention to detail and thoughtfulness. The goal is a bustling mixed reef with a wide variety of biodiversity and an interesting critter at every turn, each one more curious than the last.

With the introduction out of the way, on to the tank. For equipment I’ve gone with the Red Sea Reefer 170 G2 decked out with the full suite of RedSea hardware. I like the idea of being able to control everything from the ReefBeat app and I imagine the compatibility between RedSea hardware will make life a lot easier. You can also buy bundled hardware with the tank at a discount. Since all the equipment is controllable via ReefBeat I’ve held off on getting an aquarium controller. I may decide to get one in the future but the only incremental benefit I see is the ability to monitor salinity and PH (which is undoubtedly very important). Happy to hear everyone’s thoughts on this, worst case I just double down on controllability. See below for the full equipment list:
  • RedSea Reefer G2 170
  • ReefLED 90 Lights
  • Reefer AC Skimmer 300 - The new DC smart version (ReefBeat controllable), looks fantastic, will probably swap it out once its released and my credit card bill comes down a bit J
  • Two ReefWave 25 - these have been superb, super intuitive, easy to control from the ReefBeat App, very dynamic
  • ReefDoes 4
  • Reefmat 500 - I didn’t realize this has a media chamber for activated carbon, nice little surprise. Also very dynamic and easy to control via ReefBeat
  • Sicce Syncra SDC 3.0 Return Pump - superb, easy to control from the app, also nice that it monitors temperature
  • Redsea 3-in-1 ATO+ system - preordered, Redsea said they hope to ship them out in march
Here is all the equipment laid out, felt like Christmas 2.0:
69BFAA0E-0DBC-4755-99C1-5F9988FDD03D.jpeg

9B328846-2FA7-4BD3-AFD0-8471418C92C02.jpg
D0D5CD14-E0E1-42F3-A314-28CEB6DF2504.jpeg

76301CB9-B907-4B49-B17B-E340793AF7AD.jpeg
7A322F09-1A97-4989-8361-7C0E84AA1E86.jpeg


With all the hardware secured, it’s time to aquascape. I had a specific vision for the aquascape (see diagram below). The idea was to create an even balance of positive and negative space with focal points at each of the four intersections implied by the rule of thirds (think the 4 intersections on a single side of a rubix cube). I also wanted there to be various sight lines through the rockwork to increase depth. I followed BRS’s NSA aquascaping tutorial (). I started off with 40 pounds of Marco Dry Rock and crushed it into smaller, more workable pieces with a hammer and chisel. I then slowly built up from two medium sized Marco Foundation Rocks using a combination of Extra Thick Gel Supper Glue and Insta-Set to secure pieces together. It worked wonderfully. Once I had the whole thing put together I went over the joints with E-Marco Aquascaping Mortar to guarantee a lasting bond. Using BRS General Bonding Glue I covered the mortar with Marco sand (Marco NSA Poweder) to give the scape a seamless, natural look. The whole process took about a day but I had a blast. Admittedly I got a bit carried away making crevices and overhangs but I always knew I didn’t have the restraint for the minimalistic aesthetic.

Design 3.PNG

Here's the 1:1 PVC frame I built to guide me while I played my hand at god, creating the world some (hopefully lucky) critters will call home. This was incredibly helpful and I would really recommend this to anyone taking the NSA aquascape route.
4F51D224-35AA-405E-819B-A17AAFA2AB23.jpeg


Here's the rubble before I smash it to bits, you can see how the foundation rocks are machined flat at the bottom so subterranean animals don't knock over your scape:
CDC67742-51F0-4A91-86D9-EFE34596F7AC.jpeg


Not a bad place for some aquascaping:


All broken into rubble:
80D8FAF3-5D00-42BA-B211-D399F1B02267.jpeg


A work in progress:
C14AD70A-CAE2-49A3-B8E0-60F46A297DC5.jpeg


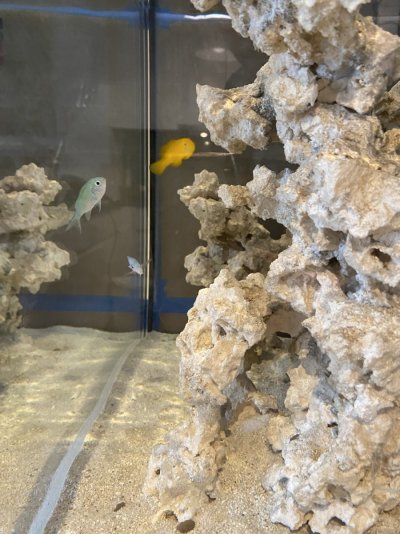
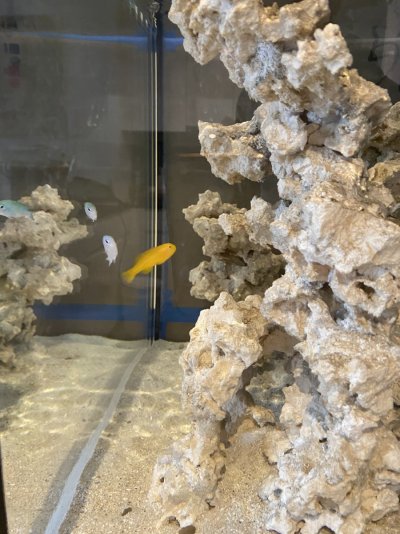
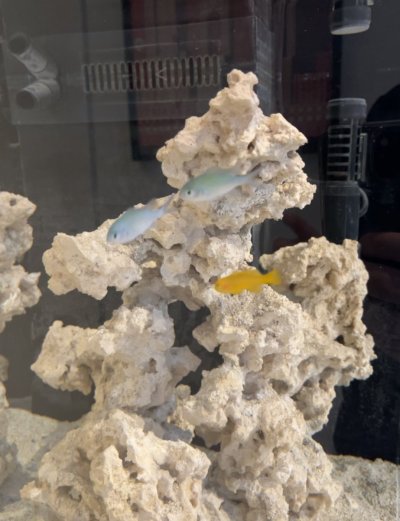
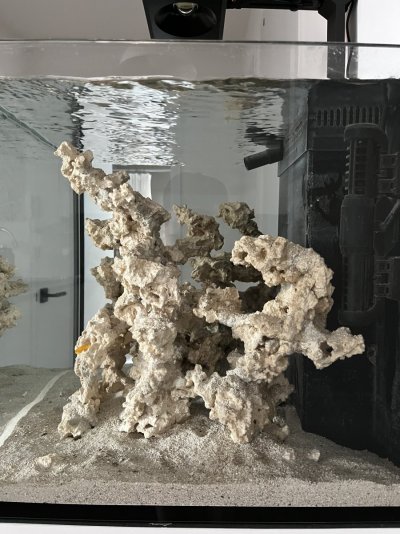
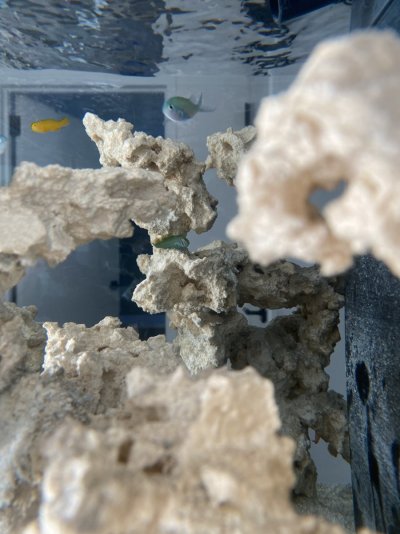
And here's the final product:


1677962855948.png
52203973-8170-4447-B3B9-3702AA7357FA.jpeg
8560C0A5-E70C-4FFD-BD6C-D151CEDDA51C.jpeg


Having finished the aquascape It was time to set up the tank. The plumbing and installation of everything was pretty seamless. I was glad I stuck with RedSea equipment, integration of things like the roller mat was very intuitive. Unsurprisingly, the cable management was the most tedious part of the whole thing.

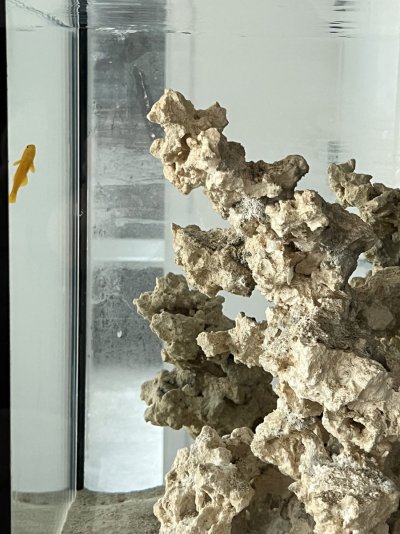
Here it is, disregard the sandy glass!


My apartment gets lots of light so I covered it up to stop those pesky photosynthetic organisms from getting a foothold.
F7606C0A-2368-4237-95DB-000159E8F19C.jpeg


Post cable management, pre ReefDose 4 Installation:
63F5E822-E0A3-412F-B5EF-629332EB8B7A.jpeg


With the ReefDose installed, the ATO revivor will go to the left of the sump, given the specific dimensions I think I'll have to get one custom made, any recommendations?


Its time to cycle. I’m using Dr. Tim’s One and Only and Ammonium Chloride to cycle my tank, also I’ll be running the tank at ~85 degrees per Dr. Tim’s recommendation during the cycle though I did not drop my salinity as he suggests. I forgot the bacteria was more effective at lower salinity until after I dropped it in the tank. I’ve outlined my short term plan for the tank in the diagram below. Over the next two months I’m hoping to establish a (relatively) diverse biome and well-rounded Clean Up Crew to ease some of the symptoms of the ugly phase. Any suggestion / advice is more than welcome.

1677977951009.png


The set up took place ~2 weeks ago, the cycle has been progressing since then and I hope to have a post-cycle update in the next week or so.

Thanks for reading!

TM 9B328846-2FA7-4BD3-AFD0-8471418C92C02.jpg Design 2.jpg A90E46CC-B320-42D5-A423-09FA052A3266.jpeg 0C2821E9-8787-452D-B0B7-9F3D74ABDBD6.jpeg 8BC132EC-03EA-40E3-B755-5C288F13DA10.jpeg
 

Attachments

  • IMG_0058.MOV
    41.7 MB
  • IMG_0996.MOV
    39.2 MB
www.dinkinsaquaticgardens.com
AquaCave Logo Banner
OP
OP
Tuna Melt

Tuna Melt

Community Member
Review score
+0 /0 /-0
View Badges
Joined
Feb 22, 2023
Messages
90
Reaction score
83
Review score
+0 /0 /-0
Location
Manhattan
Rating - 0%
0   0   0
Well ladies and gentlemen, the cycle is over. It took longer than expected (and longer than Dr. Tim advertised) but it was still pretty quick. I think two things contributed to the extended length, (i) my salinity was ~35 which is higher than the Dr. recommends since nitrifying bacteria is (ostensibly) less effective in high salinity environments, and (ii) I added live sand which likely contained a material amounts of ammonia before dosing ammonium chloride, meaning I effectively doubled down on ammonia which could have “stalled” the cycle for a bit. That being said, I’m happy with the results and I think Dr. Tim’s provided a robust population of nitrifying bacteria that can convert ~1.0 ppm ammonium chloride to Nitrate in 60 hours. To contextualize this, I am expecting to dose ~0.12ppm ammonia per day or 0.29 ppm ammonia every 60 hours so my cycle seems adequately sized. To calculate my ammonia per food dose, I use the following calculation:
  • Numerator: (1MG of food) times (16% protein) times (16% nitrogen in protein)
  • Denominator: Tank Volume in Liters
Here are examples for typical frozen foods:
  • Full Cube of Mysis: (3.3g x 7.6% protein x 16% N in protein) = 40mg N / 130L system volume = 0.31 PPM ammonia
  • Full Cube of Brine: 3.3g x 3.7% protein x 16% N in protein = 20mg N / 130L system volume = 0.15 PPM ammonia
I’m planning to feed a 1/4th a cube of each for the first few weeks so 0.12 PPM ammonia a day.

Here is an overview of the cycle, I tested every morning and evening with the RedSea Marine test kit.
1679522239764.png


Time for some fishies. I was planning to start with two clowns but my LFS made a strong argument against adding clowns first. They pointed toward aggression and territorial issues and I have to say, google corroborated all of what they were saying. That being said, they seem to be the most common starter fish and I have not heard many bad experiences with adding them first. Regardless, I decided to go with two Chromis instead. They were not on my original Livestock list but I have always liked how they swim at the top of the water column and I was getting tired of looking at that empty tank. I'm happy I pulled trigger on them, they are delightful. Here is my current stocking plan, any thoughts? Now I know the Bioload is large, but I recently purchased an algae scrubber (official post coming soon) and between the Algea scrubber, roller mat, and skimmer, I think I should be covered. As always, would love to hear other opinions on this.

Pics to follow shortly!

1679522018439.png
 
AquaCave Logo Banner
Top Shelf Aquatics

mosreef

Community Member
Review score
+0 /0 /-0
View Badges
Joined
Nov 6, 2022
Messages
58
Reaction score
53
Review score
+0 /0 /-0
Location
Tacoma
Rating - 0%
0   0   0
Thanks, it was a hassle, no two ways about it, but it was also very fun. Felt almost like legos
I know - it’s WAY tougher than it looks on YouTube, right? With all the hours and all the pounds of rock - I should’ve just ordered one. But it’s like creating a sculpture, really. Nice work!
 
OP
OP
Tuna Melt

Tuna Melt

Community Member
Review score
+0 /0 /-0
View Badges
Joined
Feb 22, 2023
Messages
90
Reaction score
83
Review score
+0 /0 /-0
Location
Manhattan
Rating - 0%
0   0   0
I know - it’s WAY tougher than it looks on YouTube, right? With all the hours and all the pounds of rock - I should’ve just ordered one. But it’s like creating a sculpture, really. Nice work!
Thanks! Ryan at BRS makes it look so easy... Next thing you know your halfway through smashing 40 pounds of rock into rubble, your lower back is hurting, and you haven't even cracked open the glue yet! But when your inner artist has a ~vision~ who are you to tell them no
 
OP
OP
Tuna Melt

Tuna Melt

Community Member
Review score
+0 /0 /-0
View Badges
Joined
Feb 22, 2023
Messages
90
Reaction score
83
Review score
+0 /0 /-0
Location
Manhattan
Rating - 0%
0   0   0
Time for another update, but first I must apologize. I haven't been posting in real time since I’ve been so swamped with work the past two weekends. I finished my cycle about two and a three weeks ago and added the Chromis a few days after that. A week later, my nutrient levels were rock bottom, and I knew I had the nitrifying bacteria to handle a slightly larger bio-load, so I added a Yellow Clown Goby, a Warpaint Clown Goby, and 5 Nassarius snails to eat the leftover food and detritus and turn the sand bed a bit. Here are the little critters in all their glory (I’m still keeping the lights off to prevent nasty photosynthetics from getting a foothold in the tank):

4CE1B714-1778-461C-AD77-38FC984C4084.jpeg

3C5B8859-9273-4D8F-8D56-8F54ECCDE5BC.jpeg
D83696EB-8DC3-451E-AE98-B3B901D9796F.jpeg
5D1BE602-68E9-4346-AB8F-EF40FAECE48A.jpeg
BE1B4CB6-9271-42B7-86D2-1B0E317453FE.jpeg
828A62A0-DA32-4F1E-B38E-DCD52F8B6700.jpeg
A970BAF4-0608-4A66-A190-36F03B6FCDA1.jpeg


A few FTS:
A2C98AD2-D8B5-478A-8495-EC9F7C4C9475.jpeg
21873F5A-A7E7-40E8-940C-359EDEC1E9CE.jpeg


Some Videos:


Testing Time:
53321BF5-5596-455C-9C16-1408EF02E43C.jpeg


Some of the last few missing pieces of equipment came in this week. All that’s missing now is the RedSea 3-in-1 REEF ATO+…

For my ATO reservoir I had one custom made to fit in the 4-inch slot between the sump and the wall. I emailed Advanced Acrylics at 4:30 on a Sunday night asking if they could make it and John got back to me at 5:01. He charged me the standard price for an off-the-shelf slightly larger ATO and called it a day, no upcharge for customization. Exactly two weeks later it showed up to my door. Seems to be well-constructed and made with high quality inputs. Really some of the best customer service I've experienced.

E7D5D884-3D76-4F98-A18F-1CDC9CC408C9.jpeg

CA0CC882-BE13-4245-B647-351212B91027.jpeg


I got my lid from Kraken Reef. They have a standard lid for each RedSea Reefer that you can customize for a reasonable price. I read a few bad reviews about their customer service but I found them to be pretty responsive and they even allowed me to make a change to my order halfway through the "manufacturing period" (I guess a cynical person might say that means they didn't start working on my order until at least halfway through the manufacturing period but whatever, that’s the point of a manufacturing period). Regardless I’m happy with it, its sleek, fits well, and does the trick. I added a feeder hole, a few slots for my ReefWaves, and an evaporation lid to compensate for my little ATO revivor.

Without the Evaporation Lid:
BBA4BD85-07A4-46B0-B778-2485ED9B2C9E.jpeg


With the Evaporation Lid:
FB92FD51-5AFC-429E-A440-0E57656A223A.jpeg


Last but not least I got a Santa Monica Rain2 Algae Scrubber. I needed something to export nutrients and I would prefer to do that through a natural means (rather than GFO or carbon dosing). I don’t have the space for a refugium so, Algae Scrubber it is! This one had solid reviews and most importantly, it fits like a glove behind my roller mat. We’ll see how this works out, the whole idea here was to really overbuild my filtration so I can overstock and overfeed. I'm installing it tomorrow so I'll share some pics then.

See ya soon.
TM
 

Attachments

  • 6E271392-60EE-461B-91DA-2415D87BE4FA.jpeg
    6E271392-60EE-461B-91DA-2415D87BE4FA.jpeg
    219.2 KB · Views: 7
  • 3C5B8859-9273-4D8F-8D56-8F54ECCDE5BC.jpeg
    3C5B8859-9273-4D8F-8D56-8F54ECCDE5BC.jpeg
    215.2 KB · Views: 6
  • D6B734A7-919C-4D08-B2EE-4ECAB53580AB.jpeg
    D6B734A7-919C-4D08-B2EE-4ECAB53580AB.jpeg
    225.3 KB · Views: 5
  • 28EEA1F5-31C5-4FE3-B966-CBF4A931F1AD.jpeg
    28EEA1F5-31C5-4FE3-B966-CBF4A931F1AD.jpeg
    202.1 KB · Views: 9
  • B68CA83F-B8BE-4EAB-815F-C88D48881939.jpeg
    B68CA83F-B8BE-4EAB-815F-C88D48881939.jpeg
    144.6 KB · Views: 5
  • A2C98AD2-D8B5-478A-8495-EC9F7C4C9475.jpeg
    A2C98AD2-D8B5-478A-8495-EC9F7C4C9475.jpeg
    243.8 KB · Views: 4
OP
OP
Tuna Melt

Tuna Melt

Community Member
Review score
+0 /0 /-0
View Badges
Joined
Feb 22, 2023
Messages
90
Reaction score
83
Review score
+0 /0 /-0
Location
Manhattan
Rating - 0%
0   0   0
Anddddd we're back for another post! The algae scrubber proved more difficult to install than anticipated. I couldn't squeeze the fed pump into the return chamber of my sump but the scrubber itself is sitting over the return chamber so I had to plumb the scrubber to draw and return water from the main chamber. I rotated the fed pump so the tube connecting the pump to the scrubber runs perpendicular to the body of the scrubber. I also plumbed an elbow joint (not pictured below) on the downflow from the scrubber so the water is returned to the main chamber. Without the elbow joint the fed pump just pumps all the water out of my sumps main chamber into the return chamber.

94AD72F9-23B9-4B9E-9DE6-9B3A9E2C0186.jpeg


Here it is installed (with the Skimmer collection cup and Roller Mat removed). The fed pump sits under the Roller Mat.
1680469211613.png


On another note, I grabbed two spectacular Cleaner Shrimp this weekend. A Skunk Cleaner and a Blood Red Fire Shrimp; named Chopsticks and Lobster-Tail respectively. I've always been a huge fan of Inverts specifically shrimp and I am just mesmerized by these two... Lobster-Tail took a bit longer to get comfortable but he has settled in and is scurrying all over the place. Here the fellas are:

A44137F8-75B8-4CBB-B318-A005D453BD28.jpeg

32FF1448-F76F-4AA3-86D5-15C28362F675.jpeg

F7613BE2-956F-4928-8C20-032D68855814.jpeg

71BAEC11-AEC2-416A-A250-9052D83A8B9E.jpeg


I started dosing this week. I think my Calcium (~400-410 ppm), Alkalinity (6.5-6.6 dKH), and Magnesium (1200 PPM) are fine but a bit low. They are certainly lower than what the RedSea Blue Bucket advertises and much lower than my long-term target levels (440 ppm Calcium, 9.0 dKH Alk, 1,350 ppm Mag). I'm not really sure why they are low since I don't have any stony corals sucking the elements out of the water. Here are a few ideas, what do you guys think:
  • The virgin calcium carbonate Marco Rock sucked up all the magnesium causing increased precipitation.
  • When I first filled up my tank, I mixed the salt directly in the tank, I did it a bit haphazardly adding salt here and water there as my RODI unit slowly filled up the tank. Perhaps this threw things out of whack.
  • My first RedSea Blue Bucket had low levels to begin with. I'm on my second bucket now and I tested it, the levels are all as advertised but the first is gone so I cannot check it.
I'm dosing RedSea's Foundation A, B, C via the RedSea's ReefDose 4. I calculated the daily does require to bring my levels up to my target levels over three weeks. I've set the Mag to dose 15 minutes before the other two to reduce the likelihood of precipitation out of the gate. Here's the setup with the dosing pump in action:

9D9CC1EC-7A7F-4CCB-9EF7-9DE491B3567D.jpeg


My Yellow Clown Goby (named Yolk), found his way into the overflow via the 1/4th inch slits at the top of the overflow. It was a pain to fish him out (;)). I went out and bought an in-tank Mesh Breeding Cage from Petsmart. I cut it up and tucked the mesh behind the "grate". The grates slide out so it was pretty easy to slip the mesh in and pin it down with the grate. If you look closely you can see the mesh tucked in behind the grates:

2AE5723F-9FD0-45CC-AAD8-9EFDD8BAD3E6.jpeg

DF1F6D00-2505-4353-A38B-B13FC0E987A2.jpeg

FEFF6B82-C1B1-4901-B93B-A7F6C4243C08.jpeg

A077376B-9B41-4EFF-AD0E-421A95BFE119.jpeg


Lastly, I'm also thinking of swaping out my skimmer for a smaller one (perhaps the Reef Octopus Classic 110SSS 5"). I think the RedSea Skimmer 300 is oversized for my tank and it's hardly pulling any skimmate. Perhaps my tank is just too young and once its more mature and fully stocked the protein level in the water will increase and the skimmer will start working, but I think it's just oversized, especially considering I have a RollerMat and Algae Scrubber. Thoughts?

See ya next week.
TM
 

Attachments

  • 0CE184AC-6915-437D-970A-D3ED3C5DA341.jpeg
    0CE184AC-6915-437D-970A-D3ED3C5DA341.jpeg
    157 KB · Views: 7
OP
OP
Tuna Melt

Tuna Melt

Community Member
Review score
+0 /0 /-0
View Badges
Joined
Feb 22, 2023
Messages
90
Reaction score
83
Review score
+0 /0 /-0
Location
Manhattan
Rating - 0%
0   0   0
Well, I’m back with another update and a lot has happened these past few weeks. Shortly after the last post, NYC had its first sweltering day of the fleeting spring season. In the warmer months I keep my apartment around ~75 degrees which I assumed was a cool enough ambient temperature to keep a reef tank without a cooling mechanism. Boy was I wrong. The tank’s temp rose from 78 to 80 degrees in about 4 hours so I decided to purchase a cooling fan and hook it up to an Inkbird Wifi 308 to mitigate quick temperature increases. The Inkbird has a cooling outlet and a heating outlet, the respective outlets turn on automatically when the temperature is 1 degree off the target temp in either direction. I have mine set to 78 so it turns the fan on at 79 degrees and turns on a heater at 77. I have a second heater set to 78 which is not plugged into the Inkbird so my temp will fluctuate between 78 and 79 degrees. If it fails, the temp will drop to 77 and the Inkbird will flick on my backup. If it gets stuck on, the cooling fan will flick on and I’ll get notifications via the ReefBeat, Inkbird, and Siccee ControAll apps if it surpasses 80 degrees.
D8514F51-A856-4655-B11F-570483F98B0B.jpeg


After locking down the temperature, I added a quintessential shrimp goby combo, I opted for the Randall’s Pistol Shrimp and Highfin Goby. The shrimp was miniscule (smaller than a sexy shrimp). They were not a pair when I purchased them. I acclimated them together and introduced them via a 3-inch PVC pipe together. The PVC pipe led directly into a rubble strewn part of the sandbed and the idea was that they would pair up together in the pipe and stick together when I remove the pipe and release them to the wider tank. I let them sit in the sand at the bottom of the pipe for about three hours. To my chagrin, when I removed the pipe, the goby darted to a cave at the back of the tank and the shrimp scurried into a crevice near the front of the rockwork. I honestly thought the goby declined the lil’ shrimp (“you can’t protect me; you can’t even protect yourself!”). The next morning, I found the goby standing watch over a little mound of sand while the shrimp diligently excavated their new hideout. Ever since they’ve been thick as thieves.
B7EBF179-650A-44C5-B157-07CD64EA3A0D.jpeg
AB361D3C-F416-498D-AF25-8CAC662ADCA6.jpeg

15A4D3FE-0945-4FF2-85F6-39F890CE3720.jpeg


A week later I added a healthy-looking Royal Gramma I picked up at my LFS. The next morning, I notice a few white splotches on him. Boom Ich. I have not quarantined anything, the misses would only sign off on a single tank in our small Manhattan apartment and I cannot blame her in the slightest, she’s a saint for putting up with all the tank mess as is! So, eradication was off the table, management it is! I started feeding LRS reef frenzy soaked in selcon and Frozen Clams that I purchased live and froze myself. The clams are an ode to Paul B, he claims they can make your fish immune. I can't speak to the truth of that theory but its worth reading his thread, can’t hurt I suppose. I also did a monumental amount of research into UV and ultimately purchased a 40 wat UV from IceCap that I plan to use intermittently as needed. I’ve plumbed it so it hangs on the side of the display tank and is easy to install / remove as needed. When adding new fish or combating an outbreak I’ll throw it on for a few weeks then put it back in storage. The feeder pump pulls directly from the display and hovers about 6 inches above the substrate, hopefully this will capture more of the theronts. I’m running the UV at about 250GPH which is significantly below the recommended dose of 1,000GPH to deliver a lethal dose of 270,000 uW/s/cm2 by my rudimentary calculation. Per this article (https://www.reef2reef.com/threads/finally-cryptocaryon-uv-dosage-data.892710/#post-11311518) a mild dose of 69,000 should make a huge dent in the population so hopefully with 5+ times turnover per hour and the high dose I should be able to break the Ich cycle. Going forward I am only going to buy pre-quarantined fish to prevent anything else from getting in the tank. The Gramma didn’t make it, by the time the UV was in he was covered in white spots. He lasted for another cycle or two of Ich and one morning, I woke to find his carcass half eaten under his cave. Yolk (my miniscule and adorable yellow clown goby) had started showing a few spots and his health was deteriorating. He wasn’t eating with the same vigor as usual, and he was looking thinner and paler than by the day. A few weeks after the installation of the UV the spots disappeared and since then he’s returned to his old self.
1683952246794.png

291B6BFE-EFBC-470E-AB0D-FDDA758D13CB.jpeg


I also took the dive into the wonderful world of coral. Before purchasing anything, I mapped out the Par in my tank. I was surprised by the strength of the lights. I didn’t expect to get so many ~300 Par locations. It’s a shame any acro would surely perish in my tank. One day these perches will be host to SPS but not for a while. I also have very low light areas on the vertical surfaces of my aquascape. I’m planning to cover these with Acans and other low light coral. The largest, dimly lit vertical surface I am turning into an Acan wall (Micromussa Lord technically).
1683953719647.png

1683953730423.png

1683953687903.png

1683953702620.png


Here’s my budding zoa garden nestled in the shadows of the looming Acan wall:
6E6414B8-2997-4E56-B397-582D11244DF7.jpeg


Yolk has taken to this voluminous Acan Lord from Tidal Gardens:
7ACFF0D1-2D29-48ED-8002-EF63388F83F1.jpeg


I got this Trichophilia for an absolute steal, $250. It was at a local freshwater shop that has a small frag tank in the back. I don’t think they knew how much this thing was worth (I’d guess at least $400 but I could be wildly off). While dipping it I noticed a small hole in the skeleton, after some research I think it’s a Gall Crab. I plan to go in and fish him out soon.
834C044E-8B02-4E41-8E12-EC86503A74B7.jpeg


My Riccordea patch. I have mixed Florida and Yuma and I’m not sure if that’s a no-no or not. I see some conflicting reports online about the two touching. If any of you know if they will fight, please let me know! The small blue one under the Yuma is ostensibly a Florida but I think it may be a Rhodactis.
40F80BA3-89A3-4F85-8742-247795799C15.jpeg


Here’s my grove of RFAs. I had another green one that totally disappeared a few weeks ago. He never really got settled. He would hang out in one area for a few days and then the next morning he would be blowing around the tank. I don't know if his foot ever really took hold of anything. He’s MIA to this day.
1B1383BA-0552-4E7E-A6FB-2D85DE52F0BE.jpeg

960AA4E9-157E-4995-957E-32282541CB42.jpeg


Some other pics:
4A333632-F490-4D35-B5D7-8C54A7EFA3B3.jpeg

FF6FE6E7-0104-4629-946D-0665414F483F.jpeg


This little porcelain crab has taken to my blasto, hopefully he works his way over to the RFA Grove.
96469FC7-E430-4E96-889B-F73D0C8E682B.jpeg


A few Aptasia hitched a ride on some frags so I grabbed some Berghia Nudi’s to eat em before they got out of control. Worked like a charm. Now they have exhausted their food source I'd like to give them to my LFS If I can catch em (lord knows they could use them). Check out these eggs:
D53AC20E-6AF9-4DD4-8BF0-F7C3D0362353.jpeg

808C9DF5-2586-4372-8321-D8E514CF9B08.jpeg


Last, but certainly not least I got Dinos… Dinos and Ich in two months, lucky first few months of reefing at least everything from here on out will be a breeze. I replaced my RSK 300 with the Reef Octopus Classic 110SSS 5, the RSK was just too big for my tank. The Reef Octopus started skimming immediately and when my algae scrubber got going it bottomed out my nutrients for a few days. I think they are Small Cell Amphidnium but not positive. My microscope purportedly can magnify up to 2000x, but its hard to see any cell details. The silver lining is that there are still other organisms present (i.e. diatoms). I did a 36-hour blackout to coax them into the water column so my disproportionate UV can gobble them up. I also syphoned a bunch off the sand bed and blasted the rock with a turkey baster, again to get them into the UV. This seemed to be effective but also set back the competition. I reduced my photo period and white lighting. I’m also dosing SpongeExcel, MB7, and maintaining elevated nutrients. After the blackout and a week dosing the biome began to shift toward diatoms, at least that’s what I’m seeing under the scope’. This has taught me to be very warry of low nutrients. Instead of targeting 0.03 Phosphate I’m going to aim for 0.05 on a long-term basis. AKA, more fish!
1683953049884.png

1683953055191.png


The culprit.... Not sure what type of algae is growing here but it has the look and consistency of creamed spinach. Surly not as tasty.
14C42ABA-D992-4643-BCE3-6375742EDC57.jpeg


Last but not least, the obligatory FTS shot. And here is a sump pic (that sounds inappropriate ;)).
FBF9561B-8CE4-4F9A-9B68-8EEA21789F5F.jpeg
03217340-81C6-4E51-A7BF-48B2ED8956B1.jpeg

E26A8C00-E09B-4D90-B174-3DF9A6E7783E.jpeg

291B6BFE-EFBC-470E-AB0D-FDDA758D13CB.jpeg

B416647A-F243-4E6A-98E5-DEACD764DBDB.jpeg


See ya later
TM FF6FE6E7-0104-4629-946D-0665414F483F.jpeg D966575D-83D6-4E66-AE54-80E8BE3EC17F.jpeg
 
Last edited:
Corals.com
AquaCave

Polyp polynomial: How many heads do you start with when buying zoas?

  • One head is enough to get started.

    Votes: 27 10.6%
  • 2 to 4 heads.

    Votes: 145 57.1%
  • 5 heads or more.

    Votes: 65 25.6%
  • Full colony.

    Votes: 10 3.9%
  • Other.

    Votes: 7 2.8%
Join the movement!
Back
Top