Building Tank Stand and drilling for sump on IM NUVO 20 Peninsula

BigNickReef

New Member
View Badges
Joined
Apr 23, 2021
Messages
4
Reaction score
0
Location
Palm Beach
Rating - 0%
0   0   0
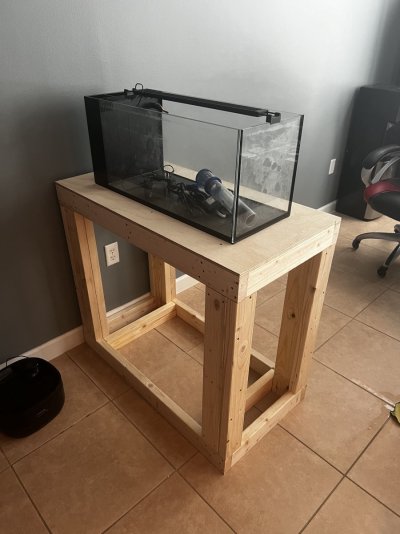
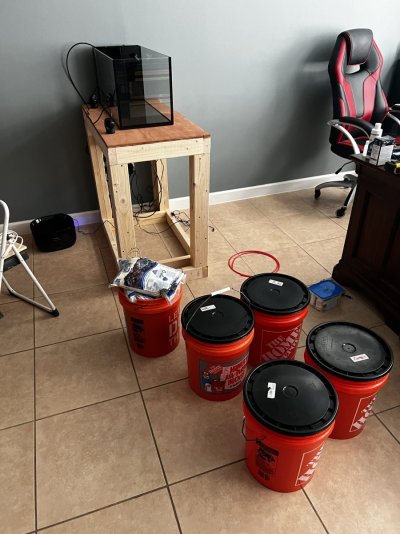
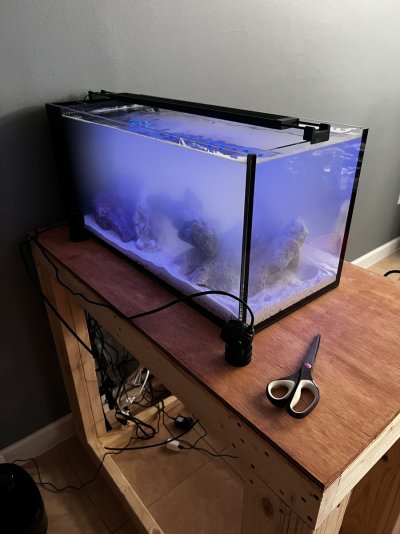
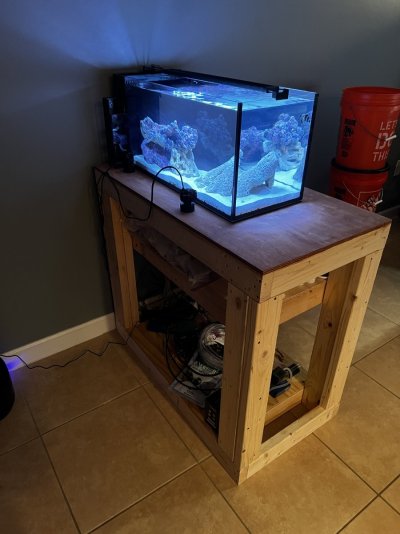
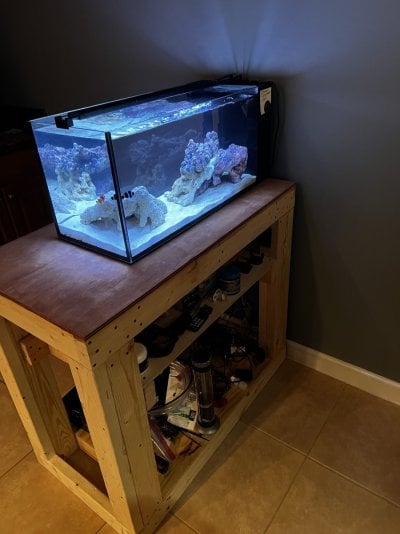
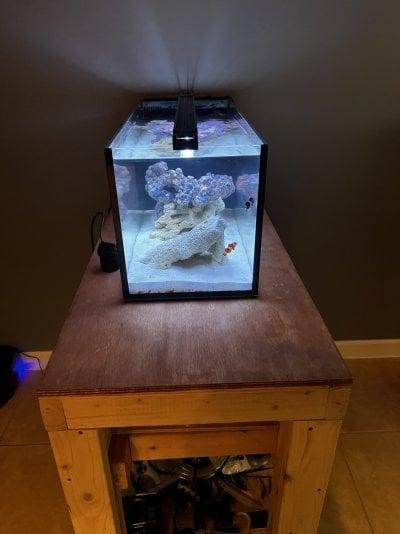
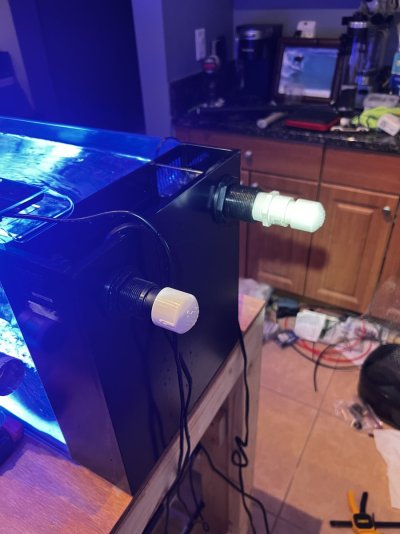
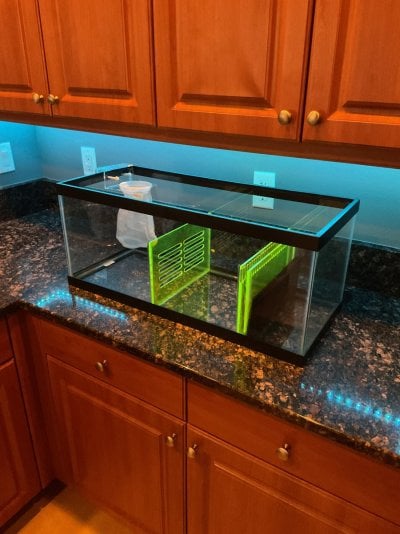
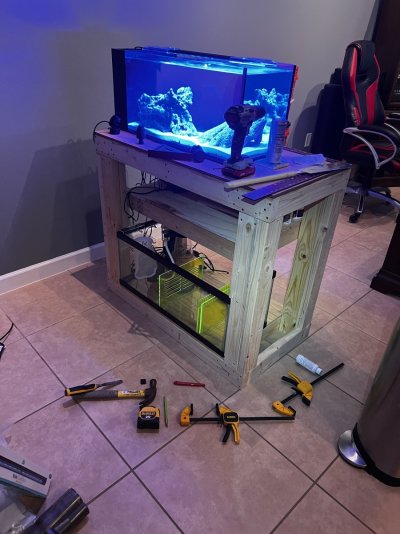
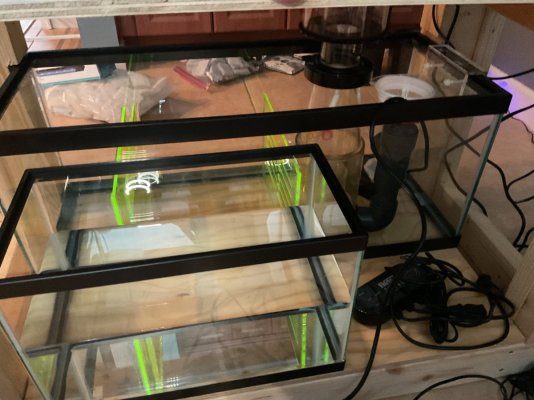
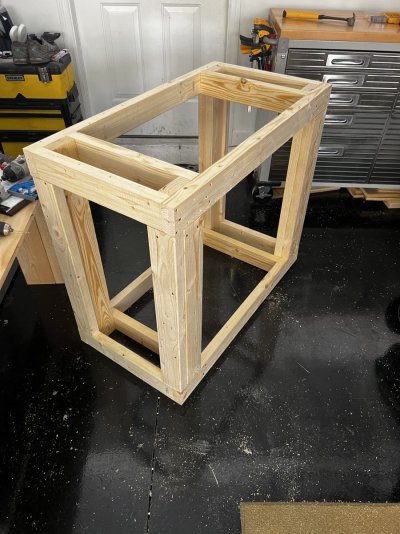
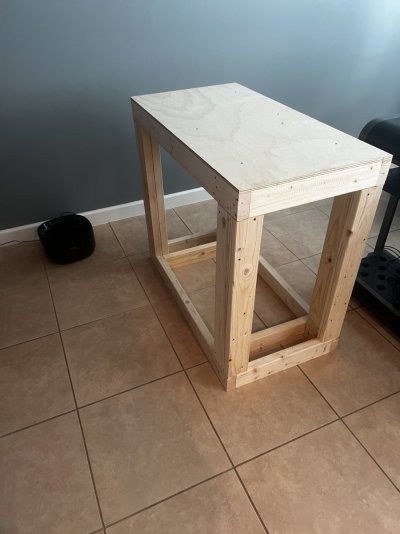
It’s my first post here and probably going to be looking for some advice in the future. I had this IM 20g Peninsula for about 4 years , it was set up on my bar top but I hated that I couldn’t see all 3 sides. I built this Tank stand last weekend and just put some shelves in it. It obviously still needs a face on the three sides to hide everything but I just wanted to get the Nitrogen cycle going and take my time making it look good. I have a month so I can take my time, might even break out the x-carve and make some door designs, and maybe some back lit epoxy inlay. I am also thinking of putting a sump underneath out of a 20 long and an auto top off with a 5.5 - 10 gallon tank so it looks better when I open it up. I have some parts from a buddy that didn’t want them anymore like a Octo 110 Protein Skimmer, carbon reactor, bunch of pumps, power heads, and I ordered an AI Blade grow for it. I haven’t grown corals before so that will be an interesting challenge that I’m up for. I want to start with drilling the tank and running the plumbing down. I have 2 bulkheads for the Outlet and return but I ordered the DIY Green chamber separators from Amazon that come in Saturday and needs to be installed in the sump before I can drill. I want to disturb the tank as little as possible. Don’t worry i have drilled quite a few tanks it will come out perfect.

Since I am using the 20L and the sump will be another 20L I’m not sure if I’m going to setup the Octo-110 Skimmer, I have a EShopps Nano tank skimmer that would probably be just fine unless I have an un-necessarily large bio-load for some reason.


Does anyone think it’s worth just setting up the 110 skimmer when I start adding fish and corals?
What do you guys think of the Build so far?
I’m thinking of setting up a YouTube channel for building cool stuff and home maintenance basics and stuff like that, i might add this project to it, after i finished the basic stand a buddy asked me to build one for him so i can record that one and make some changes that he wants like different wood and drawers, etc…. I just built this out of some scraps I had in my garage. The faces will be built from lumber I’m going to buy. I like the look of the 2x4’s on the inside though.

I am very ocd and it’s killing me that the cables aren’t managed right now, i have been working on this and painting my house and making my friends some furniture in my free time. It will look a lot better when its done.

Any other suggestions are more than welcome and very much appreciated and I hope some of you will follow along with the build and hopefully help me out a bit when i start the corals.

Thanks for taking the time to check out my project.
IMG_6944.jpeg IMG_6946.jpeg IMG_6947.jpeg IMG_6962.jpeg IMG_6963.jpeg IMG_7012.jpeg IMG_7013.jpeg IMG_7014.jpeg
 

threebuoys

Valuable Member
View Badges
Joined
Nov 24, 2020
Messages
2,449
Reaction score
5,222
Location
Avon, NC
Rating - 0%
0   0   0
The stand itself looks fine, except than the perimeter of the stand doesn't directly support the perimeter of the tank. All of the weight of the tank is transferred to the stand by the tank frame since the tank bottom does not fully rest on the plywood. The weight of the plywood and tank will be transferred to the stand along the perimeter of the plywood. So, the thin sheet of plywood may not remain flat over time due to the weight of the tank and water being concentrated in the middle of the plywood. Twenty-gallon tank with water will weigh appx 200 lbs.

I would replace the 20-gallon display tank with at least a 29-gallon tank (same footprint) or larger if you can.

You may discover with a tank this small you do not need all of the equipment you inherited from your friend. Keep it simple to begin with for a tank this size.
 
OP
OP
B

BigNickReef

New Member
View Badges
Joined
Apr 23, 2021
Messages
4
Reaction score
0
Location
Palm Beach
Rating - 0%
0   0   0
It’s my first post here and probably going to be looking for some advice in the future. I had this IM 20g Peninsula for about 4 years , it was set up on my bar top but I hated that I couldn’t see all 3 sides. I built this Tank stand last weekend and just put some shelves in it. It obviously still needs a face on the three sides to hide everything but I just wanted to get the Nitrogen cycle going and take my time making it look good. I have a month so I can take my time, might even break out the x-carve and make some door designs, and maybe some back lit epoxy inlay. I am also thinking of putting a sump underneath out of a 20 long and an auto top off with a 5.5 - 10 gallon tank so it looks better when I open it up. I have some parts from a buddy that didn’t want them anymore like a Octo 110 Protein Skimmer, carbon reactor, bunch of pumps, power heads, and I ordered an AI Blade grow for it. I haven’t grown corals before so that will be an interesting challenge that I’m up for. I want to start with drilling the tank and running the plumbing down. I have 2 bulkheads for the Outlet and return but I ordered the DIY Green chamber separators from Amazon that come in Saturday and needs to be installed in the sump before I can drill. I want to disturb the tank as little as possible. Don’t worry i have drilled quite a few tanks it will come out perfect.

Since I am using the 20L and the sump will be another 20L I’m not sure if I’m going to setup the Octo-110 Skimmer, I have a EShopps Nano tank skimmer that would probably be just fine unless I have an un-necessarily large bio-load for some reason.


Does anyone think it’s worth just setting up the 110 skimmer when I start adding fish and corals?
What do you guys think of the Build so far?
I’m thinking of setting up a YouTube channel for building cool stuff and home maintenance basics and stuff like that, i might add this project to it, after i finished the basic stand a buddy asked me to build one for him so i can record that one and make some changes that he wants like different wood and drawers, etc…. I just built this out of some scraps I had in my garage. The faces will be built from lumber I’m going to buy. I like the look of the 2x4’s on the inside though.

I am very ocd and it’s killing me that the cables aren’t managed right now, i have been working on this and painting my house and making my friends some furniture in my free time. It will look a lot better when its done.

Any other suggestions are more than welcome and very much appreciated and I hope some of you will follow along with the build and hopefully help me out a bit when i start the corals.

Thanks for taking the time to check out my project.
IMG_6944.jpeg IMG_6946.jpeg IMG_6947.jpeg IMG_6962.jpeg IMG_6963.jpeg IMG_7012.jpeg IMG_7013.jpeg IMG_7014.jpeg
Thanks for checking it out! Being a paranoid engineer I tend to over-engineer everything and have definitely had many thoughts of the middle bowing and causing a break and was very much in consideration. It has supports all the way down the top with 2x4’s thats not visible in the picture as well as the screw heads. I very much appreciate the advice and concern, the stress on the wood at a single point can hold over 300lbs on this build so the spread over the surface it will be way more than sufficient.

I am curious on your thought of the protein skimmer though, I know it is way over what’s needed and may take too much out of the water if I’m not careful. I wanted to increase water volume and have a refugium, both to keep levels more stable but I like the size of the 20L for the space. Going on what I currently have do you think its worth it for the large skimmer or just stick with the nano one?

I just finished drilling the tank and am working on getting it ready to fill up the sump. The AI Blade grow has arrived and looks awesome so I can’t wait for corals which I know will be a little bit but that’s ok with me.
 

Attachments

  • IMG_7079.jpeg
    IMG_7079.jpeg
    125.8 KB · Views: 17
  • IMG_0016.jpeg
    IMG_0016.jpeg
    200.5 KB · Views: 19
  • IMG_7066.jpeg
    IMG_7066.jpeg
    184.3 KB · Views: 25

threebuoys

Valuable Member
View Badges
Joined
Nov 24, 2020
Messages
2,449
Reaction score
5,222
Location
Avon, NC
Rating - 0%
0   0   0
Thanks for checking it out! Being a paranoid engineer I tend to over-engineer everything and have definitely had many thoughts of the middle bowing and causing a break and was very much in consideration. It has supports all the way down the top with 2x4’s thats not visible in the picture as well as the screw heads. I very much appreciate the advice and concern, the stress on the wood at a single point can hold over 300lbs on this build so the spread over the surface it will be way more than sufficient.

I am curious on your thought of the protein skimmer though, I know it is way over what’s needed and may take too much out of the water if I’m not careful. I wanted to increase water volume and have a refugium, both to keep levels more stable but I like the size of the 20L for the space. Going on what I currently have do you think its worth it for the large skimmer or just stick with the nano one?

I just finished drilling the tank and am working on getting it ready to fill up the sump. The AI Blade grow has arrived and looks awesome so I can’t wait for corals which I know will be a little bit but that’s ok with me.
Until you switch to a larger display tank, I think the nano skimmer will be adequate. That will leave you more room in the sump. for a refugium. If you are satisfied with the effectiveness of the nano, you could upgrade later.

Do you intend to use filter socks or some other means to trap larger particulates?

I see you are going with a DIY sump. I like that. Good way to save money and make it work the way you want it. I use a DIY 29gal sump for my 125 gallon tank.
 
OP
OP
B

BigNickReef

New Member
View Badges
Joined
Apr 23, 2021
Messages
4
Reaction score
0
Location
Palm Beach
Rating - 0%
0   0   0
Until you switch to a larger display tank, I think the nano skimmer will be adequate. That will leave you more room in the sump. for a refugium. If you are satisfied with the effectiveness of the nano, you could upgrade later.

Do you intend to use filter socks or some other means to trap larger particulates?

I see you are going with a DIY sump. I like that. Good way to save money and make it work the way you want it. I use a DIY 29gal sump for my 125 gallon tank.


Yes I have a filter sock, protein skimmer, and heater in the first compartment. Then there will be a refugium in the second and bubble trap to return pump. Im probably going to do an algae barn bio blocks and copepod chaeto kit but I’m not really sure when the best time to get it started. I did the Fritz 900 turbo and it only took 6 days for the cycle so I can turn on my filtration but I’m not sure if setting up the refugium would cause a mini cycle or if I should add the fritz to the sump and keep filtration off for another cycle before I setup the refugium.
 

Attachments

  • IMG_0021.jpeg
    IMG_0021.jpeg
    174.1 KB · Views: 23
Back
Top